Reversing cutting head for flush cutting operations(cont.)
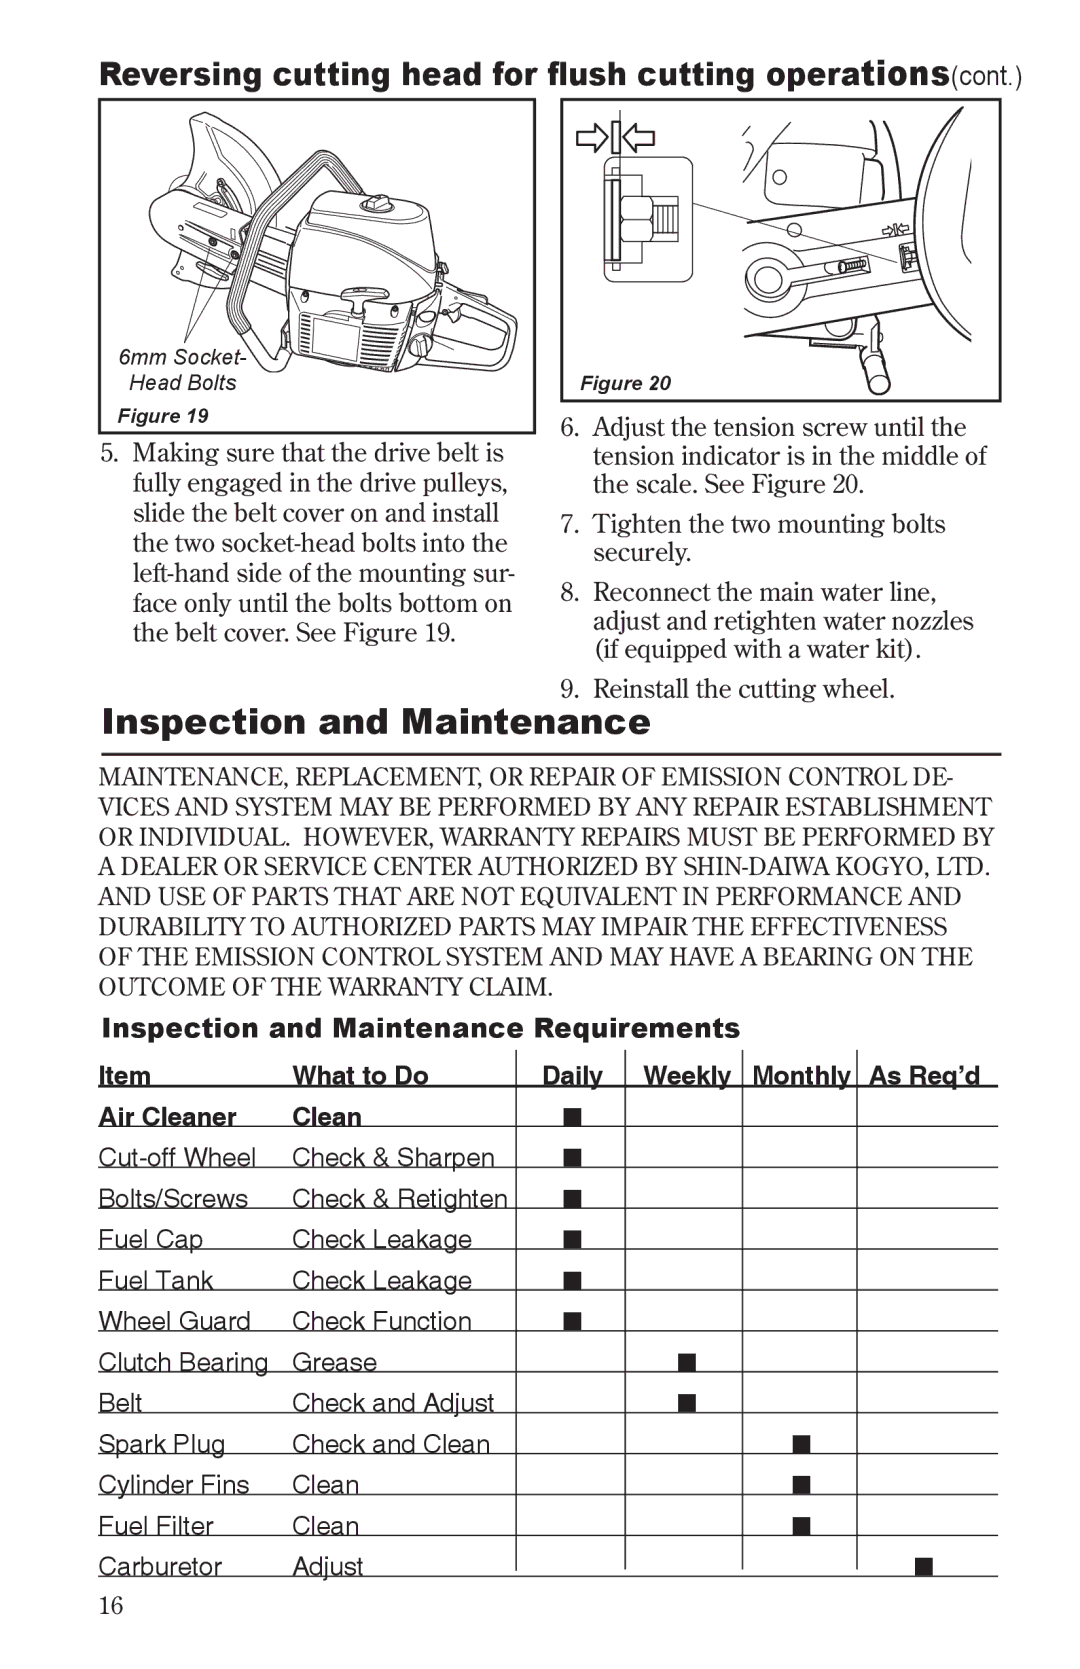
6mm Socket-
Head Bolts
Figure 19
5.Making sure that the drive belt is fully engaged in the drive pulleys, slide the belt cover on and install the two
Figure 20 |
6.Adjust the tension screw until the tension indicator is in the middle of the scale. See Figure 20.
7.Tighten the two mounting bolts securely.
8.Reconnect the main water line, adjust and retighten water nozzles (if equipped with a water kit).
9. Reinstall the cutting wheel.
Inspection and Maintenance
MAINTENANCE, REPLACEMENT, OR REPAIR OF EMISSION CONTROL DE- VICES AND SYSTEM MAY BE PERFORMED BY ANY REPAIR ESTABLISHMENT OR INDIVIDUAL. HOWEVER, WARRANTY REPAIRS MUST BE PERFORMED BY A DEALER OR SERVICE CENTER AUTHORIZED BY
Inspection and Maintenance Requirements
Item | What to Do | Daily | Weekly |
| Monthly |
| As Req’d |
Air Cleaner | Clean | |
|
|
|
|
|
Check & Sharpen | |
|
|
|
|
| |
Bolts/Screws | Check & Retighten | |
|
|
|
|
|
Fuel Cap | Check Leakage | |
|
|
|
|
|
Fuel Tank | Check Leakage | |
|
|
|
|
|
Wheel Guard | Check Function | |
|
|
|
|
|
Clutch Bearing | Grease |
| |
|
|
|
|
Belt | Check and Adjust |
| |
|
|
|
|
Spark Plug | Check and Clean |
|
|
| |
|
|
Cylinder Fins | Clean |
|
|
| |
|
|
Fuel Filter | Clean |
|
|
| |
|
|
Carburetor | Adjust |
|
|
|
|
| |
|
|
|
16
