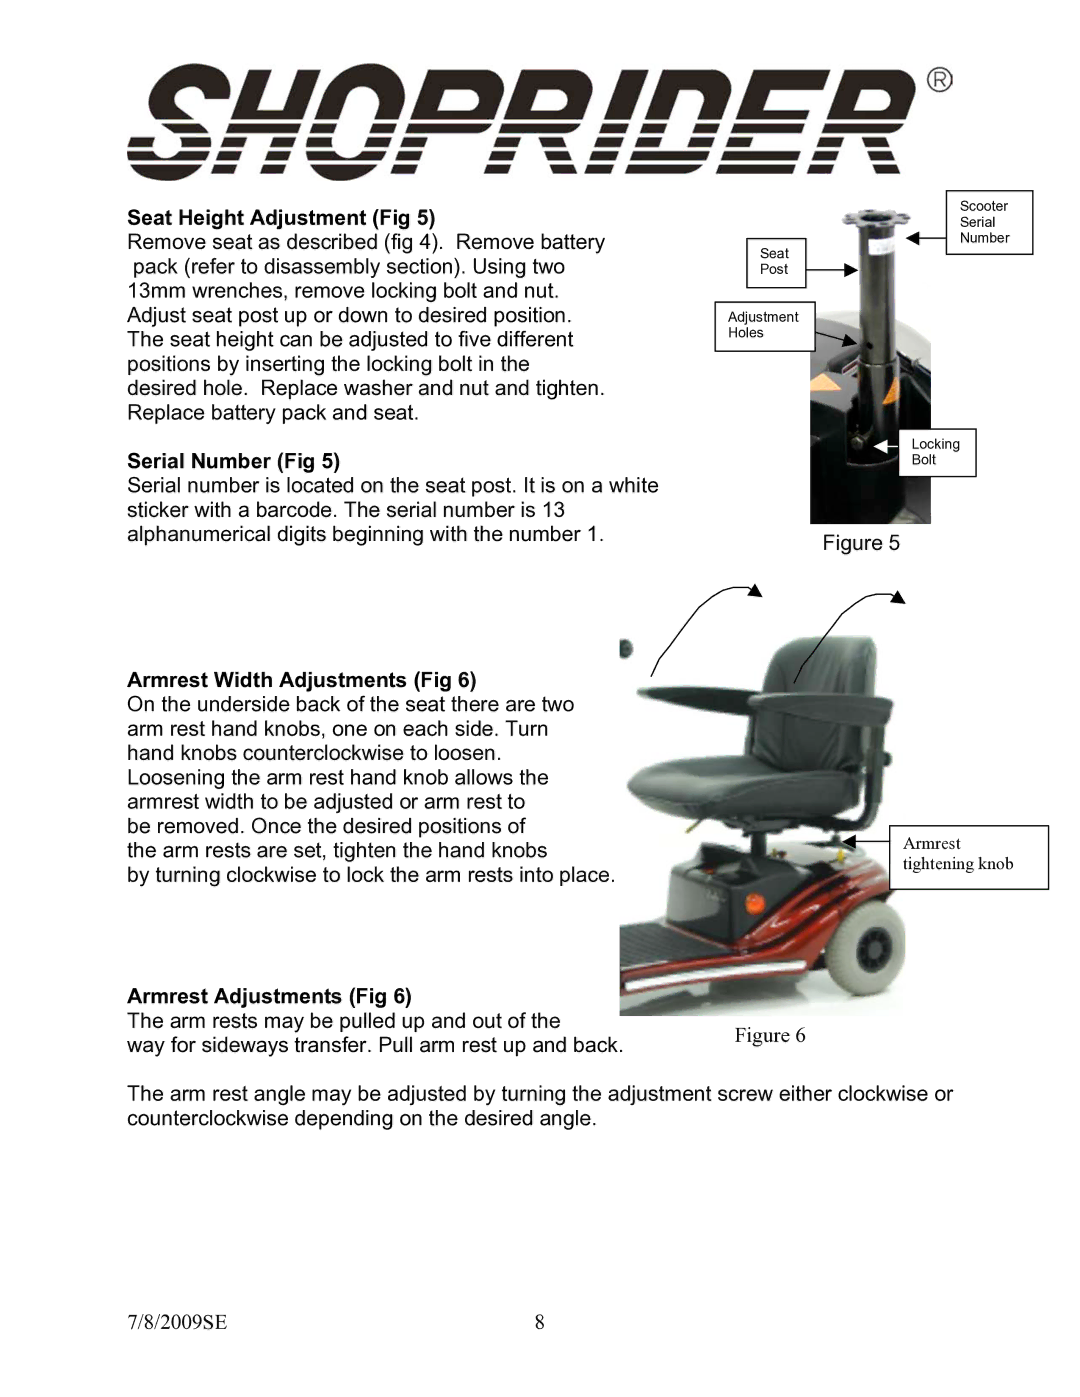
Seat Height Adjustment (Fig 5)
Remove seat as described (fig 4). Remove battery pack (refer to disassembly section). Using two 13mm wrenches, remove locking bolt and nut. Adjust seat post up or down to desired position. The seat height can be adjusted to five different positions by inserting the locking bolt in the desired hole. Replace washer and nut and tighten. Replace battery pack and seat.
Serial Number (Fig 5)
Seat
Post
Adjustment
Holes
Scooter
Serial
Number
Locking
Bolt
Serial number is located on the seat post. It is on a white sticker with a barcode. The serial number is 13 alphanumerical digits beginning with the number 1.
Armrest Width Adjustments (Fig 6)
On the underside back of the seat there are two arm rest hand knobs, one on each side. Turn hand knobs counterclockwise to loosen. Loosening the arm rest hand knob allows the armrest width to be adjusted or arm rest to
be removed. Once the desired positions of the arm rests are set, tighten the hand knobs
by turning clockwise to lock the arm rests into place.
Armrest Adjustments (Fig 6)
The arm rests may be pulled up and out of the
way for sideways transfer. Pull arm rest up and back.
Figure 5
Armrest tightening knob
Figure 6
The arm rest angle may be adjusted by turning the adjustment screw either clockwise or counterclockwise depending on the desired angle.
7/8/2009SE | 8 |