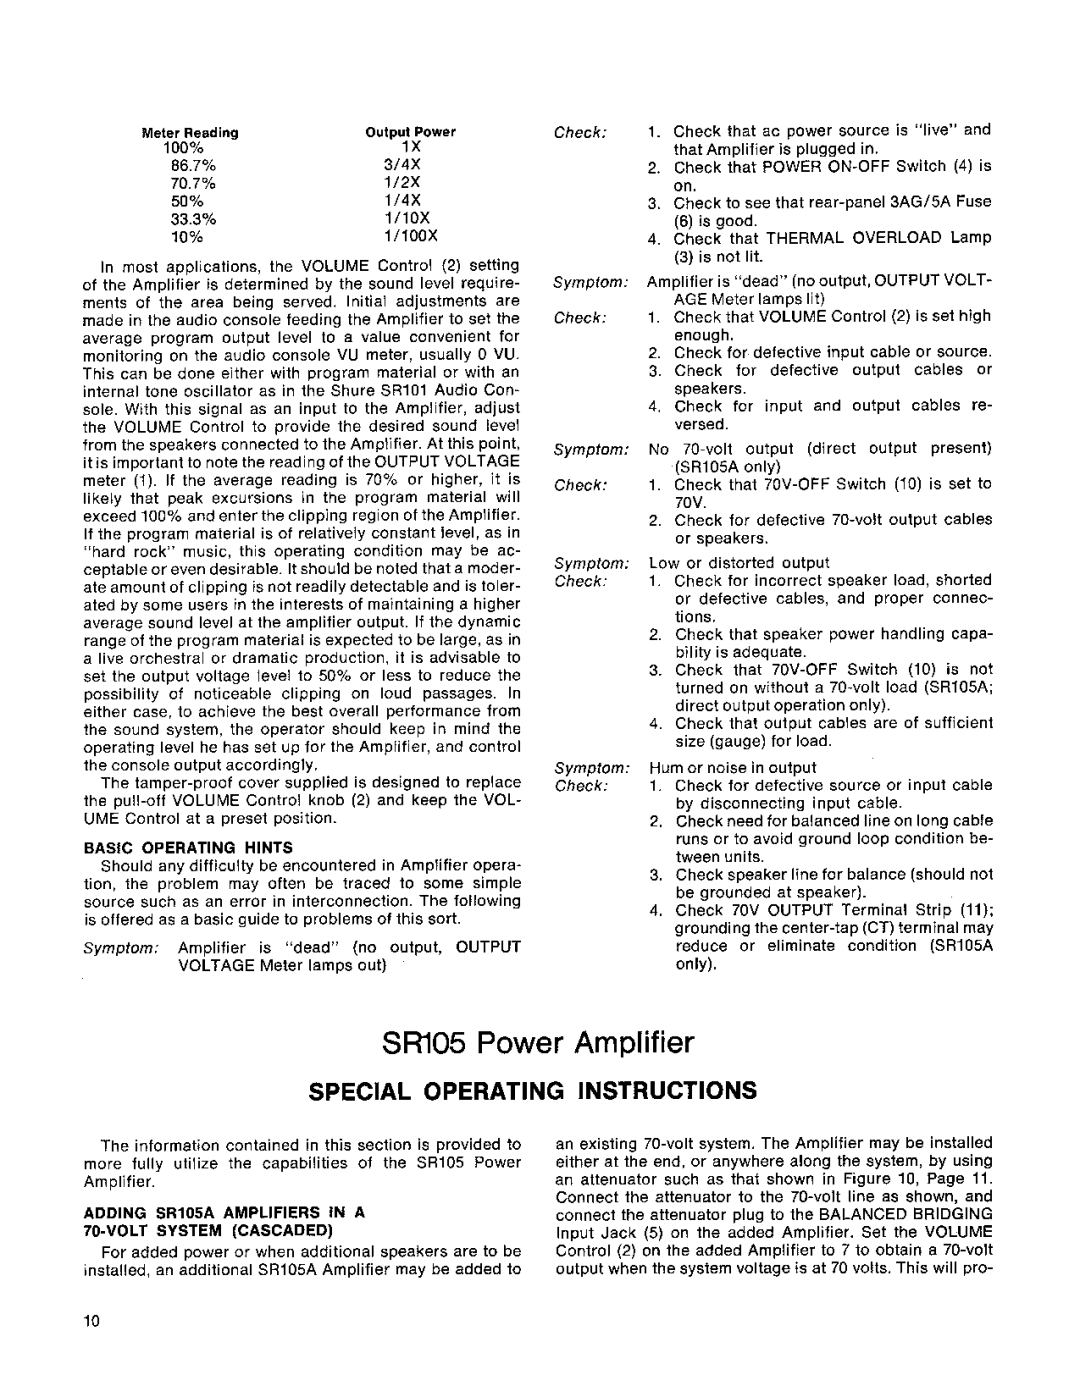
Meter Reading | Output Power |
100% | 1X |
86.7% | 3/4X |
70.7% | 1/2X |
50% | 1/4X |
33.3% | 1/10X |
10% | 1/1oox |
In most applications, the VOLUME Control (2) setting of the Amplifier is determined by the sound level require- ments of the area being served. Initial adjustments are made in the audio console feeding the Amplifier to set the average program output level to a value convenient for monitoring on the audio console VU meter, usually 0 VU. This can be done either with program material or with an internal tone oscillator as in the Shure SRlO1 Audio Con- sole. With this signal as an input to the Amplifier, adjust the VOLUME Control to provide the desired sound level from the speakers connected to the Amplifier. At this point, it is important to note the reading of the OUTPUT VOLTAGE meter (1). If the average reading is 70% or higher, it is likely that peak excursions in the program material will exceed 100% and enter the clipping region of the Amplifier. If the program material is of relatively constant level, as in "hard rock" music, this operating condition may be ac- ceptable or even desirable. It should be noted that a moder- ate amount of clipping is not readily detectable and is toler- ated by some users in the interests of maintaining a higher average sound level at the amplifier output. If the dynamic range of the program material is expected to be large, as in a live orchestral or dramatic production, it is advisable to set the output voltage level to 50% or less to reduce the possibility of noticeable clipping on loud passages. In either case, to achieve the best overall performance from the sound system, the operator should keep in mind the operating level he has set up for the Amplifier, and control the console output accordingly.
The
BASIC OPERATING HINTS
Should any difficulty be encountered in Amplifier opera- tion, the problem may often be traced to some simple source such as an error in interconnection. The following is offered as a basic guide to problems of this sort.
Symptom: Amplifier is "dead" (no output, OUTPUT VOLTAGE Meter lamps out)
1.Check that ac power source is "live" and that Amplifier is plugged in.
2.Check that POWER
3.Check to see that
4.Check that THERMAL OVERLOAD Lamp
(3)is not lit.
Symptom: Amplifier is "dead" (no output, OUTPUT VOLT- AGE Meter lamps lit)
Check: 1. Check that VOLUME Control (2) is set high enough.
2.Check for defective input cable or source.
3.Check for defective output cables or speakers.
4.Check for input and output cables re- versed.
Symptom: No
Check: 1. Check that
2.Check for defective
Symptom: Low or distorted output
Check: | 1. Check for incorrect speaker load, shorted |
| or defective cables, and proper connec- |
| tions. |
| 2. Check that speaker power handling capa- |
| bility is adequate. |
| 3. Check that |
| turned on without a |
| direct output operation only). |
| 4. Check that output cables are of sufficient |
| size (gauge) for load. |
Symptom: | Hum or noise in output |
Check: | 1. Check for defective source or input cable |
| by disconnecting input cable. |
| 2. Check need for balanced line on long cable |
| runs or to avoid ground loop condition be- |
| tween units. |
| 3. Check speaker line for balance (should not |
| be grounded at speaker). |
| 4. Check 70V OUTPUT Terminal Strip (11); |
| grounding the |
| reduce or eliminate condition (SR105A |
| only). |
SRl05 Power Amplifier
SPECIAL OPERATING INSTRUCTIONS
The information contained in this section is provided to more fully utilize the capabilities of the SR105 Power Amplifier.
ADDING SR105A AMPLIFIERS IN A 70-VOLT SYSTEM (CASCADED)
For added power or when additional speakers are to be installed, an additional SR105A Amplifier may be added to
an existing
