MOUNTING AND VENTILATION
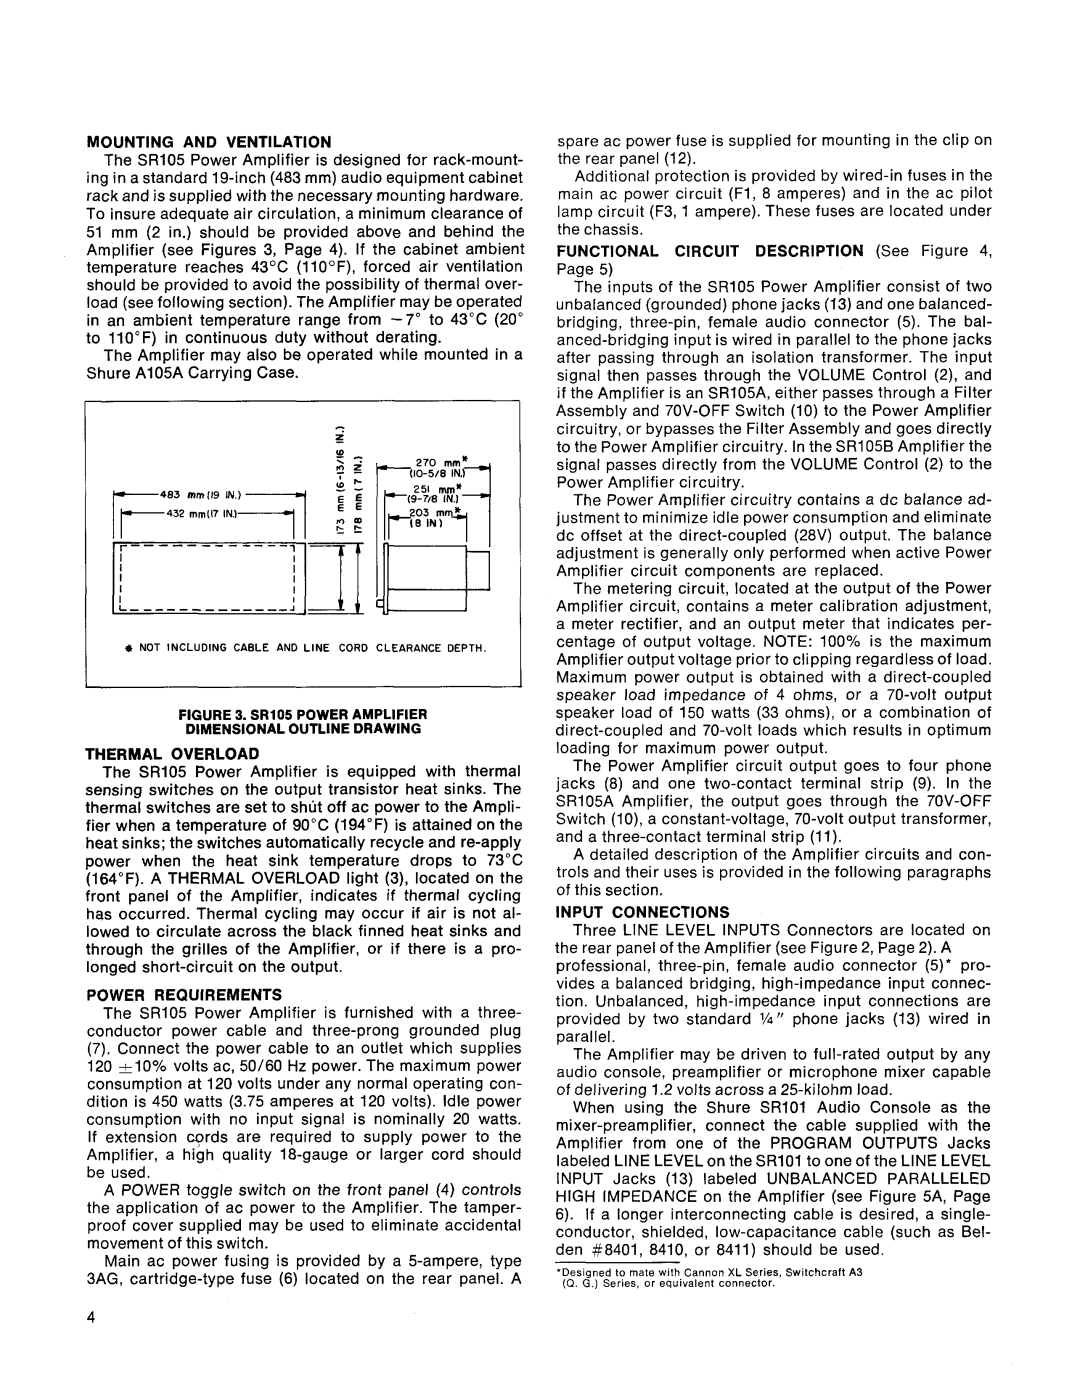
The SR105 Power Amplifier is designed for rack-mount- ing in a standard 19-inch (483 mm) audio equipment cabinet rack and is supplied with the necessary mounting hardware. To insure adequate air circulation, a minimum clearance of 51 mm (2 in.) should be provided above and behind the Amplifier (see Figures 3, Page 4). If the cabinet ambient temperature reaches 43OC (llO°F), forced air ventilation should be provided to avoid the possibility of thermal over- load (see following section). The Amplifier may be operated in an ambient temperature range from - 7 " to 43°C (20" to 110°F) in continuous duty without derating.
The Amplifier may also be operated while mounted in a Shure A105A Carrying Case.
P., . 270 mm'
? -00-518 NI).-
I | * NOT INCLUDING CABLE AND LlNE CORD CLEARANCE DEPTH. | I |
FIGURE 3. SR105 POWER AMPLIFIER
DIMENSIONAL OUTLINE DRAWING
THERMAL OVERLOAD
The SR105 Power Amplifier is equipped with thermal sensing switches on the output transistor heat sinks. The thermal switches are set to s h ~ iofft ac power to the Ampli- fier when a temperature of 90°C (194°F) is attained on the heat sinks; the switches automatically recycle and re-apply power when the heat sink temperature drops to 73°C (164°F). A THERMAL OVERLOAD light (3), located on the front panel of the Amplifier, indicates if thermal cycling has occurred. Thermal cycling may occur if air is not al- lowed to circulate across the black finned heat sinks and through the grilles of the Amplifier, or if there is a pro- longed short-circuit on the output.
POWER REQUIREMENTS
The SR105 Power Amplifier is furnished with a three- conductor power cable and three-prong grounded plug
(7). Connect the power cable to an outlet which supplies 120 ~ 1 0 %volts ac, 50160 Hz power. The maximum power consumption at 120 volts under any normal operating con- dition is 450 watts (3.75 amperes at 120 volts). Idle power consumption with no input signal is nominally 20 watts. If extension cords are required to supply power to the Amplifier, a high quality 18-gauge or larger cord should be used.
A POWER toggle switch on the front panel (4) controls the application of ac power to the Amplifier. The tamper- proof cover supplied may be used to eliminate accidental movement of this switch.
Main ac power fusing is provided by a 5-ampere, type 3AG, cartridge-type fuse (6) located on the rear panel. A
spare ac power fuse is supplied for mounting in the clip on the rear panel (12).
Additional protection is provided by wired-in fuses in the main ac power circuit (FI, 8 amperes) and in the ac pilot lamp circuit (F3, 1 ampere). These fuses are located under the chassis.
FUNCTIONAL CIRCUIT DESCRIPTION (See Figure 4,
Page 5)
The inputs of the SR105 Power Amplifier consist of two unbalanced (grounded) phone jacks (13) and one balanced- bridging, three-pin, female audio connector (5). The bal- anced-bridging input is wired in parallel to the phone jacks after passing through an isolation transformer. The input signal then passes through the VOLUME Control (2), and if the Amplifier is an SR105A, either passes through a Filter Assembly and 70V-OFF Switch (10) to the Power Amplifier circuitry, or bypasses the Filter Assembly and goes directly to the Power Amplifier circuitry. In the SR105B Amplifier the signal passes directly from the VOLUME Control (2) to the Power Amplifier circuitry.
The Power Amplifier circuitry contains a dc balance ad- justment to minimize idle power consumption and eliminate dc offset at the direct-coupled (28V) output. The balance adjustment is generally only performed when active Power Amplifier circuit components are replaced.
The metering circuit, located at the output of the Power Amplifier circuit, contains a meter calibration adjustment, a meter rectifier, and an output meter that indicates per- centage of output voltage. NOTE: 100% is the maximum Amplifier output voltage prior to clipping regardless of load. Maximum power output is obtained with a direct-coupled speaker load impedance of 4 ohms, or a 70-volt output speaker load of 150 watts (33 ohms), or a combination of direct-coupled and 70-volt loads which results in optimum loading for maximum power output.
The Power Amplifier circuit output goes to four phone jacks (8) and one two-contact terminal strip (9). In the SR105A Amplifier, the output goes through the 70V-OFF Switch (lo), a constant-voltage, 70-volt output transformer, and a three-contact terminal strip (11).
A detailed description of the Amplifier circuits and con- trols and their uses is provided in the following paragraphs of this section.
INPUT CONNECTIONS
Three LlNE LEVEL INPUTS Connectors are located on the rear panel of the Amplifier (see Figure 2, Page 2). A professional, three-pin, female audio connector (5)* pro- vides a balanced bridging, high-impedance input connec- tion. Unbalanced, high-impedance input connections are provided by two standard 1/4" phone jacks (13) wired in parallel.
The Amplifier may be driven to full-rated output by any audio console, preamplifier or microphone mixer capable of delivering 1.2 volts across a 25-kilohm load.
When using the Shure SR101 Audio Console as the mixer-preamplifier, connect the cable supplied with the Amplifier from one of the PROGRAM OUTPUTS Jacks labeled LlNE LEVEL on the SR101 to one of the LlNE LEVEL INPUT Jacks (13) labeled UNBALANCED PARALLELED HIGH IMPEDANCE on the Amplifier (see Figure 5A, Page 6). If a longer interconnecting cable is desired, a single- conductor, shielded, low-capacitance cable (such as Bel- den #8401, 8410, or 8411) should be used.
'Des~gnedto mate with Cannon XL Ser~es,Sw~tchcraftA3 (0 G ) Series, or equivalent connector

