SM 1619X04463
Mounting Charger
MOUNTING CHARGER TO
A VERTICAL SURFACE
(Models SC118 & SC118B only)
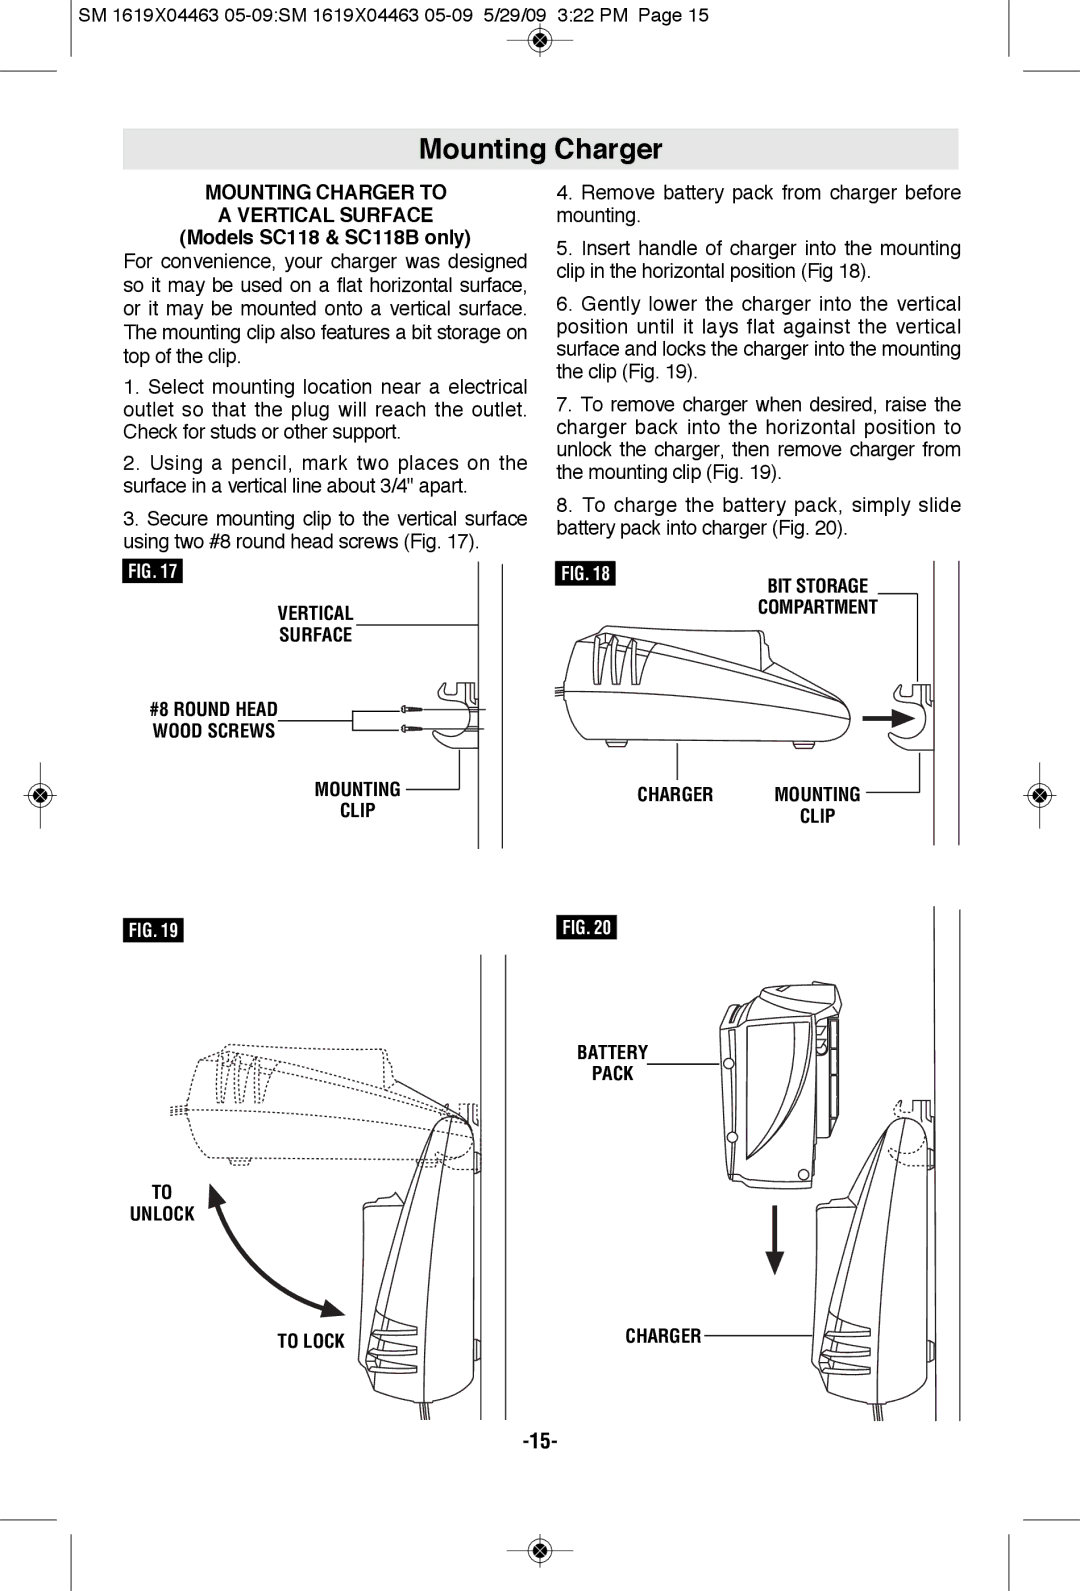
For convenience, your charger was designed so it may be used on a flat horizontal surface, or it may be mounted onto a vertical surface. The mounting clip also features a bit storage on top of the clip.
1.Select mounting location near a electrical outlet so that the plug will reach the outlet. Check for studs or other support.
2.Using a pencil, mark two places on the surface in a vertical line about 3/4" apart.
3.Secure mounting clip to the vertical surface using two #8 round head screws (Fig. 17).
FIG. 17 |
VERTICAL |
SURFACE |
#8 ROUND HEAD |
WOOD SCREWS |
MOUNTING |
CLIP |
4.Remove battery pack from charger before mounting.
5.Insert handle of charger into the mounting clip in the horizontal position (Fig 18).
6.Gently lower the charger into the vertical position until it lays flat against the vertical surface and locks the charger into the mounting the clip (Fig. 19).
7.To remove charger when desired, raise the charger back into the horizontal position to unlock the charger, then remove charger from the mounting clip (Fig. 19).
8.To charge the battery pack, simply slide battery pack into charger (Fig. 20).
FIG. 18
BIT STORAGE
COMPARTMENT
CHARGER MOUNTING
CLIP
FIG. 19 |
| FIG. 20 |
|
|
|
BATTERY
PACK
TO
UNLOCK
TO LOCK
CHARGER