SM 1619X04463
Assembly
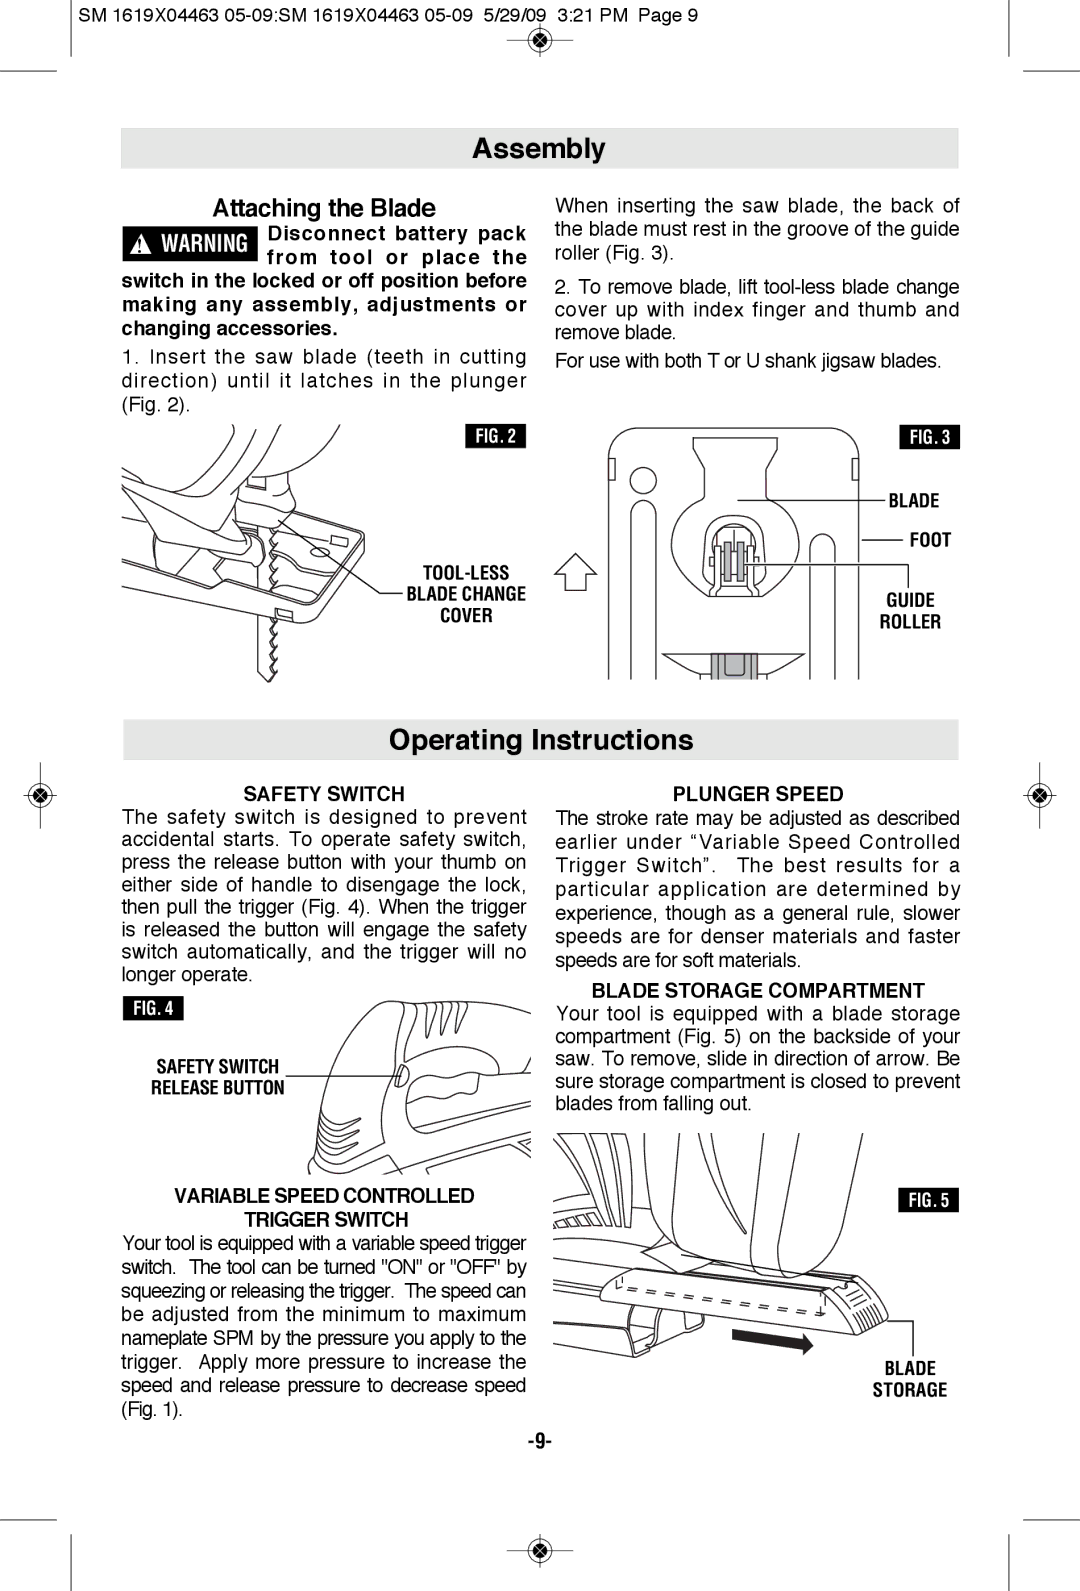
Attaching the Blade
Disconnect battery pack
!WARNING from tool or place the switch in the locked or off position before making any assembly, adjustments or changing accessories.
1.Insert the saw blade (teeth in cutting direction) until it latches in the plunger (Fig. 2).
FIG. 2
TOOL-LESS
BLADE CHANGE
COVER
When inserting the saw blade, the back of the blade must rest in the groove of the guide roller (Fig. 3).
2.To remove blade, lift
For use with both T or U shank jigsaw blades.
FIG. 3
BLADE
FOOT
GUIDE
ROLLER
Operating Instructions
SAFETy SWITCH
The safety switch is designed to prevent accidental starts. To operate safety switch, press the release button with your thumb on either side of handle to disengage the lock, then pull the trigger (Fig. 4). When the trigger is released the button will engage the safety switch automatically, and the trigger will no longer operate.
FIG. 4
SAFETY SWITCH
RELEASE BUTTON
VARIABLE SPEED CONTROLLED
TRIGGER SWITCH
Your tool is equipped with a variable speed trigger switch. The tool can be turned "ON" or "OFF" by squeezing or releasing the trigger. The speed can be adjusted from the minimum to maximum nameplate SPM by the pressure you apply to the trigger. Apply more pressure to increase the speed and release pressure to decrease speed (Fig. 1).
PLUNGER SPEED
The stroke rate may be adjusted as described earlier under “Variable Speed Controlled Trigger Switch”. The best results for a particular application are determined by experience, though as a general rule, slower speeds are for denser materials and faster speeds are for soft materials.
BLADE STORAGE COMPARTMENT
Your tool is equipped with a blade storage compartment (Fig. 5) on the backside of your saw. To remove, slide in direction of arrow. Be sure storage compartment is closed to prevent blades from falling out.
FIG. 5
BLADE
STORAGE