SM 1619X04463
CIRCLE CUTTING
1.Before attaching the rip fence, draw a circle and drive a finishing nail in the center of circle.
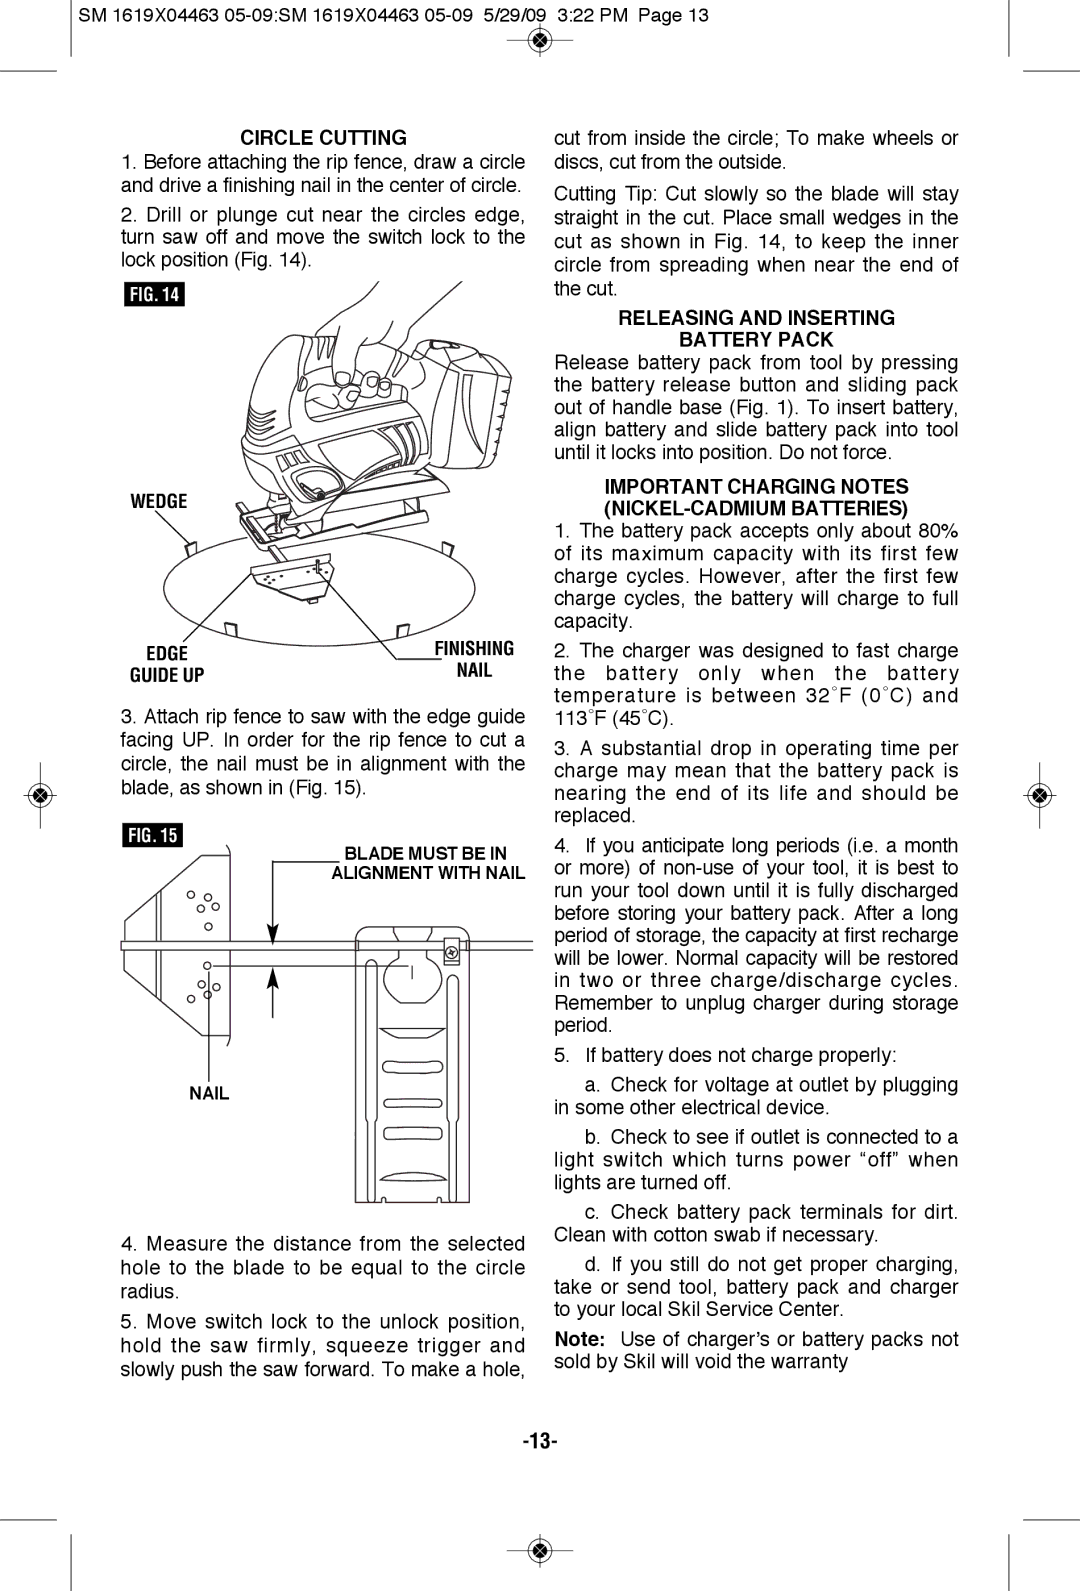
2.Drill or plunge cut near the circles edge, turn saw off and move the switch lock to the lock position (Fig. 14).
FIG. 14
WEDGE
EDGE | FINISHING |
GUIDE UP | NAIL |
3.Attach rip fence to saw with the edge guide facing UP. In order for the rip fence to cut a circle, the nail must be in alignment with the blade, as shown in (Fig. 15).
FIG. 15
BLADE MUST BE IN
ALIGNMENT WITH NAIL
NAIL
4.Measure the distance from the selected hole to the blade to be equal to the circle radius.
5.Move switch lock to the unlock position, hold the saw firmly, squeeze trigger and slowly push the saw forward. To make a hole,
cut from inside the circle; To make wheels or discs, cut from the outside.
Cutting Tip: Cut slowly so the blade will stay straight in the cut. Place small wedges in the cut as shown in Fig. 14, to keep the inner circle from spreading when near the end of the cut.
RELEASING AND INSERTING
BATTERy PACK
Release battery pack from tool by pressing the battery release button and sliding pack out of handle base (Fig. 1). To insert battery, align battery and slide battery pack into tool until it locks into position. Do not force.
IMPORTANT CHARGING NOTES (NICKEL-CADMIUM BATTERIES)
1.The battery pack accepts only about 80% of its maximum capacity with its first few charge cycles. However, after the first few charge cycles, the battery will charge to full capacity.
2.The charger was designed to fast charge the battery only when the battery temperature is between 32˚F (0˚C) and 113˚F (45˚C).
3.A substantial drop in operating time per charge may mean that the battery pack is nearing the end of its life and should be replaced.
4.If you anticipate long periods (i.e. a month or more) of
5.If battery does not charge properly:
a.Check for voltage at outlet by plugging in some other electrical device.
b.Check to see if outlet is connected to a light switch which turns power “off” when lights are turned off.
c.Check battery pack terminals for dirt. Clean with cotton swab if necessary.
d.If you still do not get proper charging, take or send tool, battery pack and charger to your local Skil Service Center.
Note: Use of charger’s or battery packs not sold by Skil will void the warranty