| FIG. 7 |
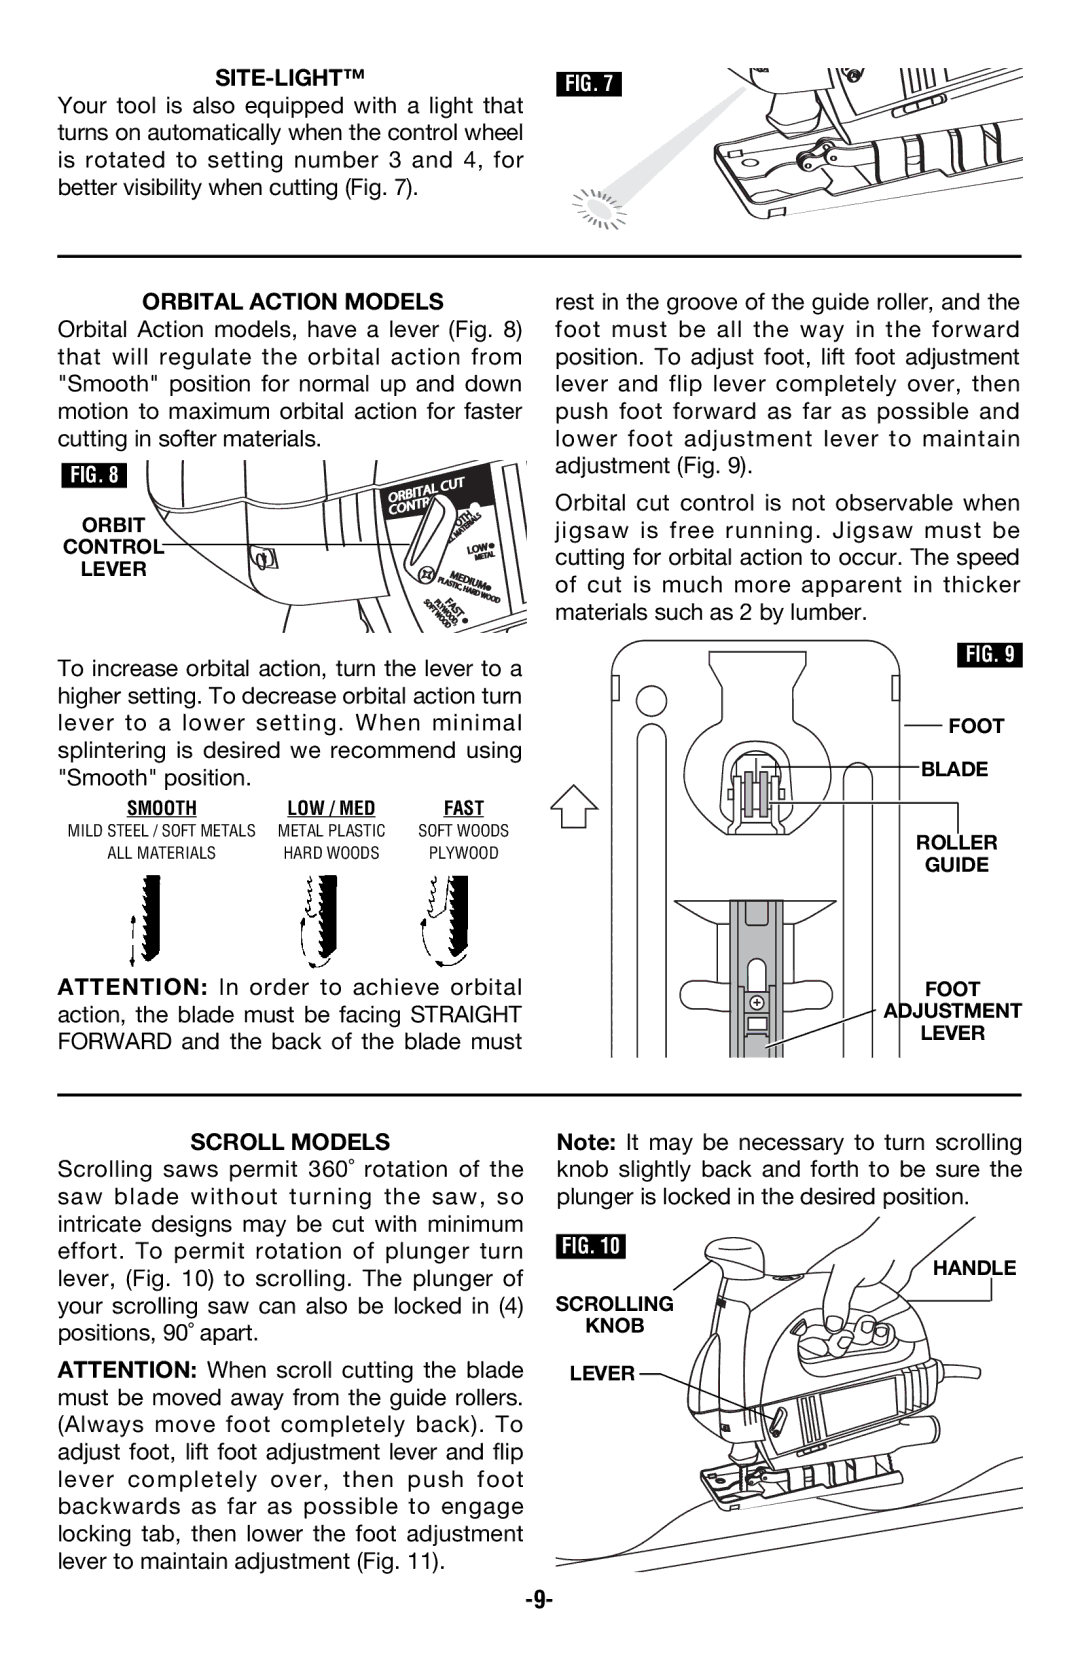
Your tool is also equipped with a light that turns on automatically when the control wheel is rotated to setting number 3 and 4, for better visibility when cutting (Fig. 7).
ORBITAL ACTION MODELS Orbital Action models, have a lever (Fig. 8) that will regulate the orbital action from "Smooth" position for normal up and down motion to maximum orbital action for faster cutting in softer materials.
FIG. 8
ORBIT
CONTROL
LEVER
To increase orbital action, turn the lever to a higher setting. To decrease orbital action turn lever to a lower setting. When minimal splintering is desired we recommend using "Smooth" position.
SMOOTH | LOW / MED | FAST |
MILD STEEL / SOFT METALS | METAL PLASTIC | SOFT WOODS |
ALL MATERIALS | HARD WOODS | PLYWOOD |
ATTENTION: In order to achieve orbital action, the blade must be facing STRAIGHT FORWARD and the back of the blade must
rest in the groove of the guide roller, and the foot must be all the way in the forward position. To adjust foot, lift foot adjustment lever and flip lever completely over, then push foot forward as far as possible and lower foot adjustment lever to maintain adjustment (Fig. 9).
Orbital cut control is not observable when jigsaw is free running. Jigsaw must be cutting for orbital action to occur. The speed of cut is much more apparent in thicker materials such as 2 by lumber.
FIG. 9
FOOT
BLADE
ROLLER
GUIDE
FOOT
ADJUSTMENT
LEVER
SCROLL MODELS
Scrolling saws permit 360˚ rotation of the saw blade without turning the saw, so intricate designs may be cut with minimum effort. To permit rotation of plunger turn lever, (Fig. 10) to scrolling. The plunger of your scrolling saw can also be locked in (4) positions, 90˚ apart.
ATTENTION: When scroll cutting the blade must be moved away from the guide rollers. (Always move foot completely back). To adjust foot, lift foot adjustment lever and flip lever completely over, then push foot backwards as far as possible to engage locking tab, then lower the foot adjustment lever to maintain adjustment (Fig. 11).
Note: It may be necessary to turn scrolling knob slightly back and forth to be sure the plunger is locked in the desired position.
FIG. 10
HANDLE
SCROLLING
KNOB
LEVER
