Manuals
/
SkyLink
/
Household Appliance
/
Home Security System
SkyLink
AA-433
manual
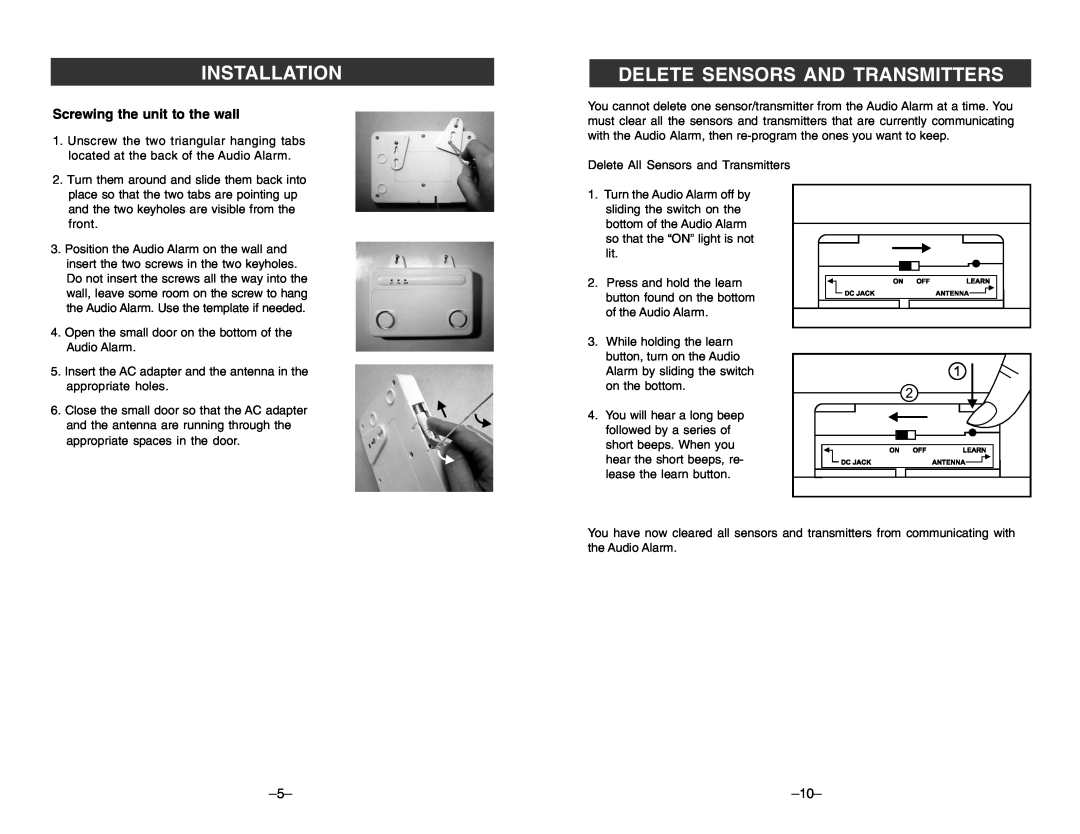
Delete Sensors And Transmitters, Screwing the unit to the wall, Installation
Models:
AA-433
1
6
8
8
Download
8 pages
25.15 Kb
1
2
3
4
5
6
7
8
Install
Audio Alarm
Additional Accessories
How to
Page 6
Image 6
Page 5
Page 7
Page 6
Image 6
Page 5
Page 7
Contents
P/N. 101Z693-001
CUSTOMER SERVICE
MODEL AA-433
FEB,2012
Audio Sensor AS-433
ADDITIONAL ACCESSORIES
MODEL AA-433
Temperature Sensor TS-101A
Security Control Panel SC-001
TABLE OF CONTENTS
Silent Alarm SW-433
Vibration Sensor VS-433
OVERVIEW
PACKAGE CONTENTS
Magnetic Switch/Magnet MS-001
Motion Sensor PS-434A
Audio Alarm Battery
BATTERY MAINTENANCE
INSTALLATION
To replace the Audio Alarm backup battery
DELETE SENSORS AND TRANSMITTERS
Screwing the unit to the wall
INSTALLATION
Alarm AA-433
OPERATION OF THE AUDIO ALARM
Program sensors / transmitters to the Audio Alarm
KEYPAD TRANSMITTER
LIGHTS
LIGHTS AND SOUNDS
ACTIVATE AND DEACTIVATE THE SYSTEM
ALL BELOW SCENARIOS INCLUDE THE “ON” LIGHT LIT
Top
Page
Image
Contents