GB
3. INSTALLATION INSTRUCTIONS
Important !
The appliance must be installed by a specialised technician according to current regulations. This washer dryer is very heavy. Take care when lifting it.
3.1 UNPACKING
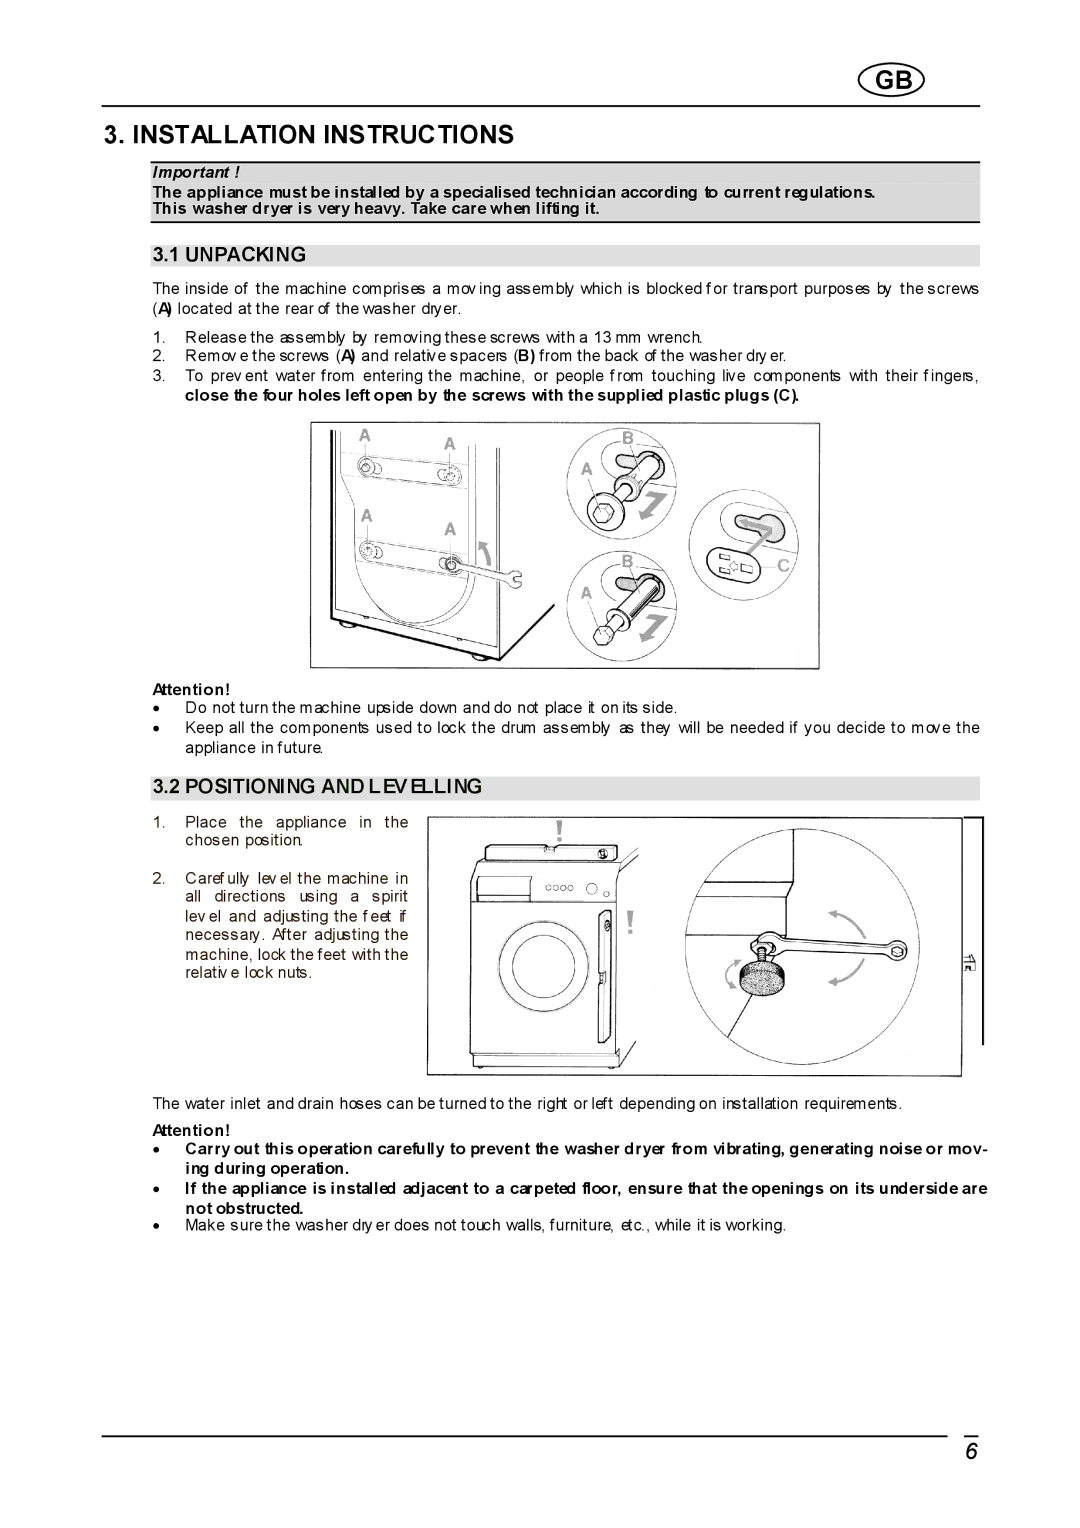
The inside of the machine comprises a mov ing assembly which is blocked f or transport purposes by the screws (A) located at the rear of the washer dryer.
1.Release the assembly by removing these screws with a 13 mm wrench.
2.Remov e the screws (A) and relative spacers (B) from the back of the washer dry er.
3.To prev ent water from entering the machine, or people f rom touching live components with their f ingers, close the four holes left open by the screws with the supplied plastic plugs (C).
Attention!
•Do not turn the machine upside down and do not place it on its side.
•Keep all the components used to lock the drum assembly as they will be needed if you decide to move the appliance in future.
3.2 POSITIONING AND LEV ELLING
1.Place the appliance in the chosen position.
2.Caref ully lev el the machine in all directions using a spirit lev el and adjusting the f eet if necessary. After adjusting the machine, lock the feet with the relativ e lock nuts.
The water inlet and drain hoses can be turned to the right or left depending on installation requirements.
Attention!
•Carry out this operation carefully to prevent the washer dryer from vibrating, generating noise or mov- ing during operation.
•If the appliance is installed adjacent to a carpeted floor, ensure that the openings on its underside are not obstructed.
•Make sure the washer dry er does not touch walls, furniture, etc., while it is working.
6