Initial Hitch Installation - Models with out 3-Point Hitch
C |
|
|
E |
| B |
|
| |
| G | D |
|
| |
| A |
|
| A | F |
|
|
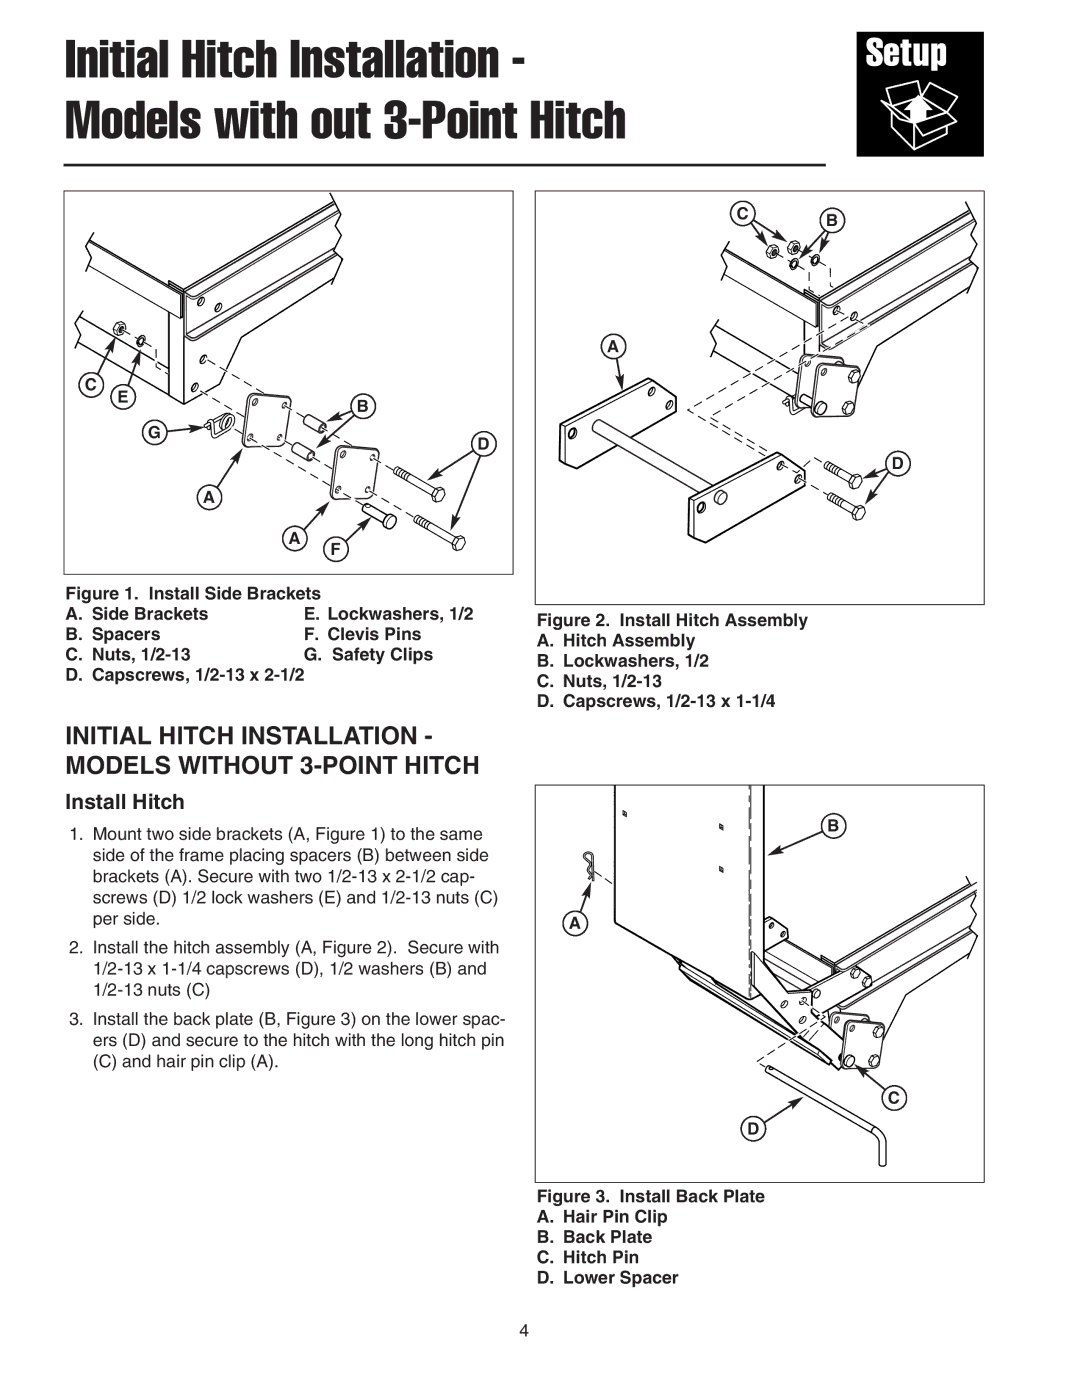
Figure 1. Install Side Brackets
A. Side Brackets | E. | Lockwashers, 1/2 |
B. Spacers | F. | Clevis Pins |
C. Nuts, | G. | Safety Clips |
D. Capscrews, 1/2-13 x 2-1/2
INITIAL HITCH INSTALLATION - MODELS WITHOUT 3-POINT HITCH
Install Hitch
1.Mount two side brackets (A, Figure 1) to the same side of the frame placing spacers (B) between side brackets (A). Secure with two
2.Install the hitch assembly (A, Figure 2). Secure with
3.Install the back plate (B, Figure 3) on the lower spac- ers (D) and secure to the hitch with the long hitch pin
(C) and hair pin clip (A).
C | B |
| |
A |
|
| D |
Figure 2. Install Hitch Assembly
A.Hitch Assembly
B.Lockwashers, 1/2
C.Nuts, 1/2-13
D.Capscrews, 1/2-13 x 1-1/4
B |
A |
C |
D |
Figure 3. Install Back Plate
A.Hair Pin Clip
B.Back Plate
C.Hitch Pin
D.Lower Spacer
4