STEP 8 (Continued)
ACTIVATE BATTERY
8.Thoroughly clean any spilled acid from battery. Neutralize with Baking Soda and flush with large quantity of water. Dry off battery.
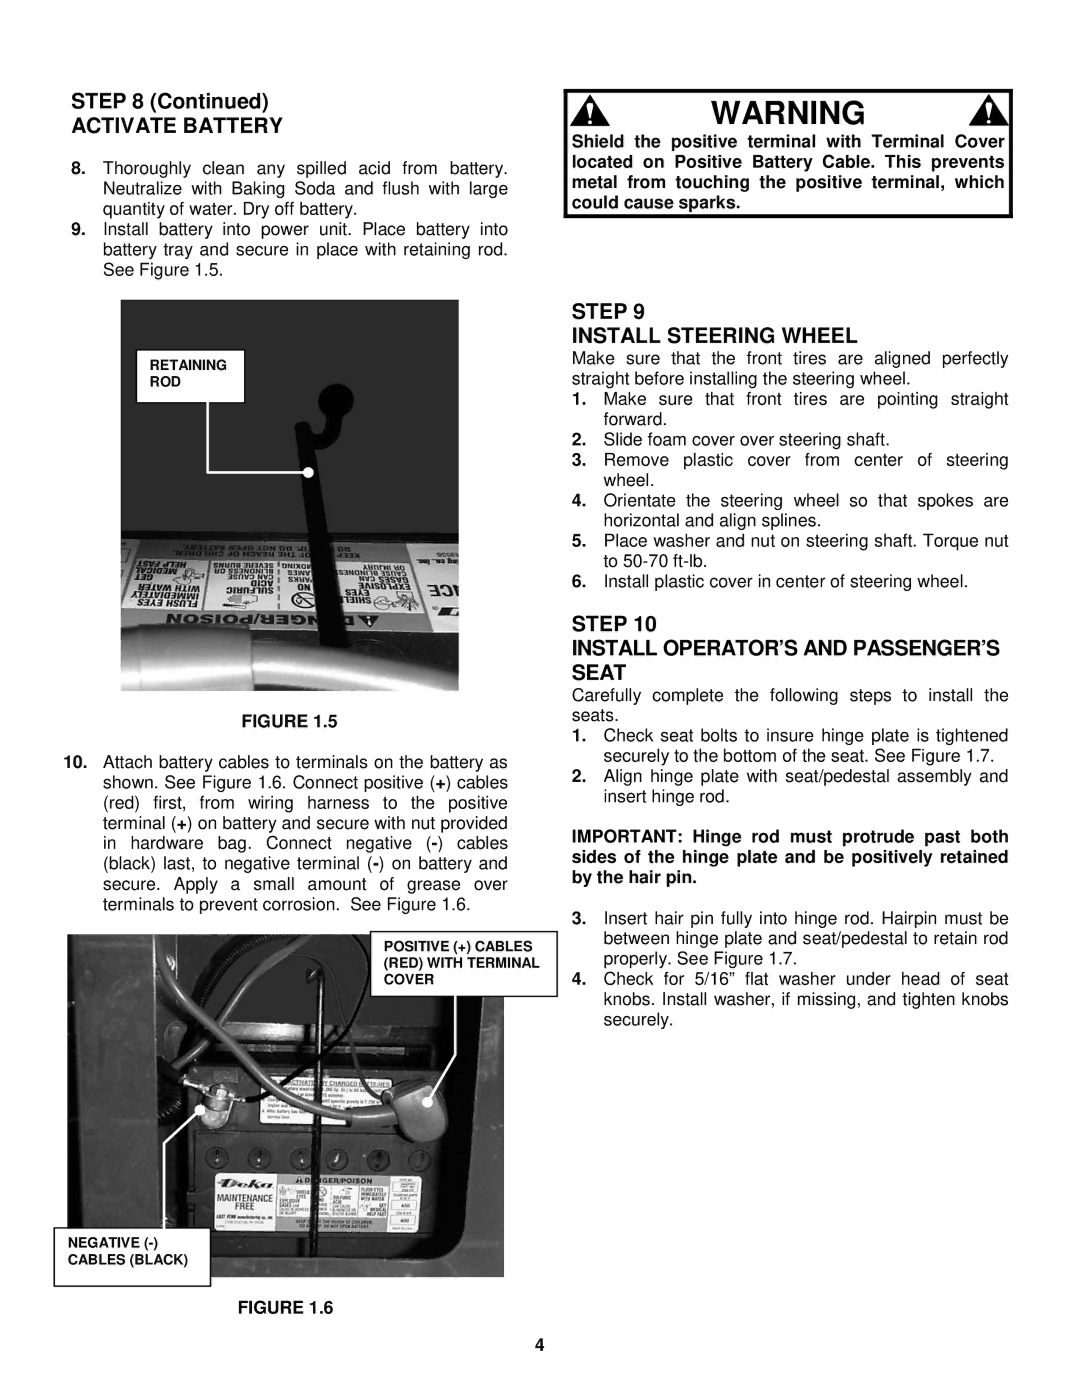
9.Install battery into power unit. Place battery into battery tray and secure in place with retaining rod. See Figure 1.5.
WARNING
Shield the positive terminal with Terminal Cover located on Positive Battery Cable. This prevents metal from touching the positive terminal, which could cause sparks.
RETAINING
ROD
FIGURE 1.5
10.Attach battery cables to terminals on the battery as shown. See Figure 1.6. Connect positive (+) cables (red) first, from wiring harness to the positive terminal (+) on battery and secure with nut provided in hardware bag. Connect negative
POSITIVE (+) CABLES (RED) WITH TERMINAL COVER
NEGATIVE
CABLES (BLACK)
FIGURE 1.6
4
STEP 9
INSTALL STEERING WHEEL
Make sure that the front tires are aligned perfectly straight before installing the steering wheel.
1.Make sure that front tires are pointing straight forward.
2.Slide foam cover over steering shaft.
3.Remove plastic cover from center of steering wheel.
4.Orientate the steering wheel so that spokes are horizontal and align splines.
5.Place washer and nut on steering shaft. Torque nut to
6.Install plastic cover in center of steering wheel.
STEP 10
INSTALL OPERATOR’S AND PASSENGER’S SEAT
Carefully complete the following steps to install the seats.
1.Check seat bolts to insure hinge plate is tightened securely to the bottom of the seat. See Figure 1.7.
2.Align hinge plate with seat/pedestal assembly and insert hinge rod.
IMPORTANT: Hinge rod must protrude past both sides of the hinge plate and be positively retained by the hair pin.
3.Insert hair pin fully into hinge rod. Hairpin must be between hinge plate and seat/pedestal to retain rod properly. See Figure 1.7.
4.Check for 5/16” flat washer under head of seat knobs. Install washer, if missing, and tighten knobs securely.
