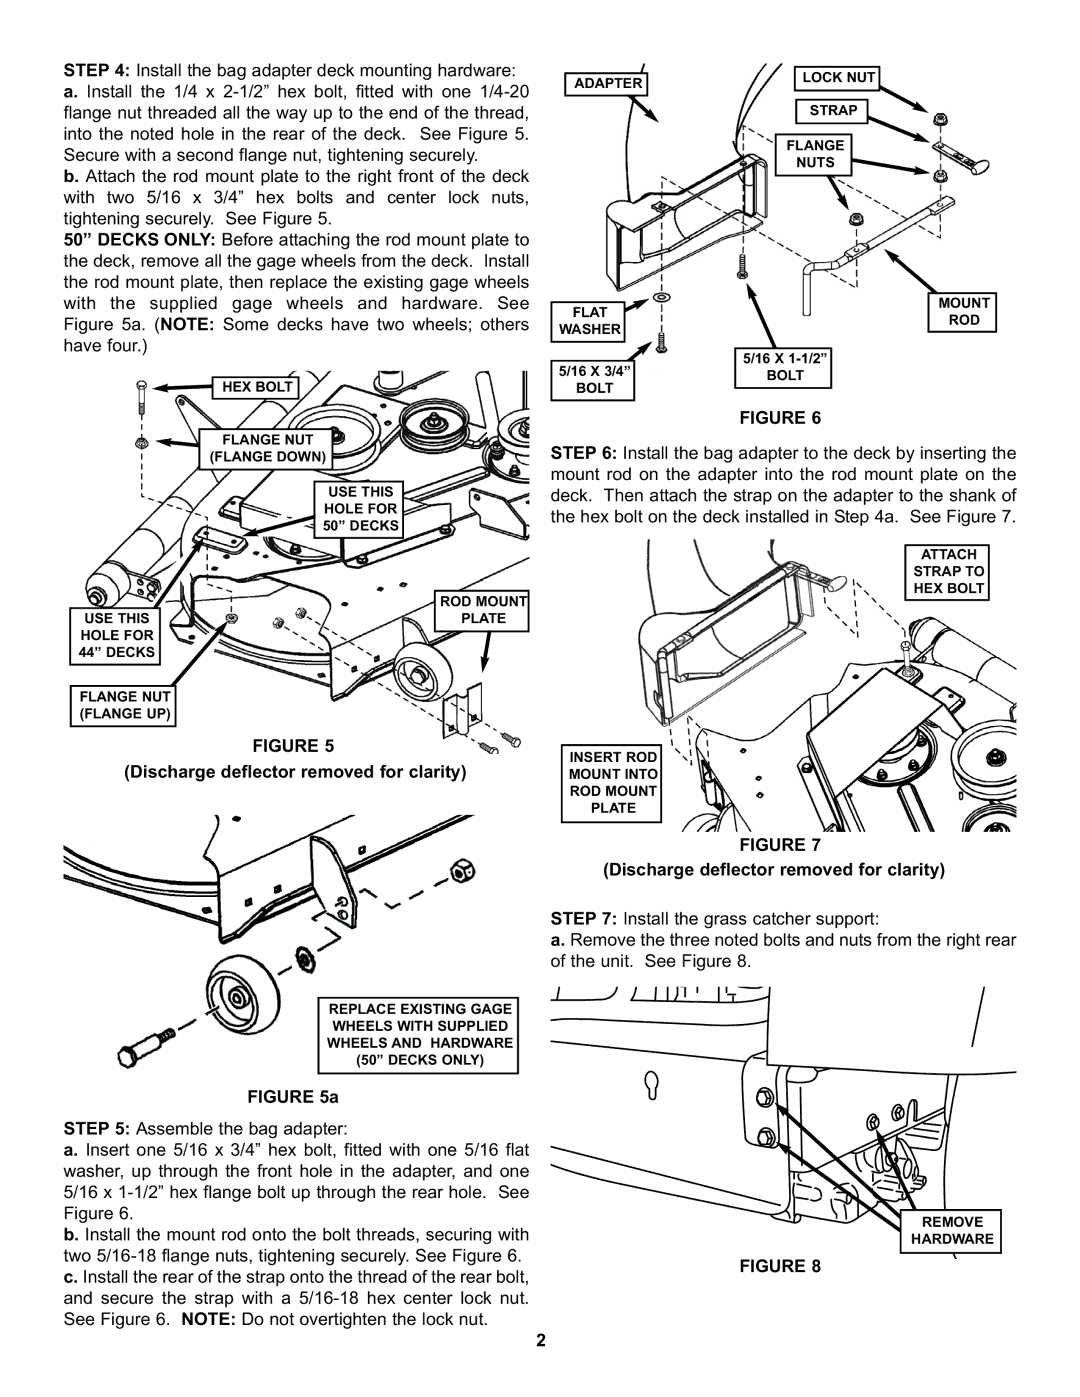
STEP 4: Install the bag adapter deck mounting hardware: a. Install the 1/4 x
b. Attach the rod mount plate to the right front of the deck with two 5/16 x 3/4” hex bolts and center lock nuts, tightening securely. See Figure 5.
50” DECKS ONLY: Before attaching the rod mount plate to the deck, remove all the gage wheels from the deck. Install the rod mount plate, then replace the existing gage wheels with the supplied gage wheels and hardware. See Figure 5a. (NOTE: Some decks have two wheels; others have four.)
HEX BOLT
ADAPTER
FLAT
WASHER
5/16 X 3/4”
BOLT
LOCK NUT
STRAP
FLANGE
NUTS![]()
MOUNT
ROD
5/16 X
BOLT
FLANGE NUT
(FLANGE DOWN)
FIGURE 6
STEP 6: Install the bag adapter to the deck by inserting the mount rod on the adapter into the rod mount plate on the
USE THIS
HOLE FOR 44” DECKS
FLANGE NUT (FLANGE UP)
USE THIS
HOLE FOR 50” DECKS
ROD MOUNT
PLATE
deck. Then attach the strap on the adapter to the shank of the hex bolt on the deck installed in Step 4a. See Figure 7.
ATTACH
STRAP TO
HEX BOLT
FIGURE 5
(Discharge deflector removed for clarity)
INSERT ROD MOUNT INTO ROD MOUNT PLATE
FIGURE 7
(Discharge deflector removed for clarity)
STEP 7: Install the grass catcher support:
a. Remove the three noted bolts and nuts from the right rear of the unit. See Figure 8.
REPLACE EXISTING GAGE WHEELS WITH SUPPLIED WHEELS AND HARDWARE (50” DECKS ONLY)
FIGURE 5a
STEP 5: Assemble the bag adapter:
a. Insert one 5/16 x 3/4” hex bolt, fitted with one 5/16 flat washer, up through the front hole in the adapter, and one 5/16 x
b. Install the mount rod onto the bolt threads, securing with two
FIGURE 8
c. Install the rear of the strap onto the thread of the rear bolt, and secure the strap with a
REMOVE
HARDWARE
2
