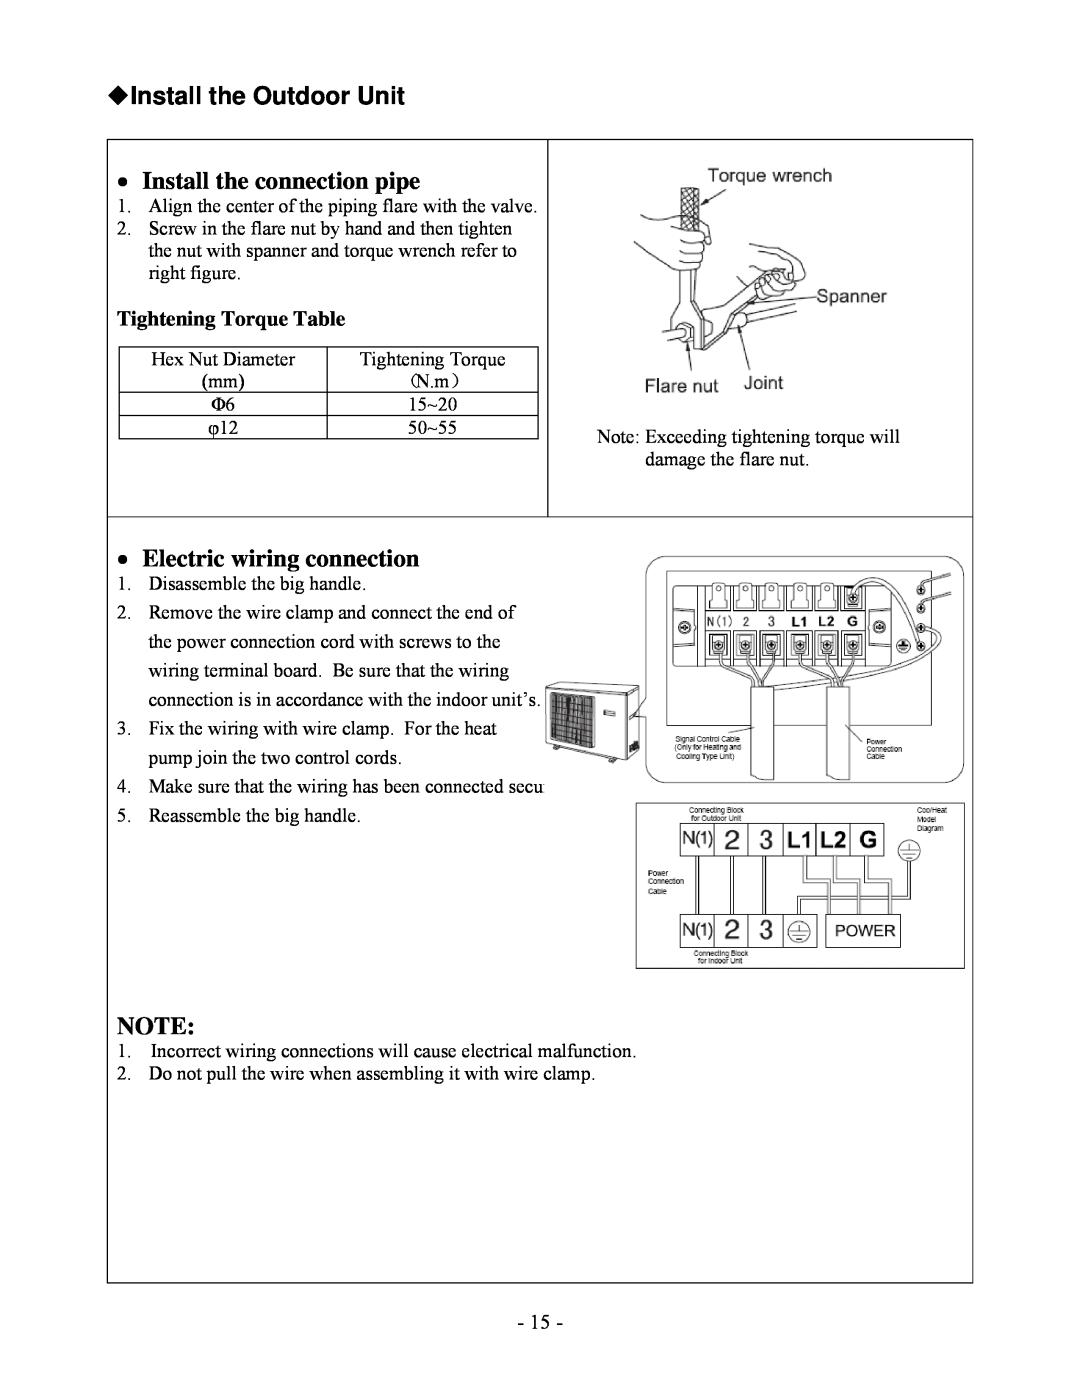
◆Install the Outdoor Unit
• Install the connection pipe |
|
| |||
1. Align the center of the piping flare with the valve. |
|
| |||
2. Screw in the flare nut by hand and then tighten |
|
| |||
| the nut with spanner and torque wrench refer to |
|
| ||
| right figure. |
|
|
| |
Tightening Torque Table |
|
|
| ||
|
|
|
|
|
|
| Hex Nut Diameter |
| Tightening Torque |
|
|
| (mm) |
| (N.m) |
|
|
| Φ6 |
| 15~20 |
|
|
| φ12 |
| 50~55 |
| Note: Exceeding tightening torque will |
|
|
|
|
| |
|
|
|
|
| damage the flare nut. |
|
|
|
|
|
|
•Electric wiring connection
1.Disassemble the big handle.
2.Remove the wire clamp and connect the end of the power connection cord with screws to the wiring terminal board. Be sure that the wiring connection is in accordance with the indoor unit’s.
3.Fix the wiring with wire clamp. For the heat pump join the two control cords.
4.Make sure that the wiring has been connected securely.
5.Reassemble the big handle.
NOTE:
1.Incorrect wiring connections will cause electrical malfunction.
2.Do not pull the wire when assembling it with wire clamp.
- 15 -
