PARTS & ASSEMBLY
PARTS
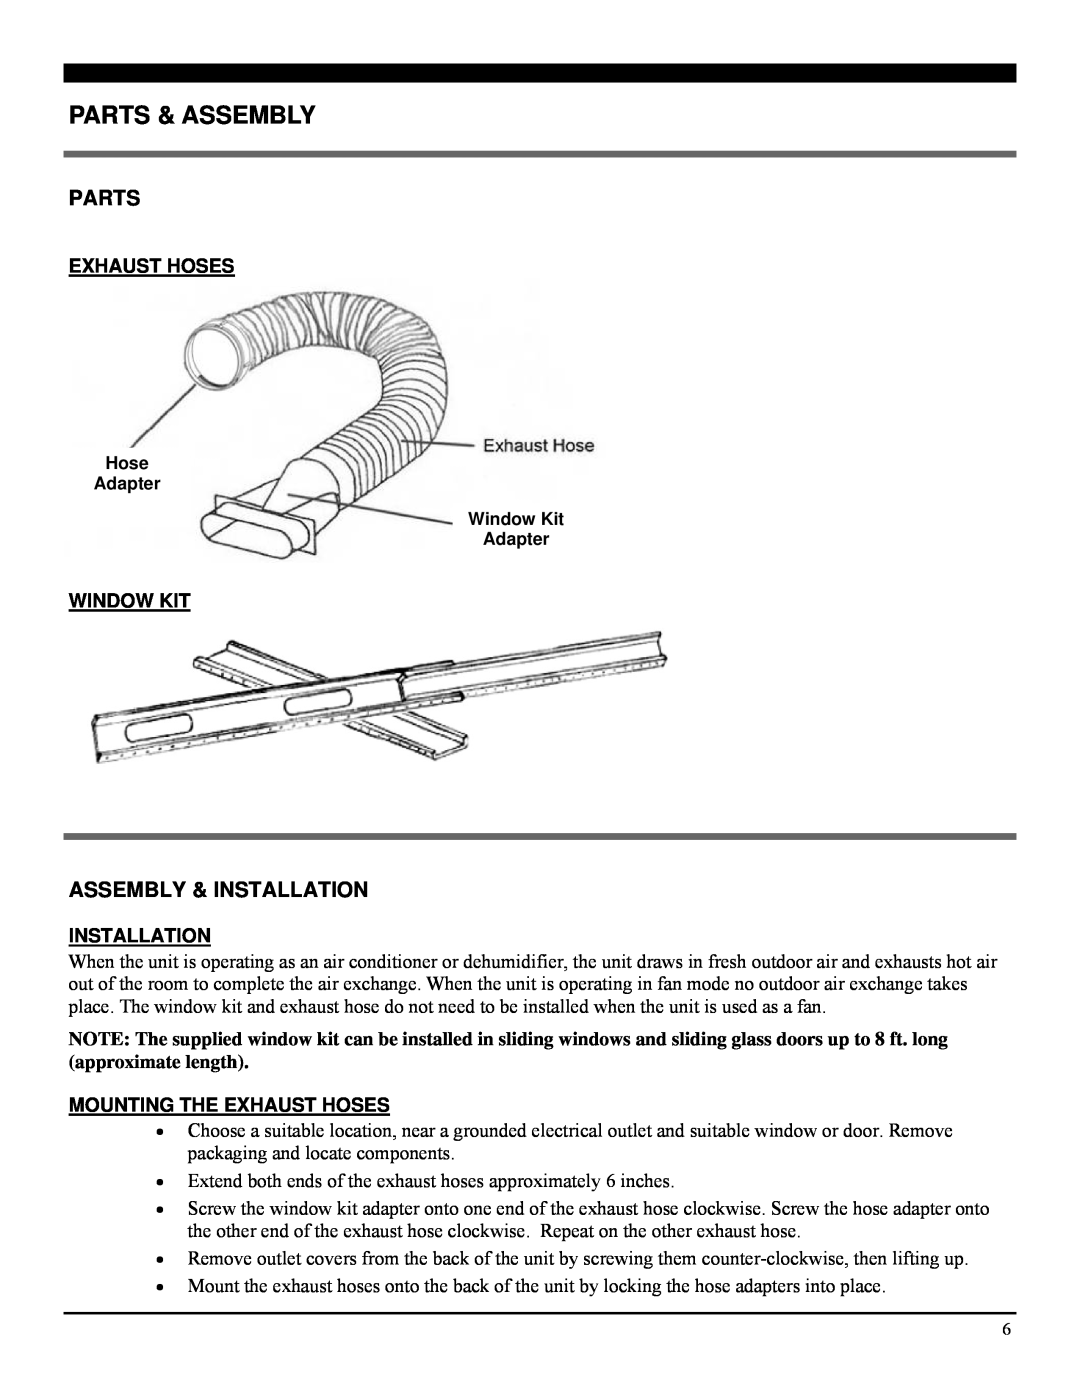
EXHAUST HOSES
Hose
Adapter
Window Kit
Adapter
WINDOW KIT
ASSEMBLY & INSTALLATION
INSTALLATION
When the unit is operating as an air conditioner or dehumidifier, the unit draws in fresh outdoor air and exhausts hot air out of the room to complete the air exchange. When the unit is operating in fan mode no outdoor air exchange takes place. The window kit and exhaust hose do not need to be installed when the unit is used as a fan.
NOTE: The supplied window kit can be installed in sliding windows and sliding glass doors up to 8 ft. long (approximate length).
MOUNTING THE EXHAUST HOSES
•Choose a suitable location, near a grounded electrical outlet and suitable window or door. Remove packaging and locate components.
•Extend both ends of the exhaust hoses approximately 6 inches.
•Screw the window kit adapter onto one end of the exhaust hose clockwise. Screw the hose adapter onto the other end of the exhaust hose clockwise. Repeat on the other exhaust hose.
•Remove outlet covers from the back of the unit by screwing them
•Mount the exhaust hoses onto the back of the unit by locking the hose adapters into place.
6