
SG-WAC-12ESE, SG-WAC-10ESE specifications
The Soleus Air SG-WAC-10ESE and SG-WAC-12ESE are portable air conditioners designed to provide effective cooling solutions for small to medium-sized spaces. Both units blend efficiency, convenience, and versatility to create an appealing option for homeowners and renters alike.One of the main features of the Soleus Air SG-WAC-10ESE and SG-WAC-12ESE is their energy-efficient design. Both units are equipped with a high-efficiency compressor that significantly reduces energy consumption while delivering superior cooling performance. The Energy Efficiency Ratio (EER) ratings for these models highlight their ability to cool effectively without unnecessary energy usage. This translates into lower electricity bills and a reduced environmental footprint.
These air conditioners come with a range of operating modes, including cooling, dehumidifying, and fan-only settings. This versatility allows users to customize their indoor environment based on their specific needs. The dehumidifying function is particularly beneficial in humid climates, as it helps to reduce moisture levels, providing additional comfort and preventing mold growth.
The Soleus Air SG-WAC-10ESE and SG-WAC-12ESE are also designed with user convenience in mind. The units feature an easy-to-use LED display and remote control, offering an intuitive interface for adjusting settings from across the room. Additionally, the programmable 24-hour timer allows users to set the air conditioner to operate only when needed, enhancing energy savings.
Portability is another key characteristic of these models. Both units come with caster wheels and built-in handles, making it easy to move them from room to room as needed. This feature is particularly useful for those who want to cool different areas of their home throughout the day.
Noise levels are minimized in the Soleus Air SG-WAC-10ESE and SG-WAC-12ESE, making them suitable for bedrooms and living areas. The air conditioners employ a whisper-quiet operation that maintains a peaceful environment while providing effective cooling.
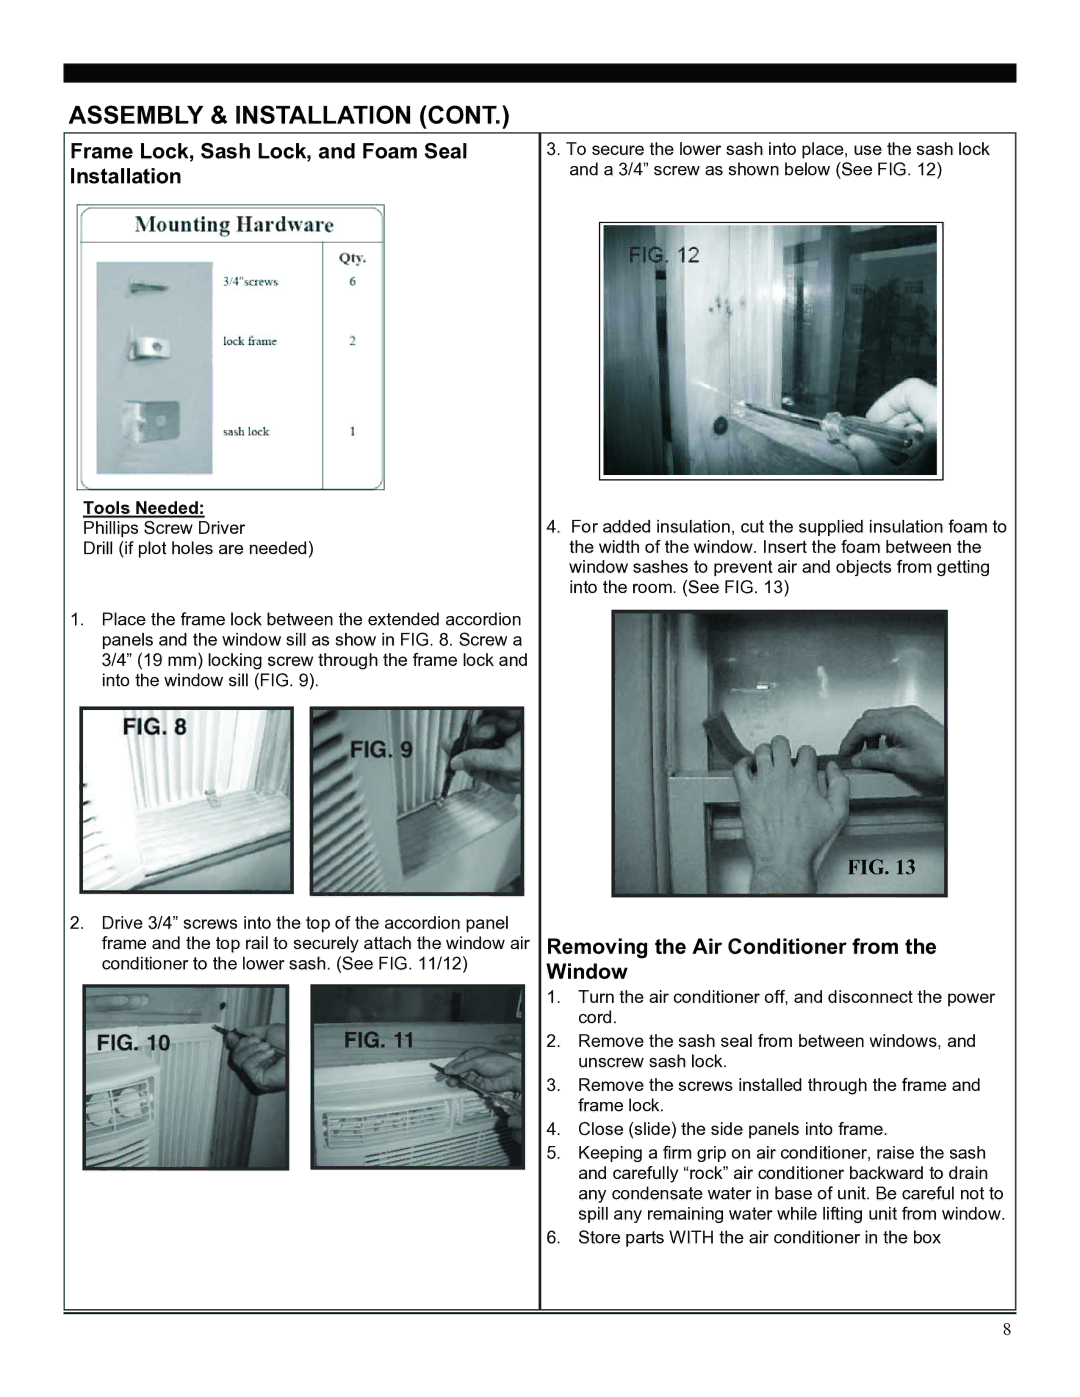
In terms of installation, these window units come with a comprehensive installation kit, ensuring a hassle-free setup process. Their sleek design fits well with various interior styles, allowing them to blend seamlessly into any space.
In summary, the Soleus Air SG-WAC-10ESE and SG-WAC-12ESE are efficient and user-friendly air conditioning solutions that prioritize comfort, convenience, and energy savings. With their range of features and technologies, they are well-suited for meeting the cooling needs of diverse living environments.