Architectural Series™
BPS - 1 I N - C E I L I N G S U B W O O F E R I N S T A L L A T I O N M A N U A L
5. Make sure the Vent Tube Clamp is positioned around the neck of the Adaptor Baffle and tighten the clamp to secure the Vent Tube around the neck of the Adaptor Baffle.
6. After confirming that the Vent Tube is securely fastened around the neck of the Adaptor Baffle, push the Adaptor Baffle into the Panel Bracket speaker opening.
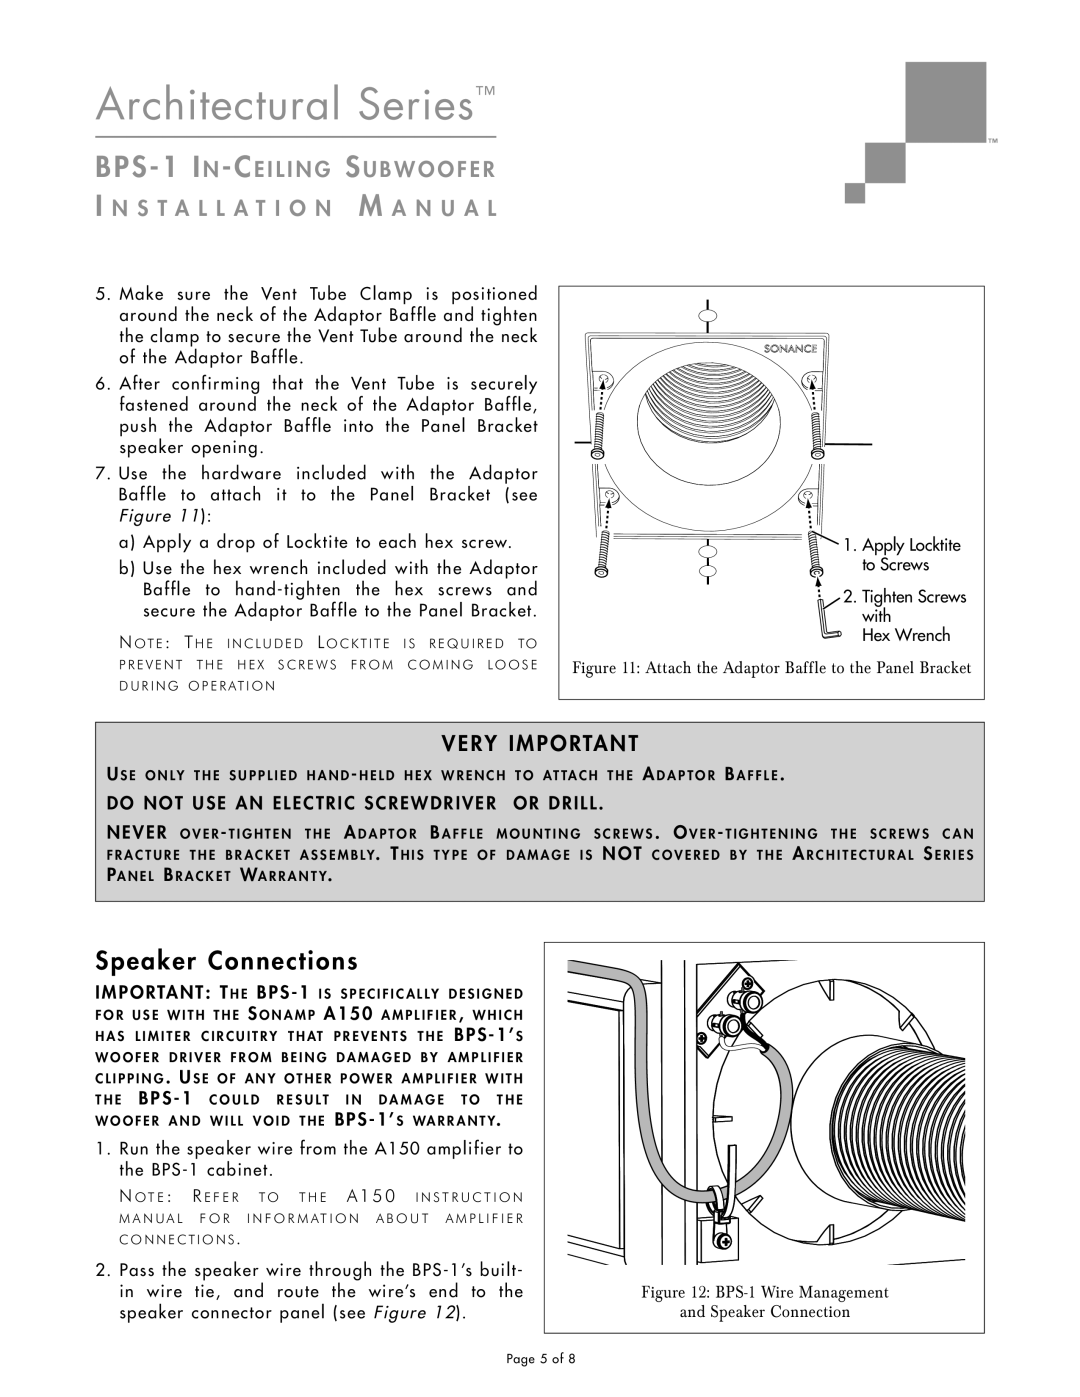
7.Use the hardware included with the Adaptor Baffle to attach it to the Panel Bracket (see Figure 11):
a)Apply a drop of Locktite to each hex screw.
b)Use the hex wrench included with the Adaptor Baffle to
NOT E : TH E I N C L U D E D LO C K T I T E I S R E Q U I R E D TO P R E V E N T T H E H E X S C R E W S F R O M C O M I N G L O O S E D U R I N G O P E R AT I O N
1. | Apply Locktite |
| to Screws |
2. | Tighten Screws |
| with |
| Hex Wrench |
Figure 11: Attach the Adaptor Baffle to the Panel Bracket | |
VERY IMPORTANT
U S E O N L Y T H E S U P P L I E D H A N D - H E L D H E X W R E N C H T O AT TA C H T H E A D A P T O R B A F F L E .
DO NOT USE AN ELECTRIC SCREWDRIVER | OR DRILL . | |||
NEVER O V E R - T I G H T E N | T H E A D A P T O R | B A F F L E | M O U N T I N G | S C R E W S . O V E R - T I G H T E N I N G T H E S C R E W S C A N |
F R A C T U R E T H E B R A C K E T | A S S E M B L Y. T H I S | T Y P E O F | D A M A G E I S | NOT C O V E R E D B Y T H E A R C H I T E C T U R A L S E R I E S |
PA N E L B R A C K E T WA R R A N T Y.
Speaker Connections
IMPORTANT: T H E BPS - 1 I S S P E C I F I C A L L Y D E S I G N E D
F O R | U S E W I T H T H E S O N A M P | A150 A M P L I F I E R , W H I C H |
H A S | L I M I T E R C I R C U I T R Y T H AT | P R E V E N T S T H E BPS - 1’ S |
W O O F E R | D R I V E R F R O M B E I N G D A M A G E D B Y A M P L I F I E R |
C L I P P I N G . U S E O F A N Y O T H E R P O W E R A M P L I F I E R W I T H | |
T H E B P S - 1 C O U L D R E S U L T I N D A M A G E T O T H E | |
W O O F E R | A N D W I L L V O I D T H E BPS - 1’ S WA R R A N T Y. |
1. Run the speaker wire from the A150 amplifier to the
N O T E : R E F E R T O T H E A150 I N S T R U C T I O N M A N U A L F O R I N F O R M A T I O N A B O U T A M P L I F I E R C O N N E C T I O N S .
2. Pass the speaker wire through the
Figure 12: |
and Speaker Connection |
Page 5 of 8