CCD-TRV21/TRV29/TRV211
Battery pack | |||||||||
While | LCD open2) | 60 (30) | 70 (35) | 210 (110) | 185 (100) | 130 (70) | 100 (50) | 105 (55) | 95 (50) |
recording1) | LCD close | 80 (40) | 85 (50) | 275 (155) | 240 (135) | 165 (95) | 135 (75) | 145 (80) | 120 (70) |
| |||||||||
While playing back on | 65 | 70 | 220 | 190 | 135 | 105 | 100 | 95 | |
LCD3) |
|
|
|
|
|
|
|
|
|
1)Approximate continuous recording time indoors is indicated outside of parentheses. Approximate minutes when recording while you repeat recording start/stop, zooming and turning the power on/off are indicated in parentheses. The actual battery life may be shorter.
2)Approximate minutes when using the LCD screen. When using both the viewfinder and LCD screen, the battery life is shorter.
3)Approximate continuous playback time indoors.
If the LCD BACK LIGHT switch is set to BRIGHT while the LCD screen is open, the battery life is approximately 10% shorter.
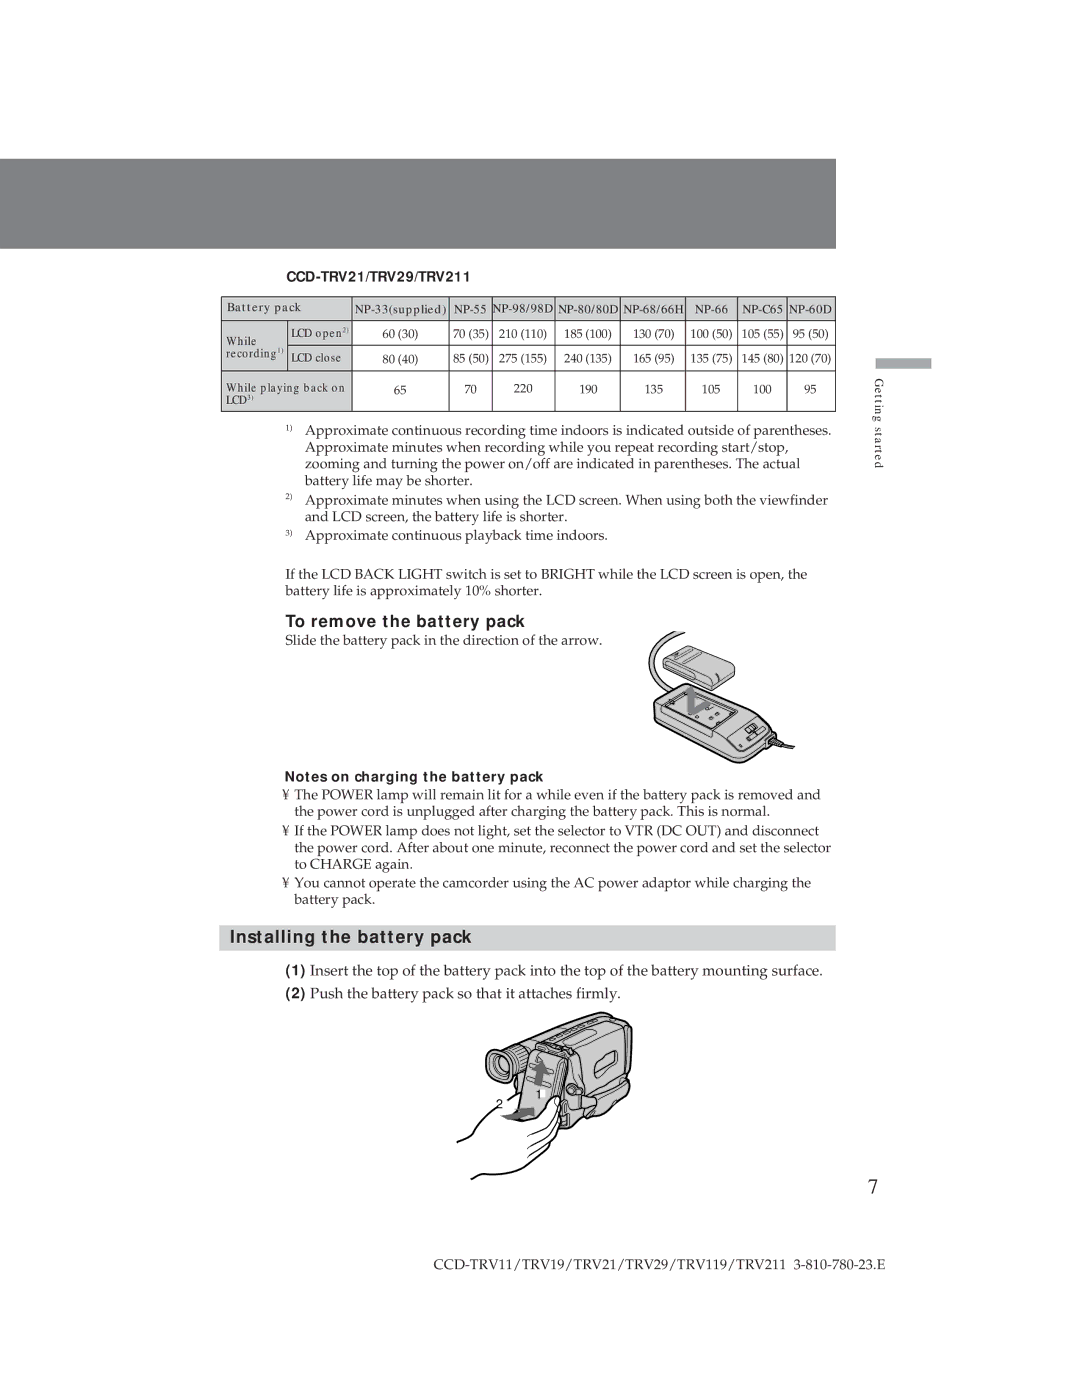
To remove the battery pack
Slide the battery pack in the direction of the arrow.
Notes on charging the battery pack
•The POWER lamp will remain lit for a while even if the battery pack is removed and the power cord is unplugged after charging the battery pack. This is normal.
•If the POWER lamp does not light, set the selector to VTR (DC OUT) and disconnect the power cord. After about one minute, reconnect the power cord and set the selector to CHARGE again.
•You cannot operate the camcorder using the AC power adaptor while charging the battery pack.
Installing the battery pack
(1)Insert the top of the battery pack into the top of the battery mounting surface.
(2)Push the battery pack so that it attaches firmly.
Getting started
1
2
7