Step 6: Connecting the Drive
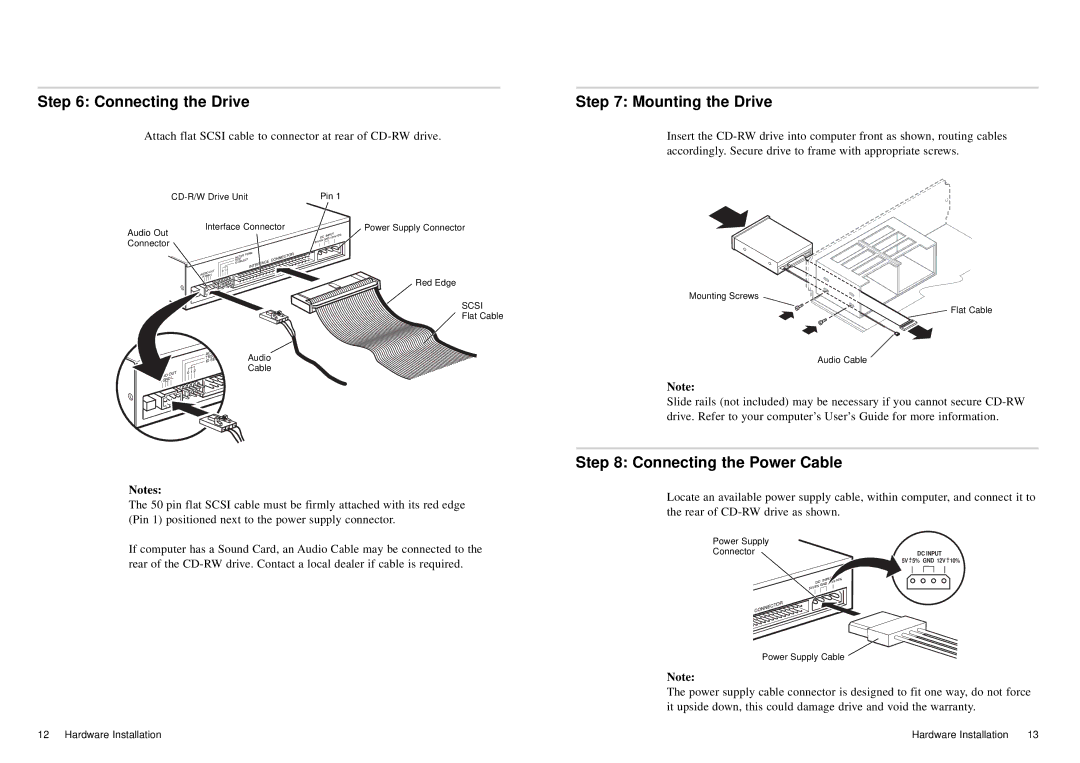
Attach flat SCSI cable to connector at rear of CD-RW drive.
Pin 1 | |
Interface Connector | Power Supply Connector |
Audio Out |
|
Connector |
|
| Red Edge |
SCSI
Flat Cable
Audio
Cable
Notes:
The 50 pin flat SCSI cable must be firmly attached with its red edge (Pin 1) positioned next to the power supply connector.
If computer has a Sound Card, an Audio Cable may be connected to the rear of the
Step 7: Mounting the Drive
Insert the
Mounting Screws
![]() Flat Cable
Flat Cable
Audio Cable
Note:
Slide rails (not included) may be necessary if you cannot secure
Step 8: Connecting the Power Cable
Locate an available power supply cable, within computer, and connect it to the rear of
Power Supply |
|
|
|
Connector | DC INPUT | +10% | |
5V | +5% | GND 12V | |
| - |
| - |
Power Supply Cable
Note:
The power supply cable connector is designed to fit one way, do not force it upside down, this could damage drive and void the warranty.
12 Hardware Installation | Hardware Installation | 13 |
