Step 9: Installation Review
Now let us review the hardware installation process, assuring that:
●All connectors are properly connected.
●Each SCSI device has its own unique SCSI ID number.
●The last physical SCSI device on the bus is properly terminated.
1
49
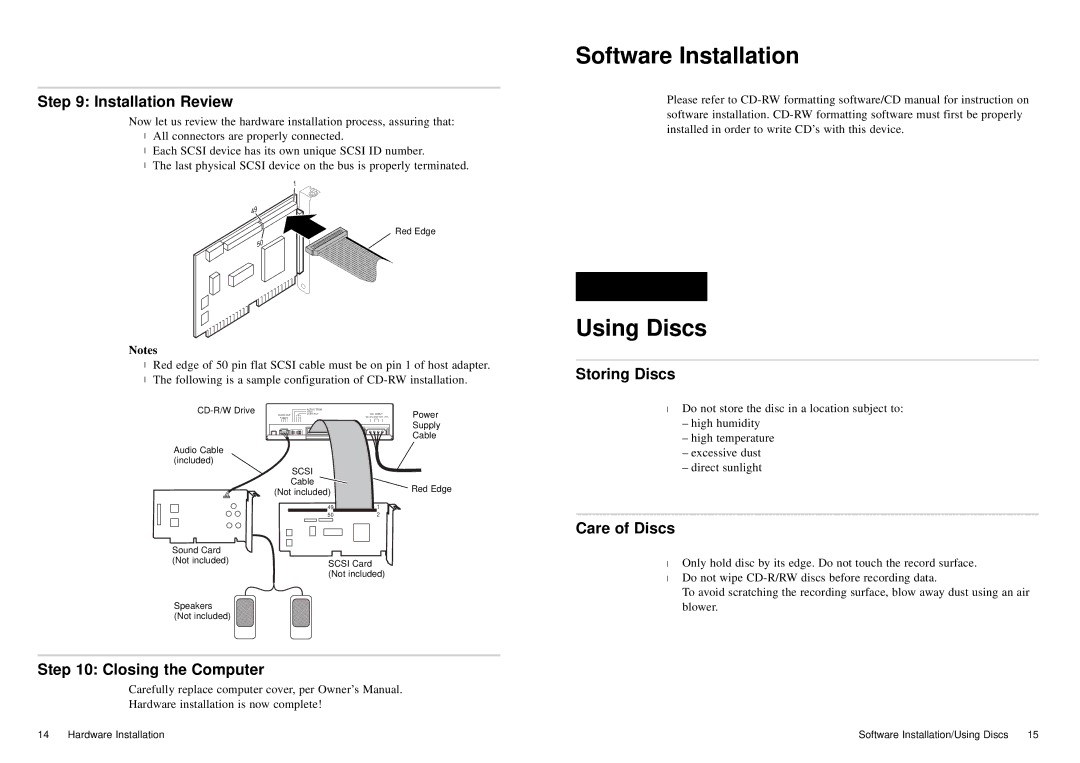
Red Edge
50
Notes
●Red edge of 50 pin flat SCSI cable must be on pin 1 of host adapter.
●The following is a sample configuration of
AUDIO OUT | ID SELECT | DC INPUT |
| |
|
| ACTIVE TERM |
| Power |
|
| TEST |
| |
| R GND L | 0 1 2 | 5V±5% GND 12V±10% | |
|
| INTERFACE CONNECTOR |
| Supply |
|
|
|
| |
|
|
|
| Cable |
Audio Cable |
|
|
|
|
(included) |
|
|
|
|
|
| SCSI |
|
|
|
| Cable |
| Red Edge |
| (Not included) |
| ||
|
|
| ||
|
| 49 | 1 |
|
|
| 50 | 2 |
|
Sound Card |
|
(Not included) | SCSI Card |
| |
| (Not included) |
Speakers |
|
(Not included) |
|
Step 10: Closing the Computer
Carefully replace computer cover, per Owner’s Manual.
Hardware installation is now complete!
Software Installation
Please refer to
Using Discs
Storing Discs
●Do not store the disc in a location subject to:
–high humidity
–high temperature
–excessive dust
–direct sunlight
Care of Discs
●Only hold disc by its edge. Do not touch the record surface.
●Do not wipe
To avoid scratching the recording surface, blow away dust using an air blower.
14 | Hardware Installation | Software Installation/Using Discs | 15 |