Selecting Image Quality

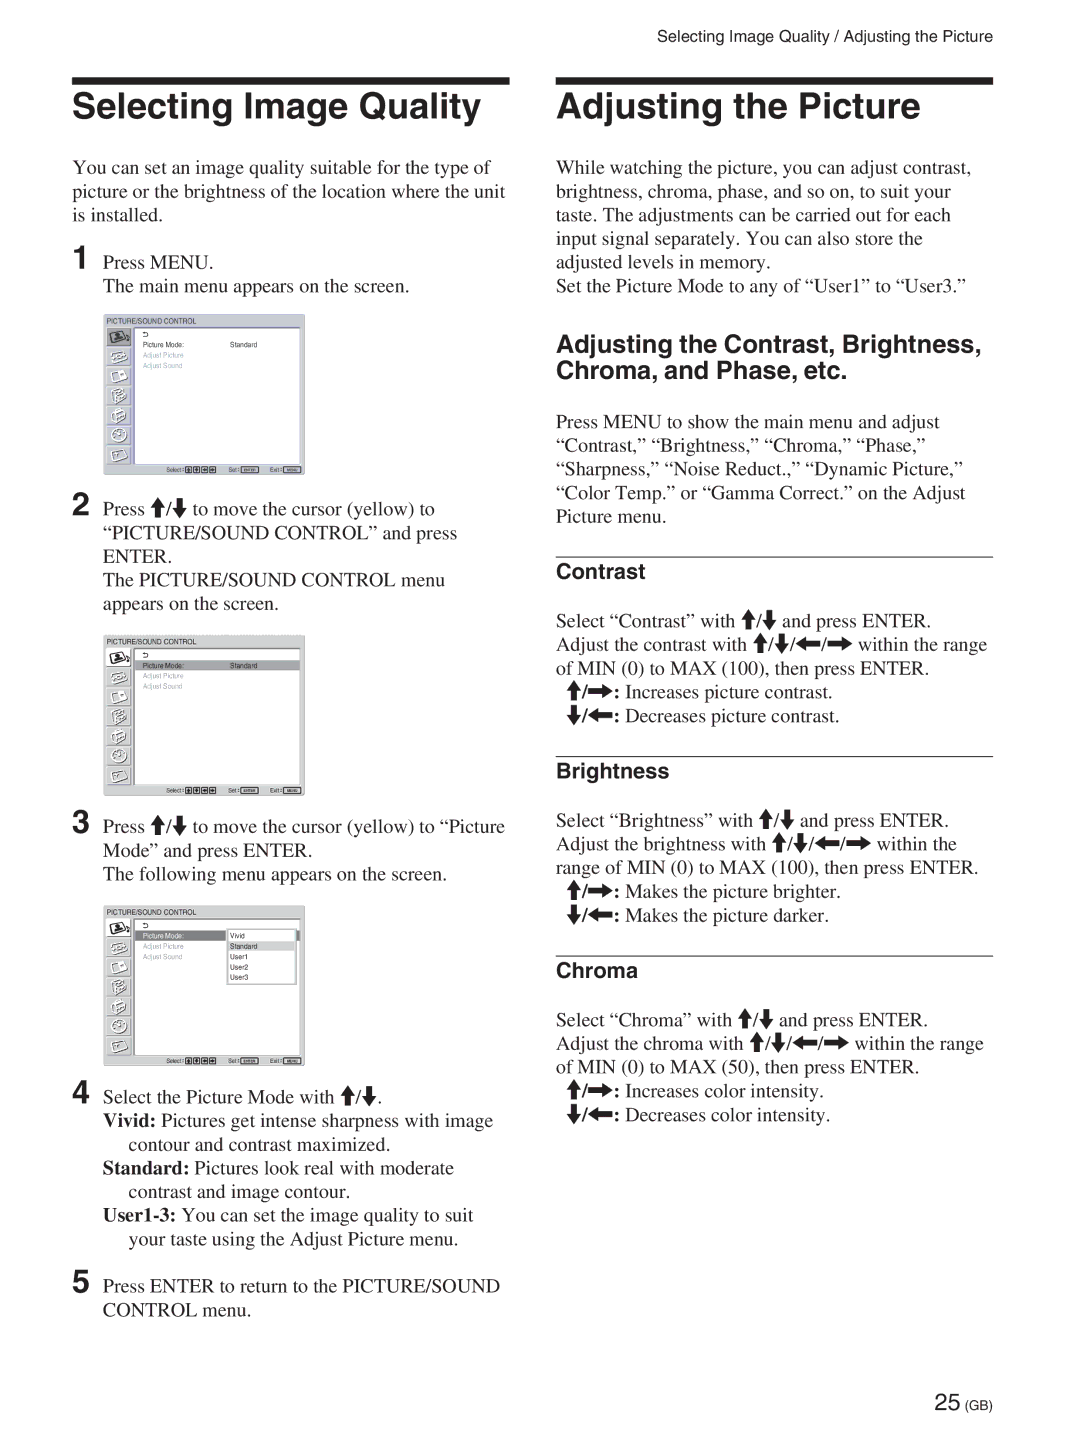
You can set an image quality suitable for the type of picture or the brightness of the location where the unit is installed.

1 Press MENU.

The main menu appears on the screen.

PICTURE/SOUND CONTROL

Picture Mode:

Standard

Adjust Picture


Adjust Sound


Select

Set ENTER

Exit

MENU

2 Press M/m to move the cursor (yellow) to “PICTURE/SOUND CONTROL” and press

ENTER.

The PICTURE/SOUND CONTROL menu appears on the screen.

PICTURE/SOUND CONTROL


Picture Mode:

Standard


Adjust Picture


Adjust Sound


Select

Set ENTER

Exit

MENU

3 Press M/m to move the cursor (yellow) to “Picture Mode” and press ENTER.

The following menu appears on the screen.

PICTURE/SOUND CONTROL


Picture Mode:

Vivid


Adjust Picture

Standard


Adjust Sound

User1


User2


User3


Select

Set ENTER

Exit

MENU

4 Select the Picture Mode with M/m.

Vivid: Pictures get intense sharpness with image contour and contrast maximized.

Standard: Pictures look real with moderate contrast and image contour.

User1-3:You can set the image quality to suit your taste using the Adjust Picture menu.

5 Press ENTER to return to the PICTURE/SOUND CONTROL menu.

Selecting Image Quality / Adjusting the Picture

Adjusting the Picture

While watching the picture, you can adjust contrast, brightness, chroma, phase, and so on, to suit your taste. The adjustments can be carried out for each input signal separately. You can also store the adjusted levels in memory.

Set the Picture Mode to any of “User1” to “User3.”

Adjusting the Contrast, Brightness, Chroma, and Phase, etc.

Press MENU to show the main menu and adjust “Contrast,” “Brightness,” “Chroma,” “Phase,” “Sharpness,” “Noise Reduct.,” “Dynamic Picture,” “Color Temp.” or “Gamma Correct.” on the Adjust Picture menu.

Contrast

Select “Contrast” with M/m and press ENTER. Adjust the contrast with M/m/</, within the range of MIN (0) to MAX (100), then press ENTER.

M/,: Increases picture contrast.

m/<: Decreases picture contrast.

Brightness

Select “Brightness” with M/m and press ENTER. Adjust the brightness with M/m/</, within the range of MIN (0) to MAX (100), then press ENTER.

M/,: Makes the picture brighter.

m/<: Makes the picture darker.

Chroma

Select “Chroma” with M/m and press ENTER. Adjust the chroma with M/m/</, within the range of MIN (0) to MAX (50), then press ENTER.

M/,: Increases color intensity.

m/<: Decreases color intensity.

25 (GB)

Page 25
Image 25
Sony FWD-50PX2A manual Selecting Image Quality, Adjusting the Picture, Contrast, Brightness, Chroma

FWD-50PX2A, FWD-50PX2 specifications

The Sony FWD-50PX2 and FWD-50PX2A are exceptional professional display models designed for various commercial applications, including retail environments, public information kiosks, and corporate settings. These displays are renowned for their vibrant image quality, advanced technologies, and robust build, making them suitable for a range of digital signage needs.

One of the standout features of the FWD-50PX2 series is the high-resolution plasma panel. With a resolution of 1366 x 768 pixels, the display provides crisp images and stunning detail. The plasma technology also ensures deep blacks and vibrant color reproduction, resulting in impressive visuals that capture attention and encourage engagement.

The FWD-50PX2 and its counterpart, the FWD-50PX2A, also incorporate Sony’s unique Bravia Engine technology. This advanced image processing engine enhances picture quality by optimizing contrast, color, and sharpness in real-time. This means that whether you’re displaying static images, videos, or dynamic content, viewers will enjoy a superior visual experience.

An essential characteristic of these displays is their exceptional readability under various lighting conditions. The anti-glare treatment ensures that images remain clear and visible even in bright environments. This makes the FWD-50PX2 series particularly effective for use in retail spaces, where ambient lighting can sometimes hinder visibility.

In terms of connectivity, the FWD-50PX2 and FWD-50PX2A offer a range of options, including HDMI, VGA, and DVI inputs, making integration with different media sources seamless. This versatility allows users to connect various devices such as computers, video players, and digital signage players without hassle.

Both models also support multiple orientation setups, enabling landscape and portrait arrangements. This flexibility allows businesses to tailor their display configurations to suit specific environments or content requirements.

Durability is another critical aspect of the FWD-50PX2 series. Designed for continuous operation, these displays can withstand the demands of busy commercial environments. Their build quality ensures longevity, reducing the need for frequent replacements.

In summary, the Sony FWD-50PX2 and FWD-50PX2A displays are powerful tools for businesses looking to enhance their visual communications. With high-resolution clarity, advanced image processing, robust connectivity options, and flexible installation capabilities, they meet the diverse needs of today's digital signage applications.