Setting Up the ICS-SP30 / Making Connections
The
Installing Card
Step 1 – Remove power cord from the display to ensure power is off. Remove any populated cards in slot 1 and/or slot 2 (if any). There may be a cover over slot 2. Remove the middle rail guide by removing screw between two card slots
Step 2 – If inserting the
to left side of the
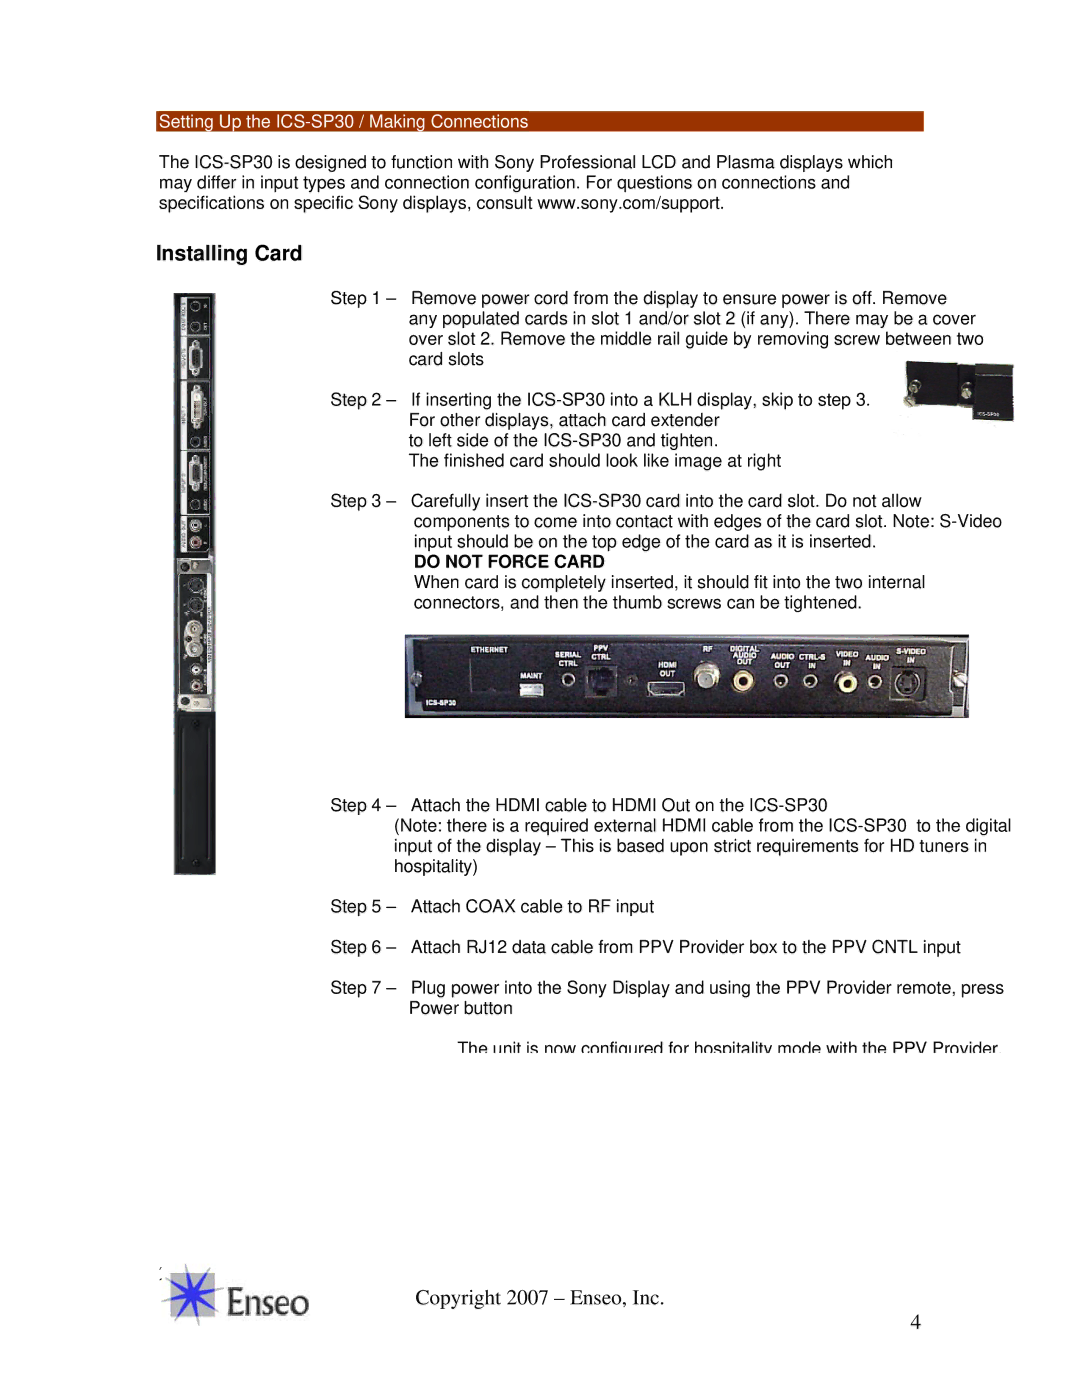
The finished card should look like image at right
Step 3 – Carefully insert the
DO NOT FORCE CARD
When card is completely inserted, it should fit into the two internal connectors, and then the thumb screws can be tightened.
Step 4 – Attach the HDMI cable to HDMI Out on the
(Note: there is a required external HDMI cable from the
Step 5 – Attach COAX cable to RF input
Step 6 – Attach RJ12 data cable from PPV Provider box to the PPV CNTL input
Step 7 – Plug power into the Sony Display and using the PPV Provider remote, press Power button
The unit is now configured for hospitality mode with the PPV Provider.
20
Copyright 2007 – Enseo, Inc.
4