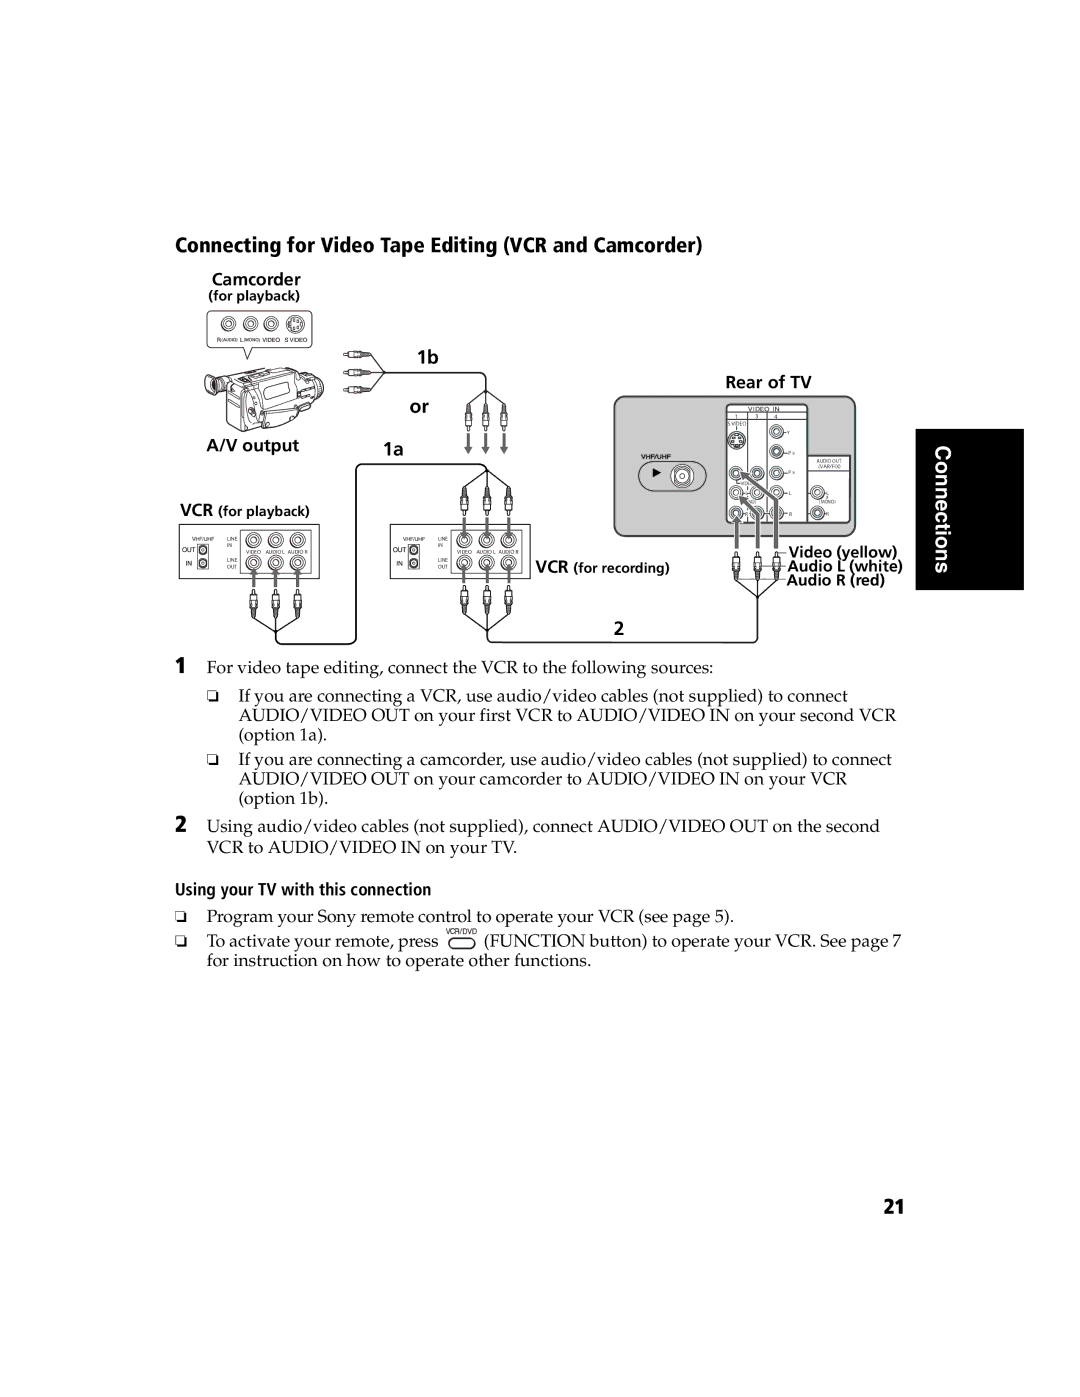
Connecting for Video Tape Editing (VCR and Camcorder)
Camcorder
(for playback)
1b
Rear of TV
| or | 3 |
|
|
| 1 | 4 |
| |
| S VIDEO |
|
|
|
A/V output |
|
| Y |
|
1a |
| P B | AUDIO OUT | |
|
|
|
| |
|
|
|
| (VAR/FIX) |
|
|
| P R |
|
| VIDEO |
|
|
|
| L |
| L | L |
VCR (for playback) |
|
|
| (MONO) |
R |
| R | R |
Connections
LINE IN
LINE OUT
VIDEO AUDIO L AUDIO R
LINE IN
LINE OUT
VIDEO AUDIO L AUDIO R
VCR (for recording)
2
Video (yellow) |
Audio L (white) |
Audio R (red) |
1 For video tape editing, connect the VCR to the following sources:
❏If you are connecting a VCR, use audio/video cables (not supplied) to connect AUDIO/VIDEO OUT on your first VCR to AUDIO/VIDEO IN on your second VCR (option 1a).
❏If you are connecting a camcorder, use audio/video cables (not supplied) to connect AUDIO/VIDEO OUT on your camcorder to AUDIO/VIDEO IN on your VCR (option 1b).
2 Using audio/video cables (not supplied), connect AUDIO/VIDEO OUT on the second VCR to AUDIO/VIDEO IN on your TV.
Using your TV with this connection
❏Program your Sony remote control to operate your VCR (see page 5).
❏To activate your remote, press ![]() (FUNCTION button) to operate your VCR. See page 7 for instruction on how to operate other functions.
(FUNCTION button) to operate your VCR. See page 7 for instruction on how to operate other functions.
21