For better picture quality, use S VIDEO instead of the yellow Audio/ Video cable. S VIDEO does not provide sound; the audio cables must still be connected.
You can use the
button to switch between the VHF/UHF and VIDEO inputs.
Optional connection
1
Cable Box
From cable
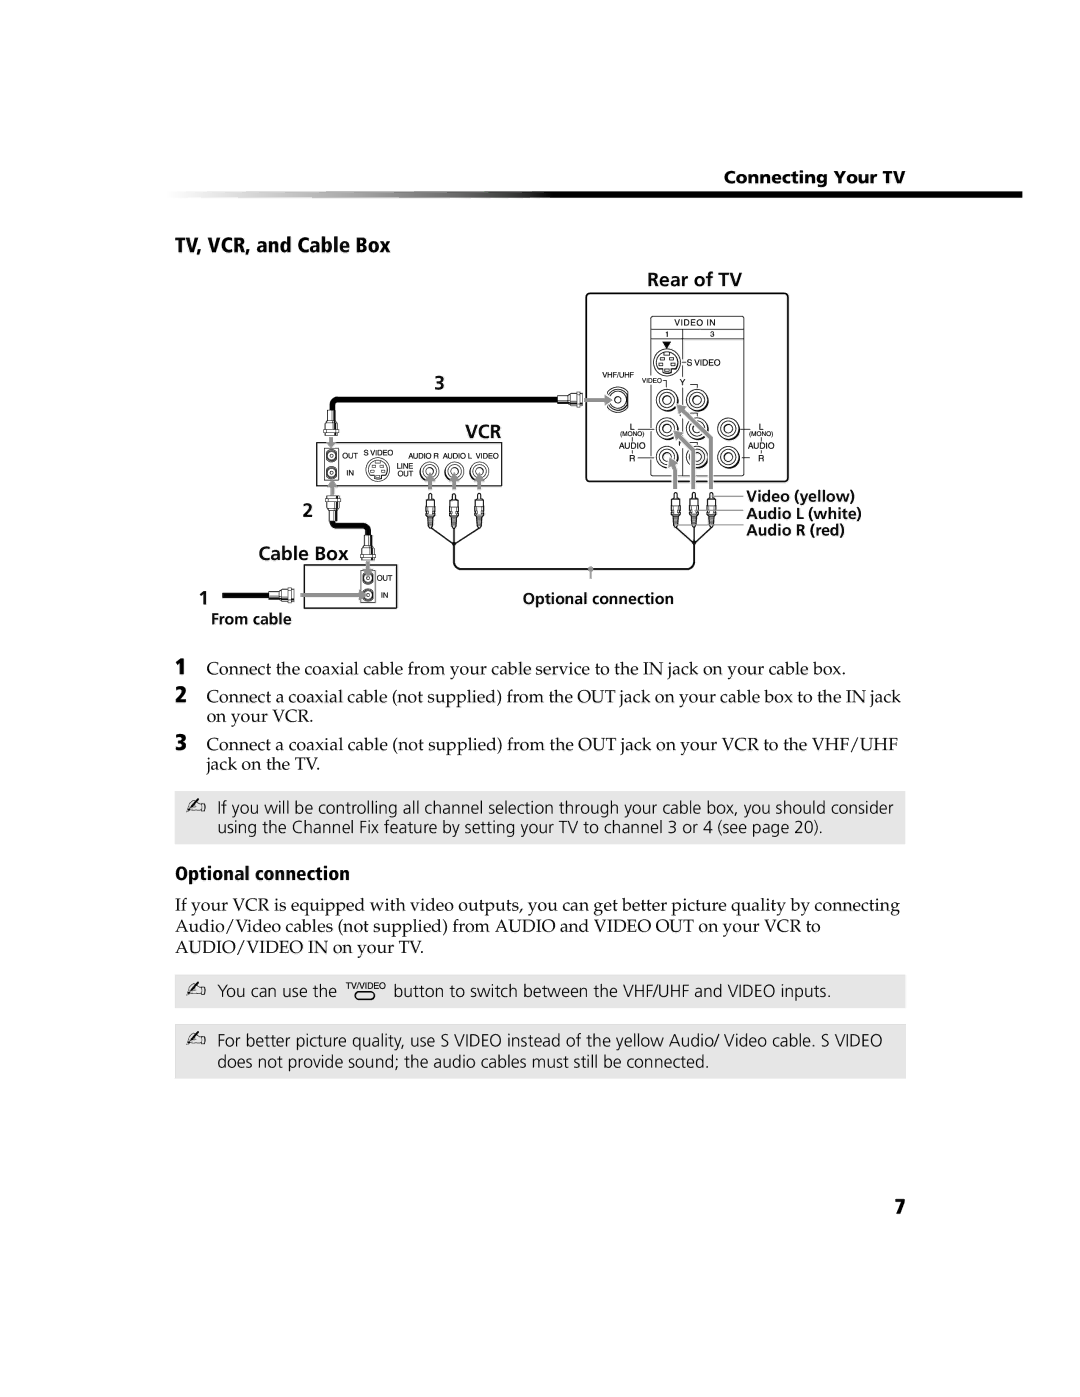
1 Connect the coaxial cable from your cable service to the IN jack on your cable box.
2 Connect a coaxial cable (not supplied) from the OUT jack on your cable box to the IN jack on your VCR.
3 Connect a coaxial cable (not supplied) from the OUT jack on your VCR to the VHF/UHF jack on the TV.
If you will be controlling all channel selection through your cable box, you should consider using the Channel Fix feature by setting your TV to channel 3 or 4 (see page 20).
Optional connection
If your VCR is equipped with video outputs, you can get better picture quality by connecting Audio/Video cables (not supplied) from AUDIO and VIDEO OUT on your VCR to AUDIO/VIDEO IN on your TV.
Connecting Your TV
TV, VCR, and Cable Box
Rear of TV
3
VCR
2 | Video (yellow) |
Audio L (white) | |
| Audio R (red) |
7