Recording a CD
— CD Synchro Recording
The CD SYNC
|
|
| DOLBY NR | |||
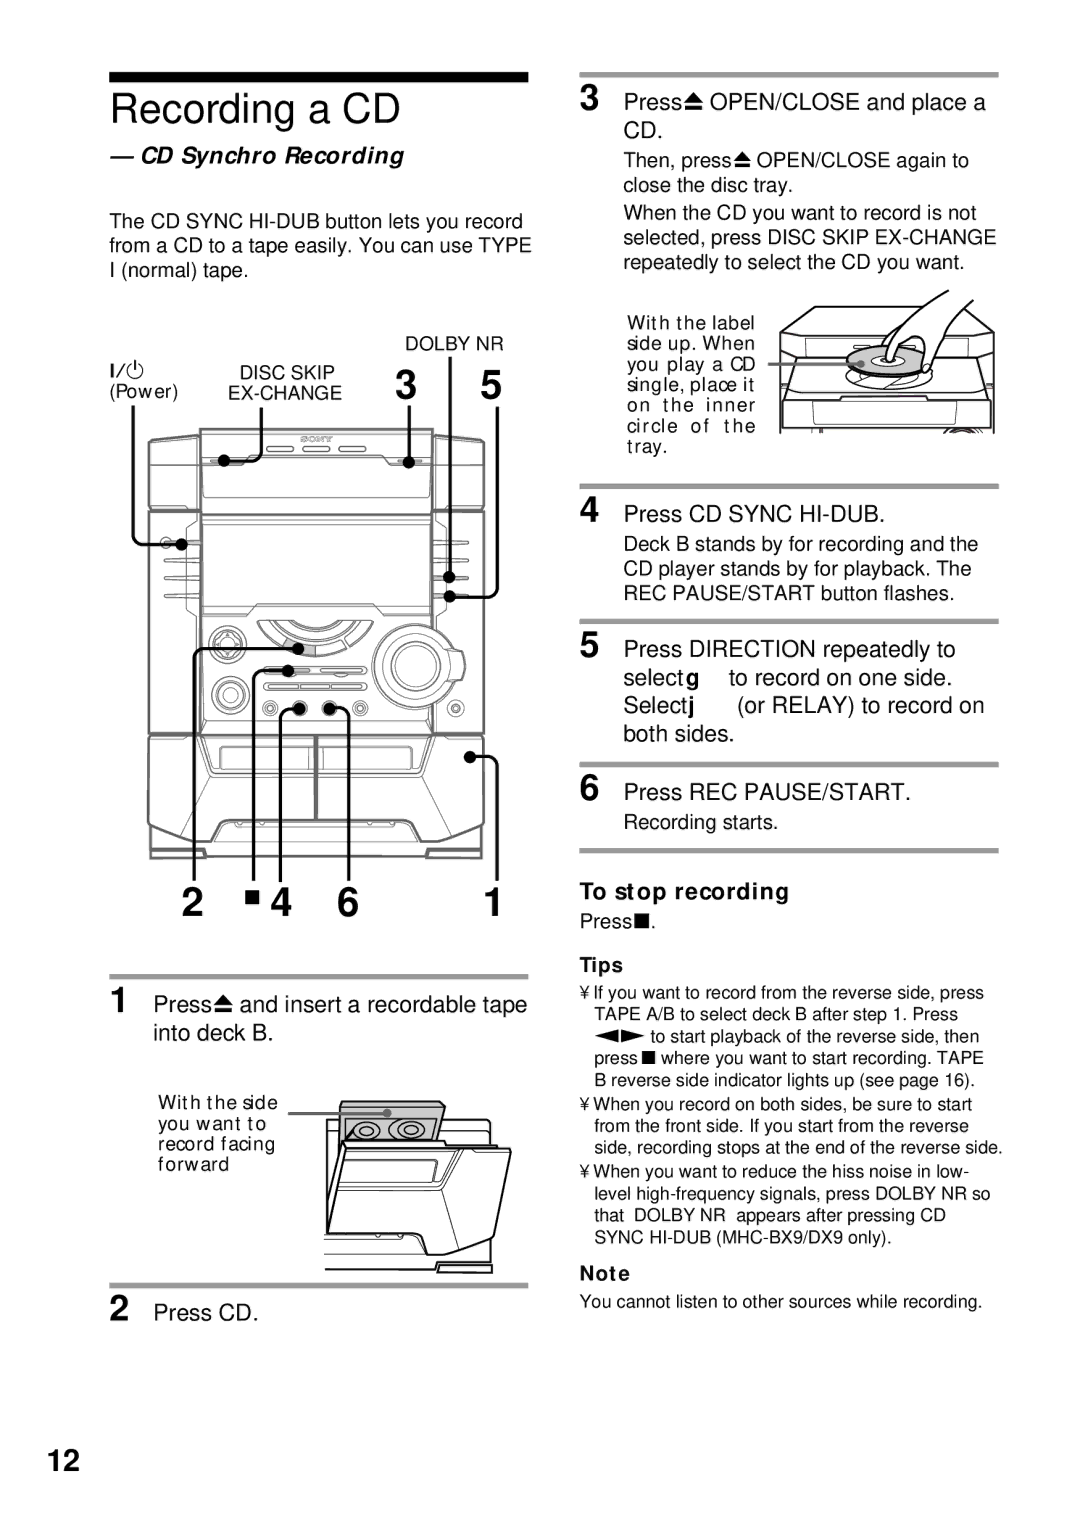
?/1 | DISC SKIP | 3 |
| 5 | ||
(Power) |
| |||||
|
|
|
|
|
|
|
|
|
|
|
|
|
|
3 Press Z OPEN/CLOSE and place a CD.
Then, press Z OPEN/CLOSE again to close the disc tray.
When the CD you want to record is not selected, press DISC SKIP
With the label side up. When you play a CD single, place it on the inner circle of the tray.
4 Press CD SYNC HI-DUB.
Deck B stands by for recording and the CD player stands by for playback. The REC PAUSE/START button flashes.
5 Press DIRECTION repeatedly to select g to record on one side. Select j (or RELAY) to record on both sides.
6 Press REC PAUSE/START.
Recording starts.
2 x 4 6 | 1 |
1 Press Z and insert a recordable tape into deck B.
With the side you want to record facing forward
2 Press CD.
To stop recording
Press x.
Tips
•If you want to record from the reverse side, press TAPE A/B to select deck B after step 1. Press nN to start playback of the reverse side, then press x where you want to start recording. TAPE B reverse side indicator lights up (see page 16).
•When you record on both sides, be sure to start from the front side. If you start from the reverse side, recording stops at the end of the reverse side.
•When you want to reduce the hiss noise in low- level
Note
You cannot listen to other sources while recording.
12