Step 1: Hooking up the system (continued)
To attach the front speaker pads
Attach the supplied front speaker pads to the bottom of the speakers to stabilize the speakers and prevent them from slipping.
Positioning the speakers (MHC-BX7/DX7 only)
Before you connect them, determine the best location for your speakers.
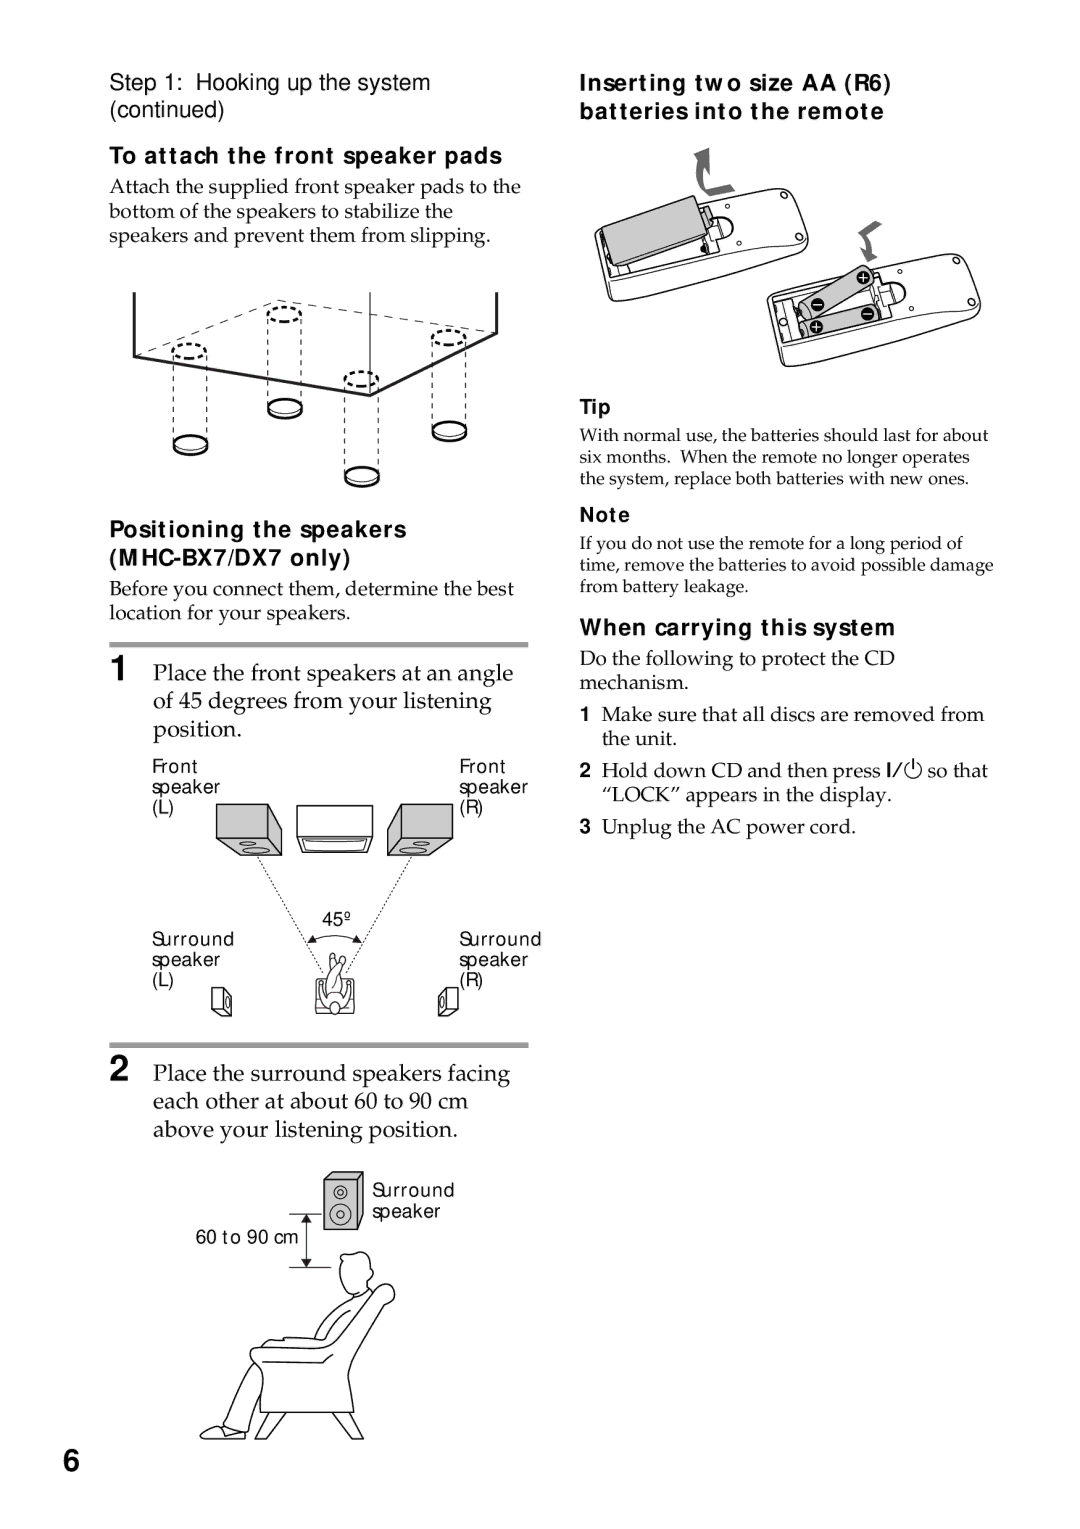
1 Place the front speakers at an angle of 45 degrees from your listening position.
Front | Front |
speaker | speaker |
(L) | (R) |
| 45º |
Surround | Surround |
speaker | speaker |
(L) | (R) |
2 Place the surround speakers facing each other at about 60 to 90 cm above your listening position.
Surround speaker
60 to 90 cm
Inserting two size AA (R6) batteries into the remote
e![]()
E | E | |
e | ||
|
Tip
With normal use, the batteries should last for about six months. When the remote no longer operates the system, replace both batteries with new ones.
Note
If you do not use the remote for a long period of time, remove the batteries to avoid possible damage from battery leakage.
When carrying this system
Do the following to protect the CD mechanism.
1Make sure that all discs are removed from the unit.
2Hold down CD and then press ?/1 so that “LOCK” appears in the display.
3Unplug the AC power cord.
6