English
CONTROLS AND ADJUSTMENTS
Controls and Adjustments
Once you have installed the monitor for your system, please read the instructions of this section which give you some guidelines on how to use the monitor more efficiently. It leads you through the various function of the user controls and explains how to adjust the monitor to your personal preference.
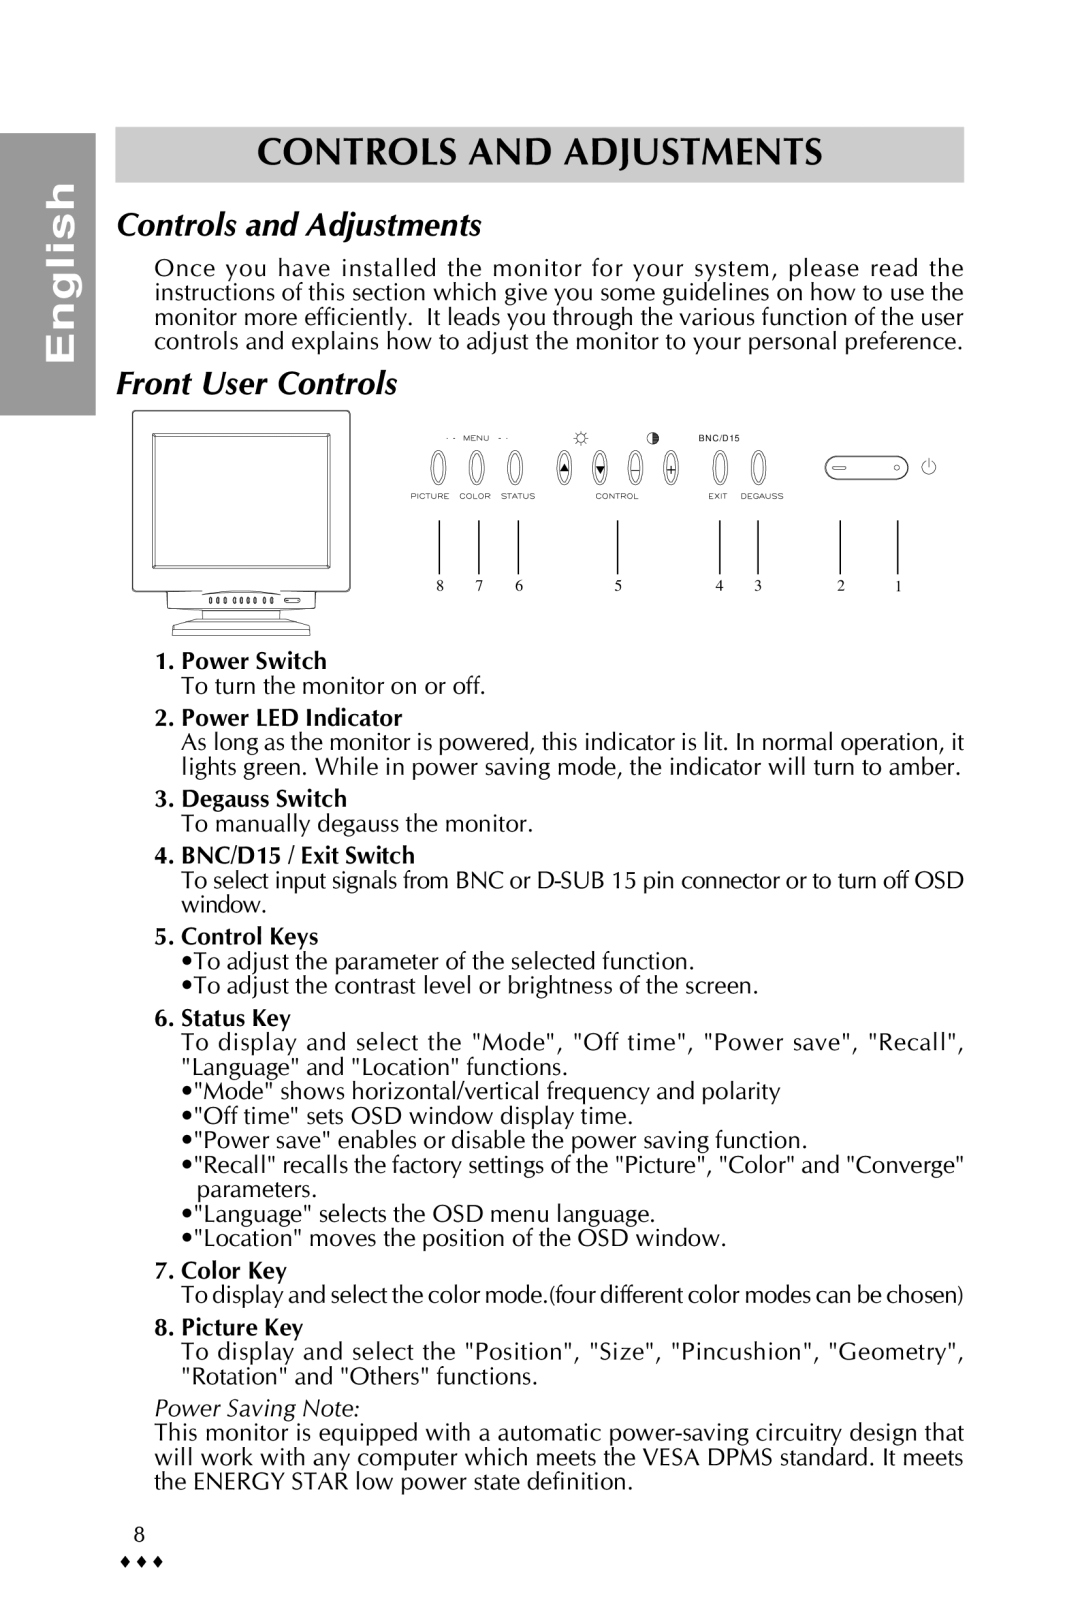
Front User Controls
BNC/D15
▲ ▼ – +
8 | 7 | 6 | 5 | 4 | 3 | 2 | 1 |
1.Power Switch
To turn the monitor on or off.
2.Power LED Indicator
As long as the monitor is powered, this indicator is lit. In normal operation, it lights green. While in power saving mode, the indicator will turn to amber.
3.Degauss Switch
To manually degauss the monitor.
4.BNC/D15 / Exit Switch
To select input signals from BNC or
5.Control Keys
•To adjust the parameter of the selected function.
•To adjust the contrast level or brightness of the screen.
6.Status Key
To display and select the "Mode", "Off time", "Power save", "Recall", "Language" and "Location" functions.
•"Mode" shows horizontal/vertical frequency and polarity •"Off time" sets OSD window display time.
•"Power save" enables or disable the power saving function.
•"Recall" recalls the factory settings of the "Picture", "Color" and "Converge" parameters.
•"Language" selects the OSD menu language. •"Location" moves the position of the OSD window.
7.Color Key
To display and select the color mode.(four different color modes can be chosen)
8.Picture Key
To display and select the "Position", "Size", "Pincushion", "Geometry", "Rotation" and "Others" functions.
Power Saving Note:
This monitor is equipped with a automatic
8
♦♦♦
