VAIO Digital Studio Computer Quick Start
Connecting a stereo A/V dubbing cable
1Connect a stereo A/V dubbing cable with triple RCA plugs at each end (optional) directly into the composite video port, composite audio L and R jacks, located on either the front or back panel of your computer.
2Connect the other ends of the stereo A/V dubbing cable into the appropriate jacks on your compatible VCR or camcorder.
Connecting a TV monitor (display)
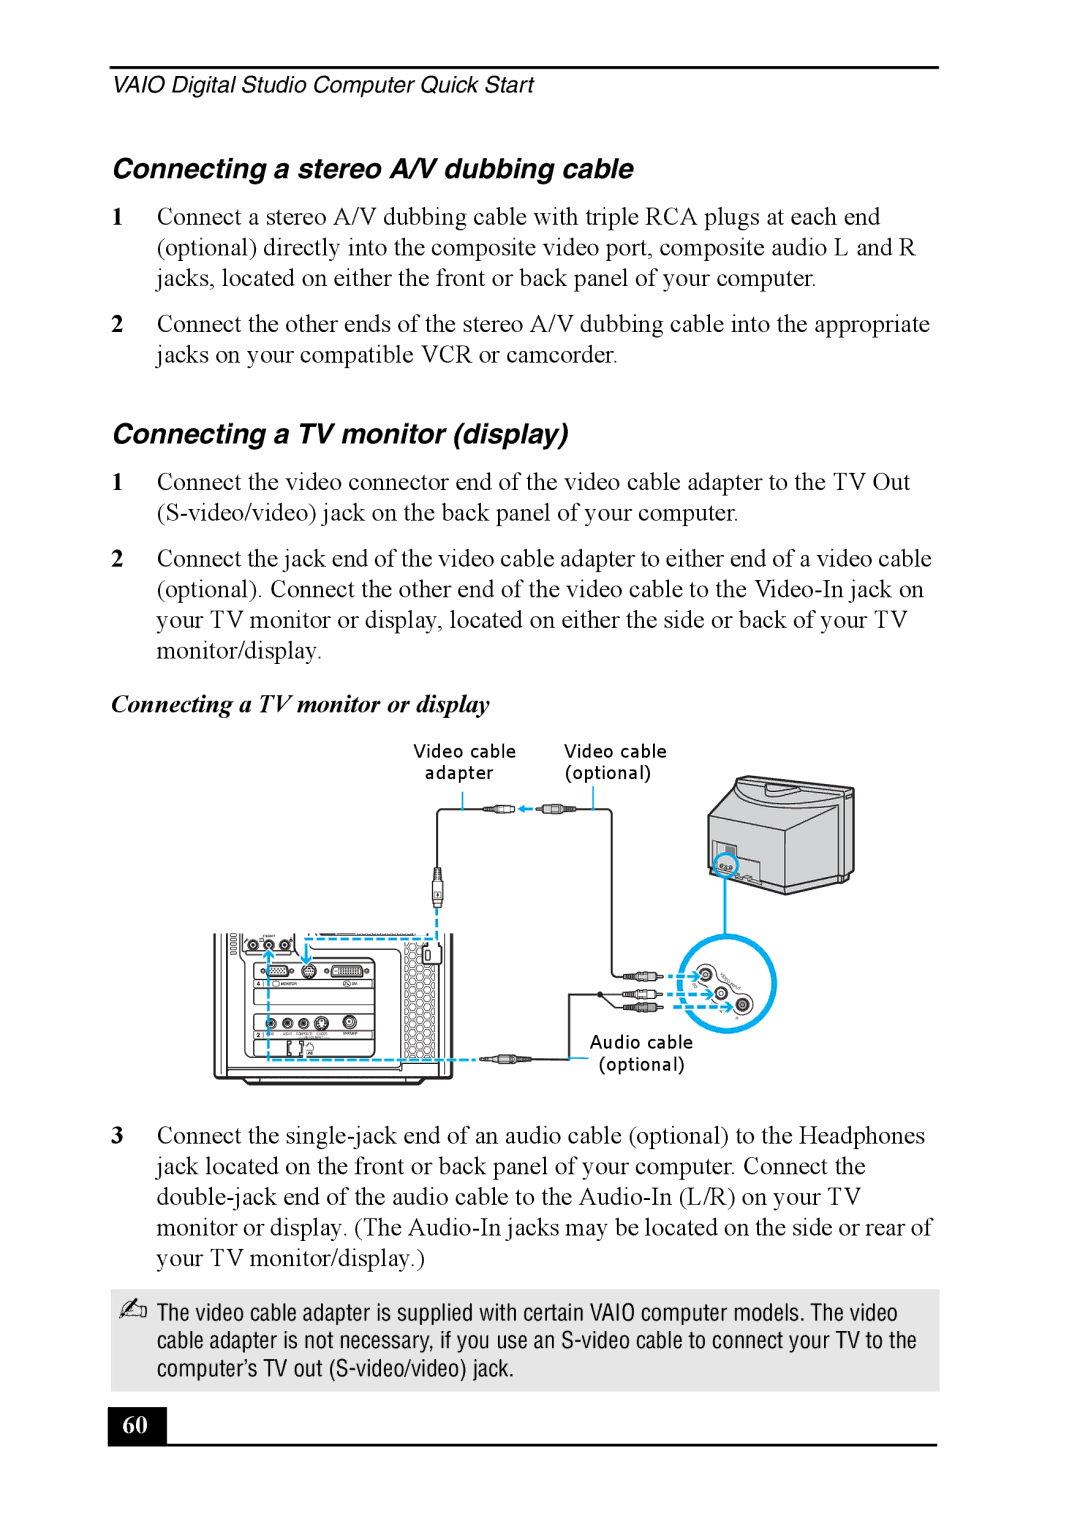
1Connect the video connector end of the video cable adapter to the TV Out
2Connect the jack end of the video cable adapter to either end of a video cable (optional). Connect the other end of the video cable to the
Connecting a TV monitor or display
Video cable | Video cable |
adapter | (optional) |
FRONT |
|
|
|
|
|
| V |
|
|
| I |
|
|
| D |
|
|
| E |
|
|
| O |
AUDIO | AUDIO COMPOSITE | S VIDEO | Audio cable |
| – VIDEO1 INPUT – |
| |
|
|
| (optional) |
V
I
D
E O INPU ![]() T
T
L(MO
NO)
R
3Connect the
✍The video cable adapter is supplied with certain VAIO computer models. The video cable adapter is not necessary, if you use an
60 |