Install the Mainboard
Follow the steps below in order to perform the installation of your new
Step 1. Install the CPU
![]() Mark your CPU Frequency: Record the working frequency of your CPU that should be clearly marked on the CPU cover.
Mark your CPU Frequency: Record the working frequency of your CPU that should be clearly marked on the CPU cover.
| 233MHz (66 x 3.5) |
| 300MHz (66 x 4.5) |
| 350MHz (100 x 3.5) |
| 450MHz (100 x 4.5) |
| 266MHz (66 x 4.0) |
| 333MHz (66 x 5.0) |
| 400MHz (100 x 4.0) |
| 500MHz (100 x 5.0) |
|
|
|
| ||||
|
|
|
|
|
|
|
|
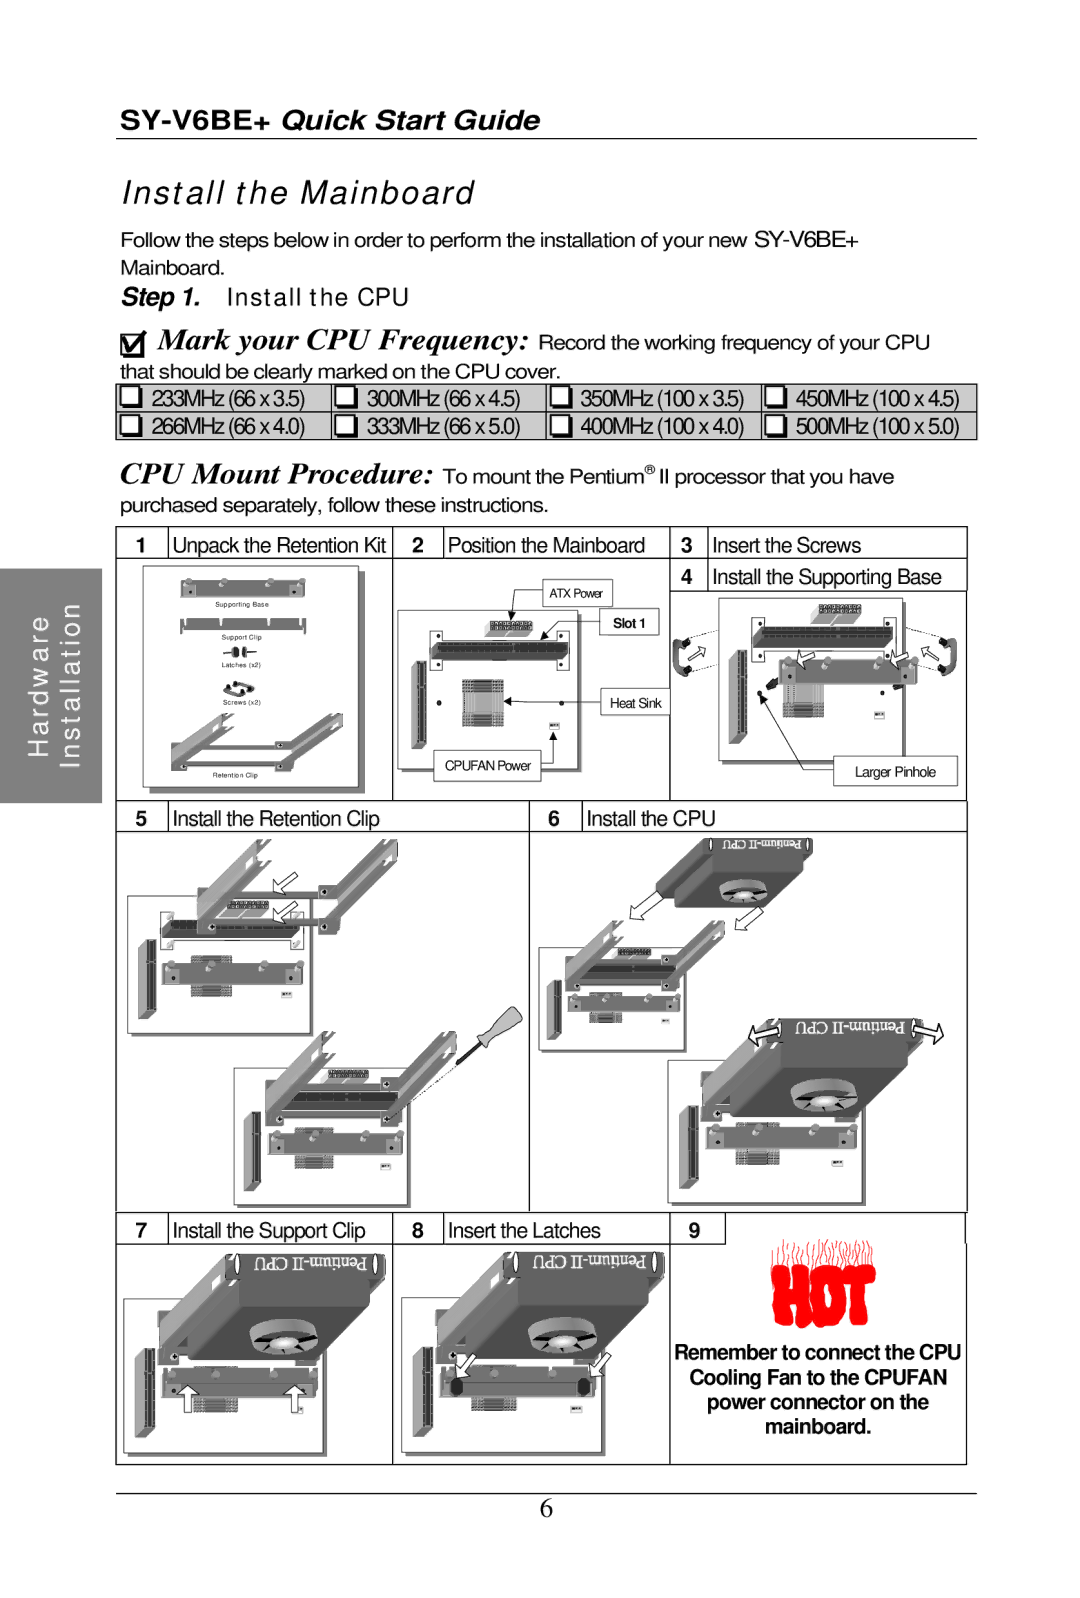
CPU Mount Procedure: To mount the Pentium® II processor that you have purchased separately, follow these instructions.
| 1 | Unpack the Retention Kit | 2 | Position the Mainboard | 3 | Insert the Screws | |
|
|
|
| ATX Power | 4 Install the Supporting Base | ||
| Installation |
|
|
|
| ||
Hardware | Supporting Base |
|
|
|
|
| |
|
|
| Slot 1 |
|
| ||
Support Clip |
|
|
|
|
| ||
Latches (x2) |
|
|
|
|
| ||
Screws (x2) |
|
| Heat Sink |
|
| ||
|
|
|
|
| |||
Retention Clip |
| CPUFAN Power |
|
| Larger Pinhole | ||
|
|
|
|
| |||
|
|
|
|
|
| ||
| 5 | Install the Retention Clip |
| 6 | Install the CPU | ||
| 7 | Install the Support Clip | 8 | Insert the Latches | 9 |
| |
Remember to connect the CPU
Cooling Fan to the CPUFAN
power connector on the
mainboard.
6