Step 5. Set the CPU Frequency
This mainboard does not use any jumpers to set the CPU frequency, CPU setting are changed through the BIOS [SOYO COMBO SETUP]. Refer to Chapter 3 “Quick BIOS Setup”for details on how to set the Pentium® II processor frequency.
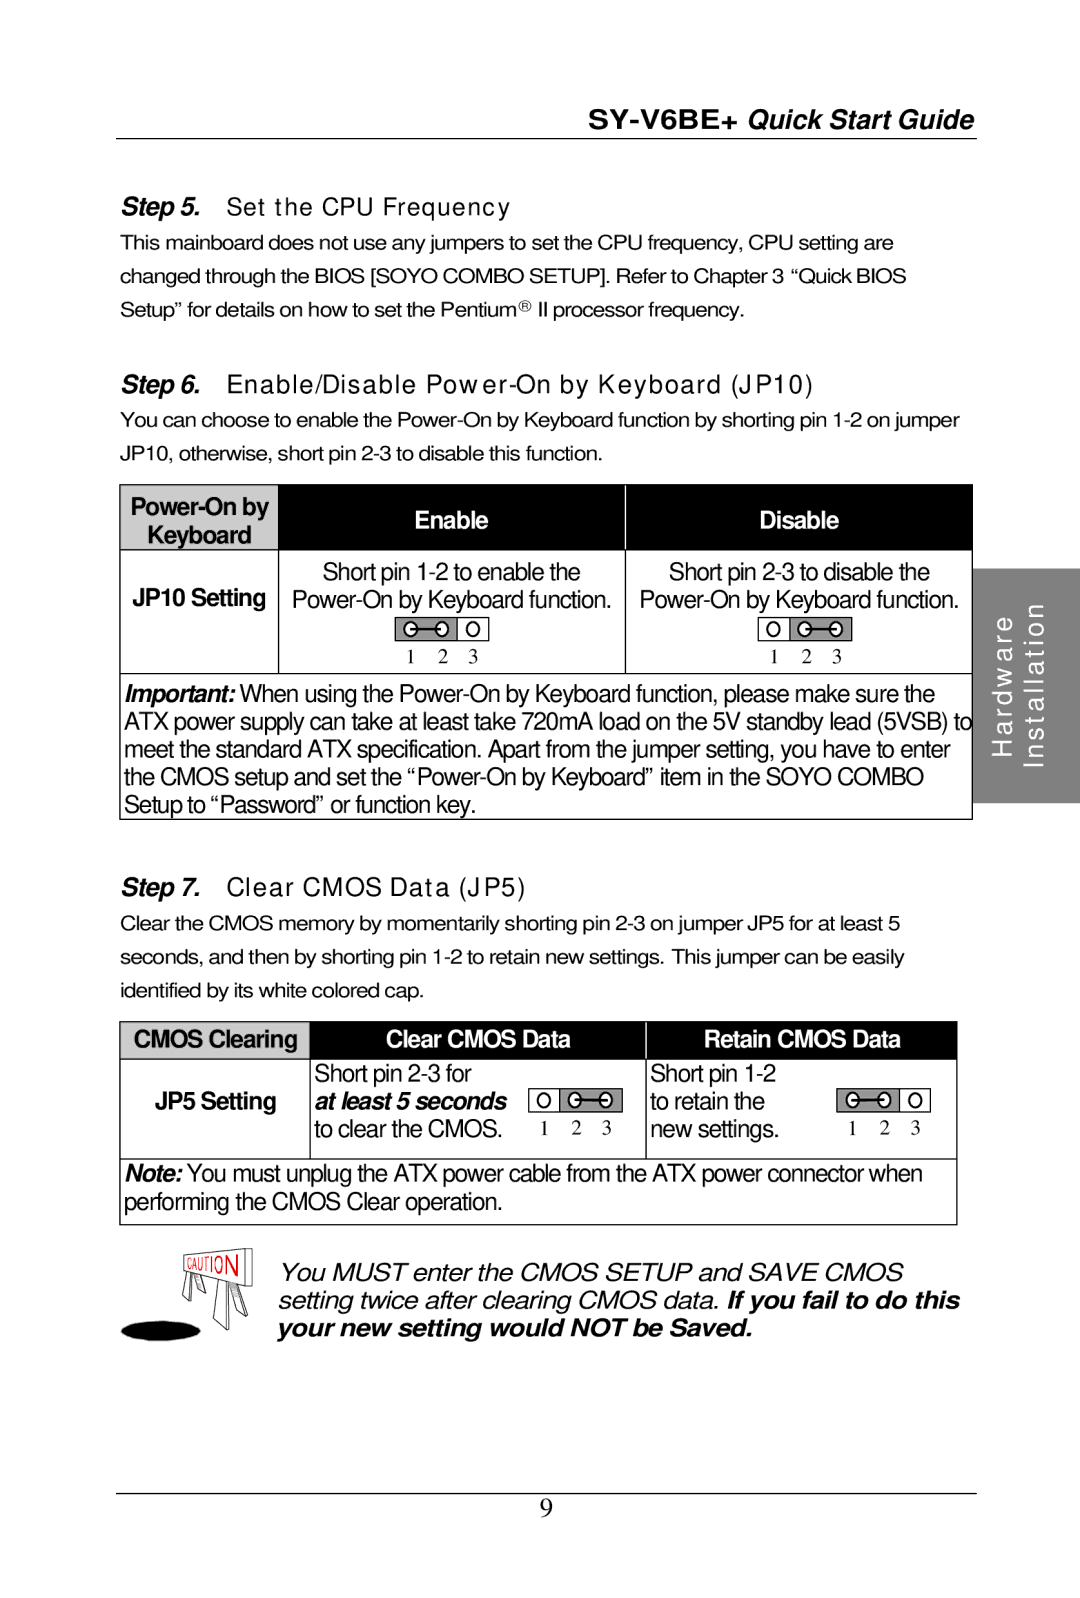
Step 6. Enable/Disable Power-On by Keyboard (JP10)
You can choose to enable the
Keyboard
JP10 Setting
Enable
Short pin
1 2 3
Disable
Short pin
1 2 3
Important: When using the
Step 7. Clear CMOS Data (JP5)
Clear the CMOS memory by momentarily shorting pin
CMOS Clearing | Clear CMOS Data |
| Retain CMOS Data | ||||||
| Short pin |
| Short pin |
|
|
| |||
JP5 Setting | at least 5 seconds |
|
|
|
| to retain the |
|
|
|
| to clear the CMOS. 1 2 3 |
| new settings. | 1 2 3 |
| ||||
|
|
|
|
|
|
|
|
|
|
Note: You must unplug the ATX power cable from the ATX power connector when performing the CMOS Clear operation.
You MUST enter the CMOS SETUP and SAVE CMOS setting twice after clearing CMOS data. If you fail to do this your new setting would NOT be Saved.
9