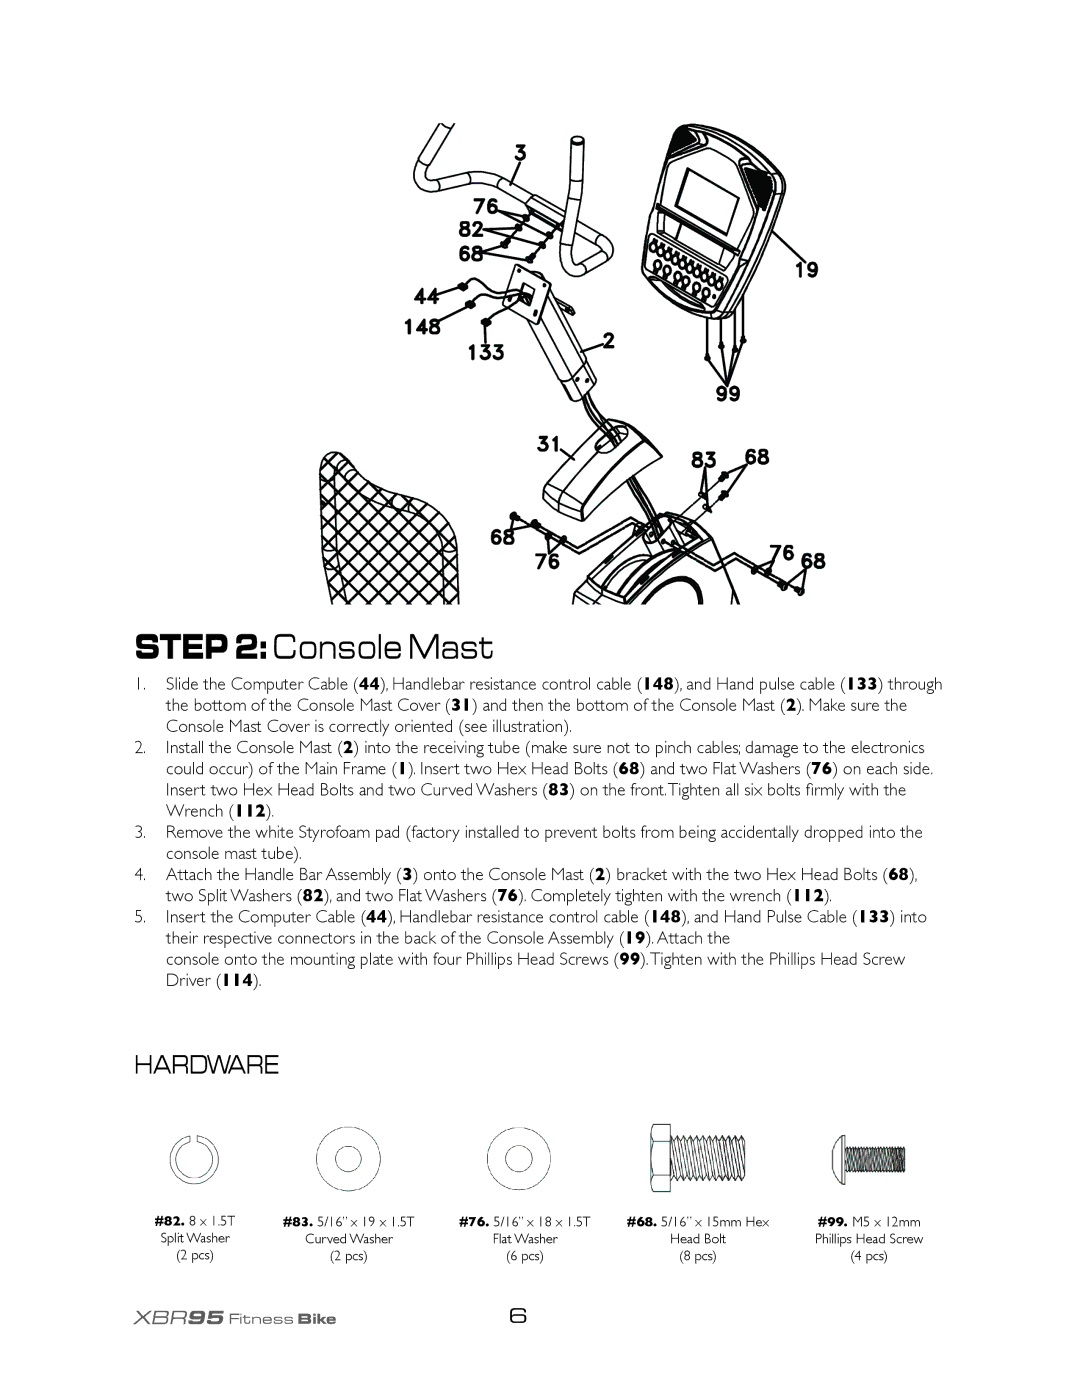
STEP2:Console Mast
1.Slide the Computer Cable (44), Handlebar resistance control cable (148), and Hand pulse cable (133) through the bottom of the Console Mast Cover (31) and then the bottom of the Console Mast (2). Make sure the Console Mast Cover is correctly oriented (see illustration).
2.Install the Console Mast (2) into the receiving tube (make sure not to pinch cables; damage to the electronics could occur) of the Main Frame (1). Insert two Hex Head Bolts (68) and two Flat Washers (76) on each side. Insert two Hex Head Bolts and two Curved Washers (83) on the front.Tighten all six bolts firmly with the Wrench (112).
3.Remove the white Styrofoam pad (factory installed to prevent bolts from being accidentally dropped into the console mast tube).
4.Attach the Handle Bar Assembly (3) onto the Console Mast (2) bracket with the two Hex Head Bolts (68), two Split Washers (82), and two Flat Washers (76). Completely tighten with the wrench (112).
5.Insert the Computer Cable (44), Handlebar resistance control cable (148), and Hand Pulse Cable (133) into their respective connectors in the back of the Console Assembly (19). Attach the
console onto the mounting plate with four Phillips Head Screws (99).Tighten with the Phillips Head Screw Driver (114).
HARDWARE
#82. 8 x 1.5T | #83. 5/16” x 19 x 1.5T | #76. 5/16” x 18 x 1.5T | #68. 5/16” x 15mm Hex | #99. M5 x 12mm |
Split Washer | Curved Washer | Flat Washer | Head Bolt | Phillips Head Screw |
(2 pcs) | (2 pcs) | (6 pcs) | (8 pcs) | (4 pcs) |
XBR95 Fitness Bike | 6 |
|
| |