ASSEMBLY INSTRUCTIONS
STEP 7
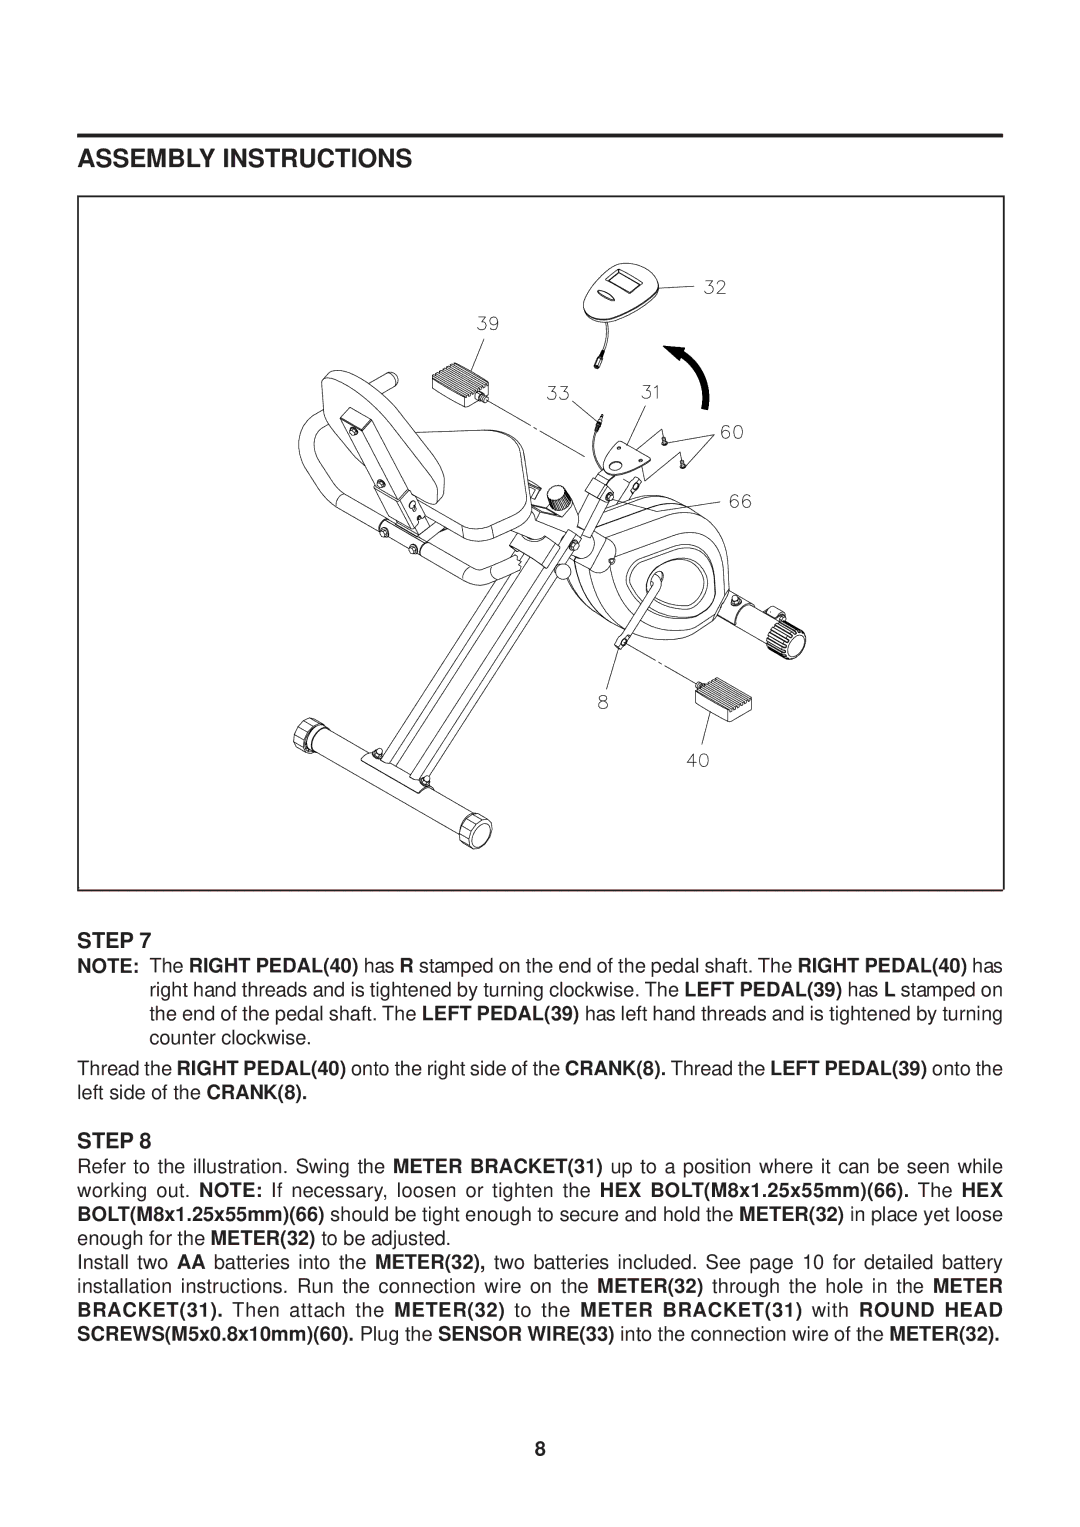
NOTE: The RIGHT PEDAL(40) has R stamped on the end of the pedal shaft. The RIGHT PEDAL(40) has right hand threads and is tightened by turning clockwise. The LEFT PEDAL(39) has L stamped on the end of the pedal shaft. The LEFT PEDAL(39) has left hand threads and is tightened by turning counter clockwise.
Thread the RIGHT PEDAL(40) onto the right side of the CRANK(8). Thread the LEFT PEDAL(39) onto the left side of the CRANK(8).
STEP 8
Refer to the illustration. Swing the METER BRACKET(31) up to a position where it can be seen while working out. NOTE: If necessary, loosen or tighten the HEX BOLT(M8x1.25x55mm)(66). The HEX BOLT(M8x1.25x55mm)(66) should be tight enough to secure and hold the METER(32) in place yet loose enough for the METER(32) to be adjusted.
Install two AA batteries into the METER(32), two batteries included. See page 10 for detailed battery installation instructions. Run the connection wire on the METER(32) through the hole in the METER BRACKET(31). Then attach the METER(32) to the METER BRACKET(31) with ROUND HEAD SCREWS(M5x0.8x10mm)(60). Plug the SENSOR WIRE(33) into the connection wire of the METER(32).
8