ASSEMBLY INSTRUCTIONS
Place all parts from the box in a cleared area and position them on the floor in front of you. Remove all packing materials from your area and place them back into the box. Do not dispose of the packing materials until assembly is completed. Read each step carefully before beginning. If you are missing a part please call our
L |
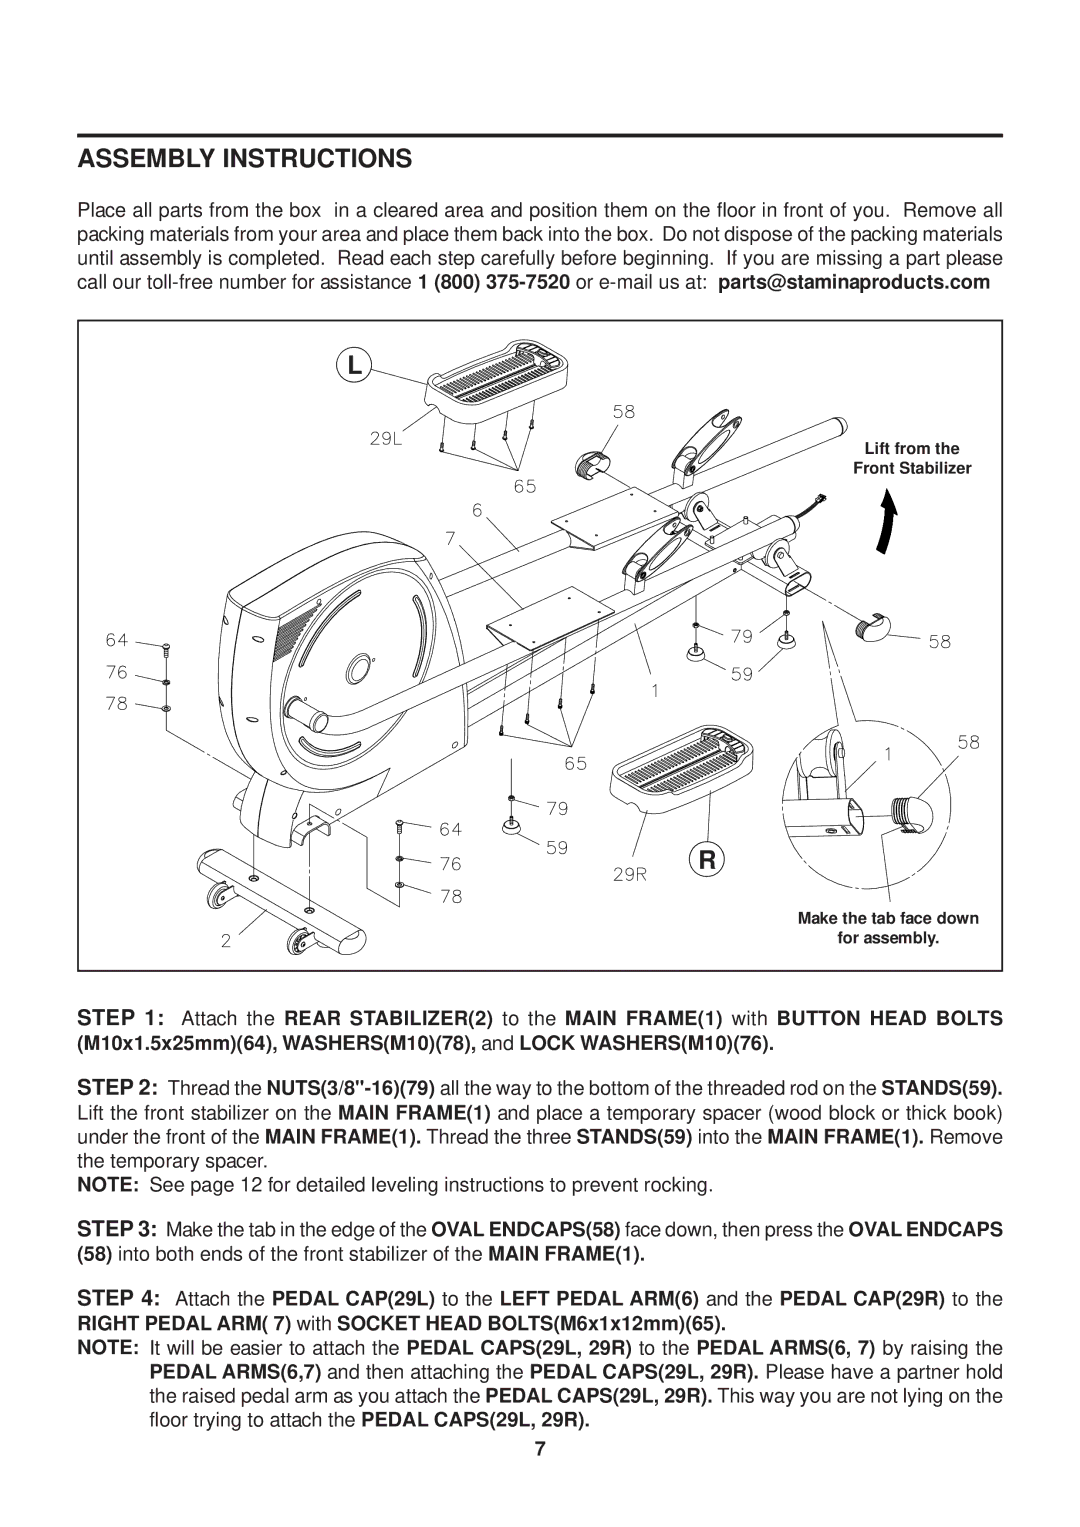
Lift from the |
Front Stabilizer |
R |
Make the tab face down |
for assembly. |
STEP 1: Attach the REAR STABILIZER(2) to the MAIN FRAME(1) with BUTTON HEAD BOLTS (M10x1.5x25mm)(64), WASHERS(M10)(78), and LOCK WASHERS(M10)(76).
STEP 2: Thread the
NOTE: See page 12 for detailed leveling instructions to prevent rocking.
STEP 3: Make the tab in the edge of the OVAL ENDCAPS(58) face down, then press the OVAL ENDCAPS
(58)into both ends of the front stabilizer of the MAIN FRAME(1).
STEP 4: Attach the PEDAL CAP(29L) to the LEFT PEDAL ARM(6) and the PEDAL CAP(29R) to the RIGHT PEDAL ARM( 7) with SOCKET HEAD BOLTS(M6x1x12mm)(65).
NOTE: It will be easier to attach the PEDAL CAPS(29L, 29R) to the PEDAL ARMS(6, 7) by raising the PEDAL ARMS(6,7) and then attaching the PEDAL CAPS(29L, 29R). Please have a partner hold the raised pedal arm as you attach the PEDAL CAPS(29L, 29R). This way you are not lying on the floor trying to attach the PEDAL CAPS(29L, 29R).
7