800C specifications
Star Micronics 800C is a state-of-the-art thermal printer designed to meet the high demands of retail, hospitality, and various other industries. This compact and efficient device excels in providing quick, high-quality printing solutions, offering a range of features that enhance its functionality and user experience.One of the standout features of the Star Micronics 800C is its remarkable printing speed. Capable of delivering up to 250 mm per second, it ensures that receipts and labels are printed swiftly, significantly reducing customer wait times. This efficiency is crucial in fast-paced environments where time is of the essence.
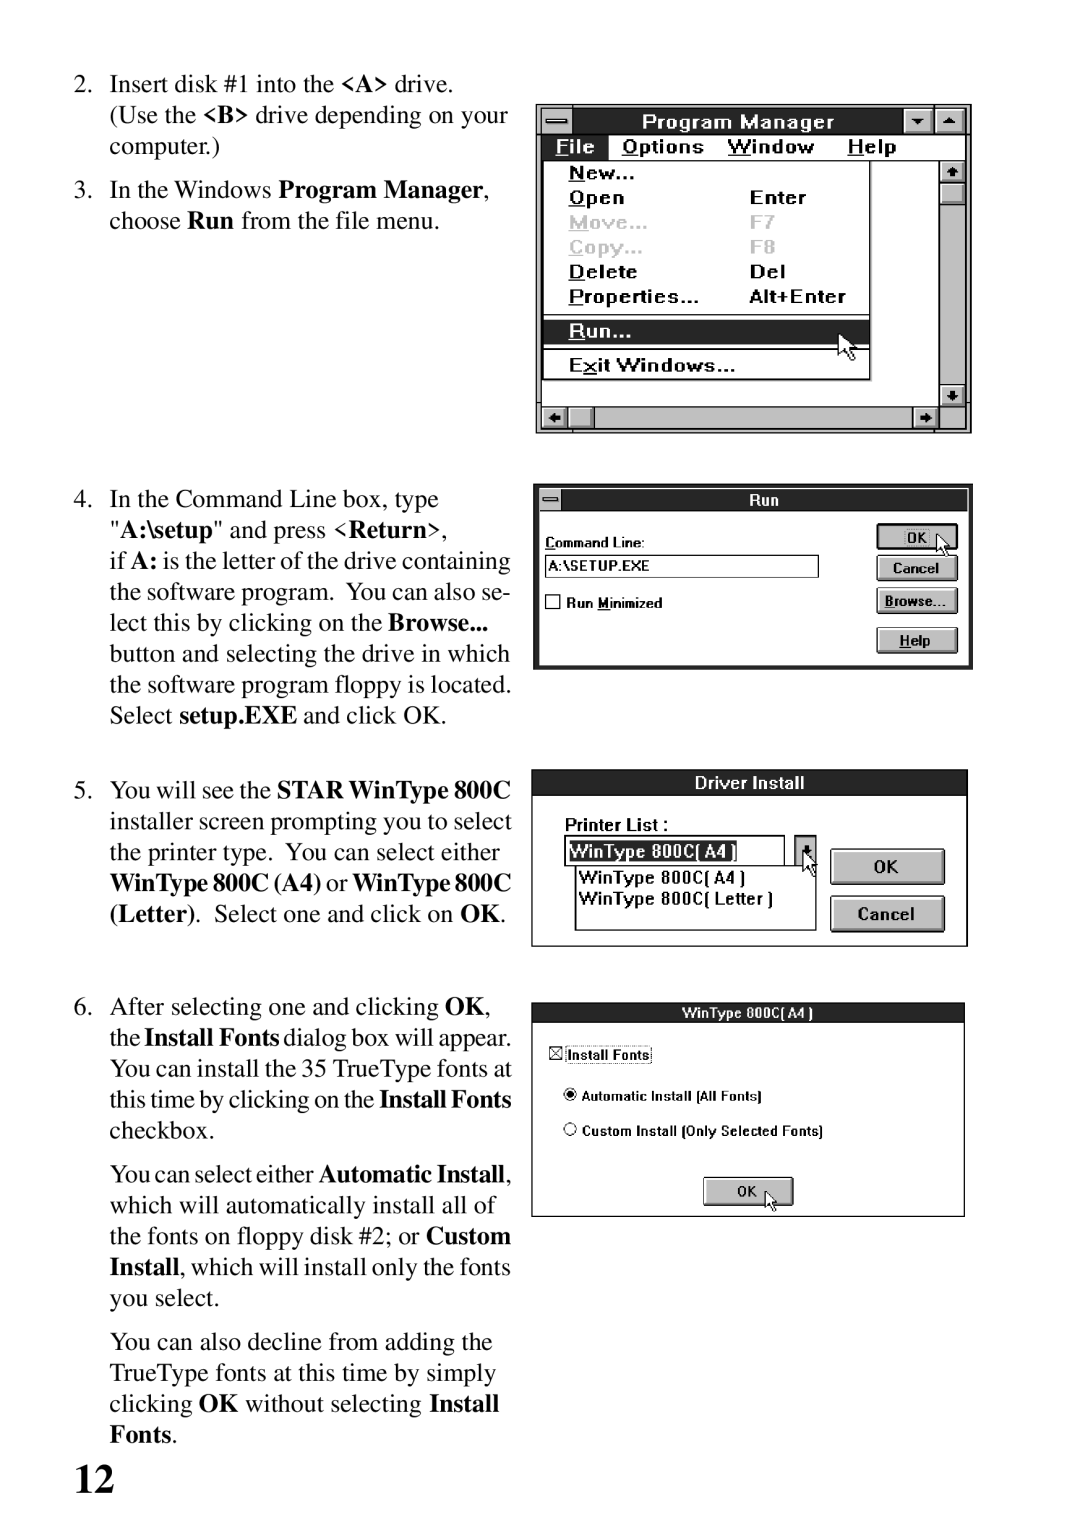
The printer supports a variety of interfaces, including USB, Serial, and Ethernet, making it easy to integrate into existing systems. It also offers Bluetooth and Wi-Fi connectivity options, allowing for wireless printing. This flexibility means businesses can seamlessly connect the printer to various devices, enhancing operational efficiency.
In terms of print quality, the 800C utilizes high-resolution thermal printing technology, ensuring that text and graphics are sharp and clear. This is particularly important in retail settings where legibility can affect customer satisfaction and regulatory compliance. The printer supports multiple languages and character sets, making it suitable for international businesses.
Another noteworthy characteristic of the Star Micronics 800C is its compact design. Measuring just a small footprint, it can easily fit into limited counter space without sacrificing functionality. Additionally, the printer features an easy-to-load paper compartment, simplifying the process of changing rolls. This user-friendly design minimizes downtime and enhances productivity.
Durability is yet another key aspect of the 800C's design. Built to withstand the rigors of heavy use, it is constructed with high-quality materials that ensure longevity. The printer also has an energy-saving mode, which helps reduce power consumption, making it an environmentally friendly choice.
Moreover, the Star Micronics 800C is equipped with advanced firmware that allows for easy updates and enhancements. This means that businesses can benefit from the latest technological advancements without needing to purchase new hardware.
In conclusion, the Star Micronics 800C thermal printer combines speed, versatility, and robustness, making it an ideal solution for businesses that require efficient and high-quality printing. Its range of features, including connectivity options and energy-saving technologies, position it as a reliable choice for any retail or hospitality environment.