
DP8340 specifications
The Star Micronics DP8340 is a high-performance impact printer that has been widely recognized for its reliability and versatility in various business environments. Designed primarily for receipts and multi-part forms, the DP8340 has garnered appreciation in sectors such as retail, hospitality, and logistics due to its robust build and outstanding printing capabilities.One of the primary features of the DP8340 is its ability to produce high-quality printouts at impressive speeds. With a print speed of up to 550 characters per second, it ensures that customers are served quickly and efficiently, enhancing operational productivity. This makes it an excellent choice for busy environments where time is of the essence.
The DP8340 utilizes an 80-column printing format, ensuring compatibility with standard receipt formats. It is capable of handling various media types, including plain paper, multi-part forms, and even sticker labels, providing businesses with flexibility in their printing needs. The printer’s automatic form feed feature further simplifies operation, ensuring smooth handling of different media.
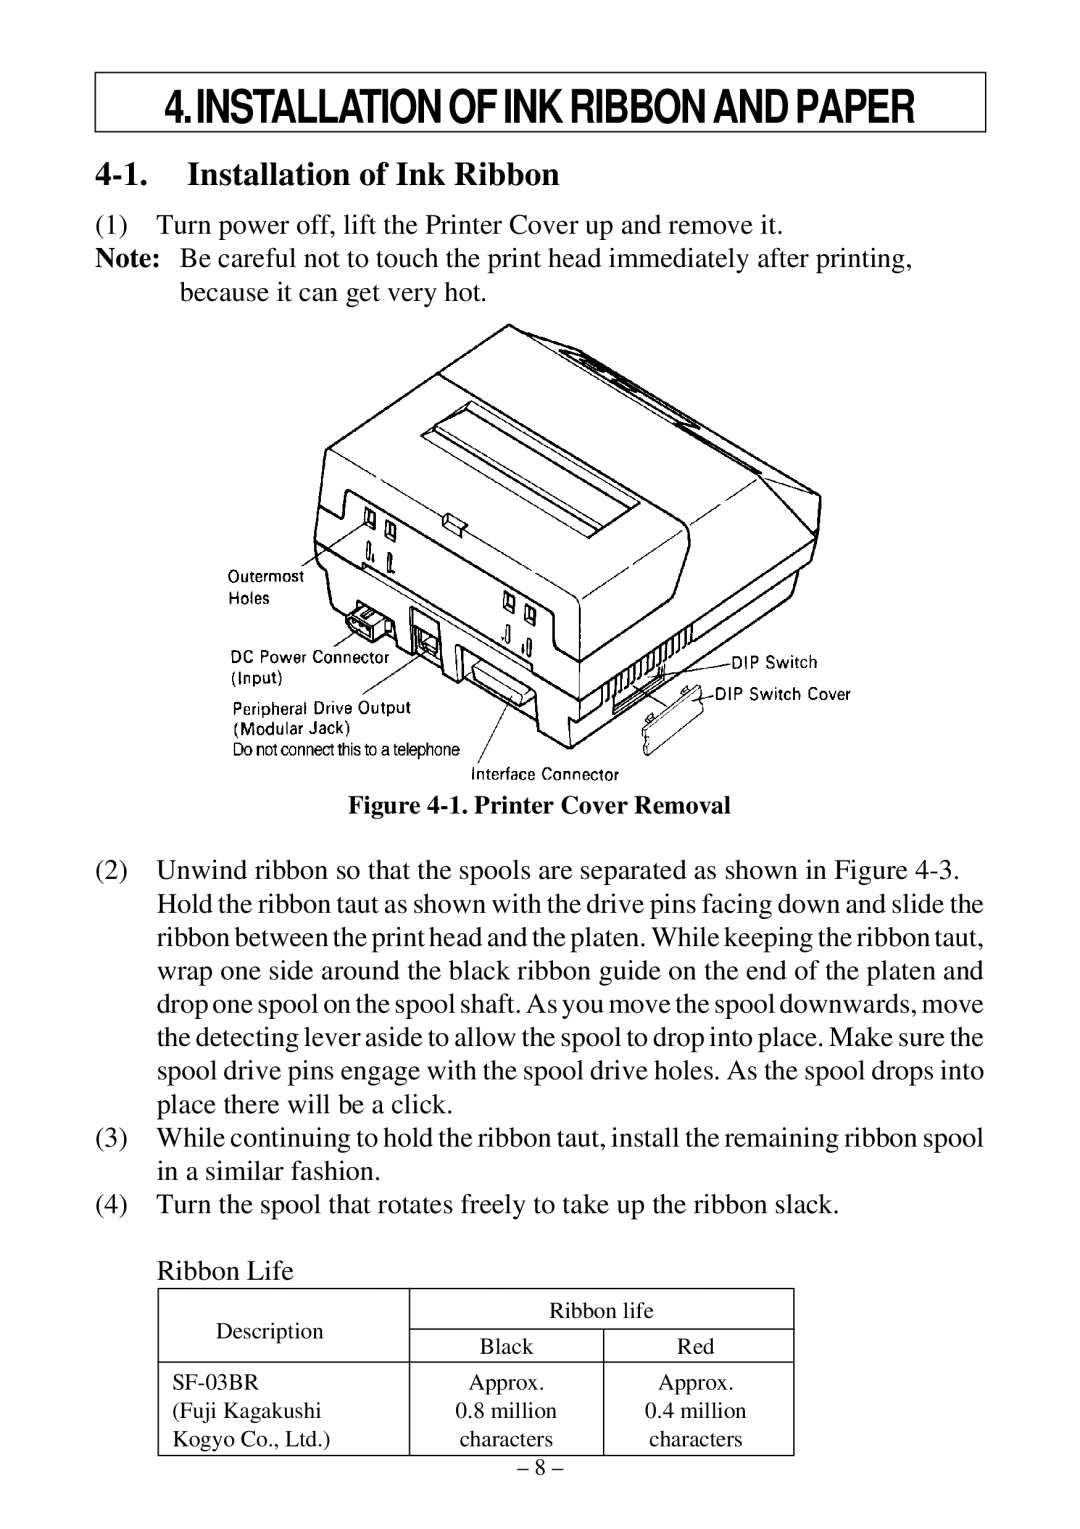
In terms of technology, the DP8340 employs a ribbon cartridge system that ensures ease of replacement and consistent print quality. Additionally, its impact printing technology allows it to print through multiple layers, making it well-suited for tasks involving invoices and receipts that require carbon copies. This durability and function make the DP8340 a long-lasting and cost-effective choice for organizations focused on efficiency.
Another significant characteristic of the DP8340 is its interface options. It is equipped with parallel, serial, and USB interfaces, providing ample connectivity choices to integrate seamlessly into existing systems. This adaptability ensures that businesses can upgrade or expand their systems without facing compatibility issues.
The printer is also designed with user-friendliness in mind. Its simple control panel allows for straightforward operation, while the compact design makes it easy to fit into various workspaces. The DP8340's robust construction further contributes to its longevity, ensuring that it can withstand the rigors of daily use.
In summary, the Star Micronics DP8340 is a powerful impact printer featuring high-speed printing, versatile media handling, and easy connectivity options. Its reliable performance and user-friendly design make it an excellent addition to any business looking to enhance their printing capabilities.