TCP100 Series, TCP2000 Series specifications
Star Micronics, a leading provider of advanced technology in the point-of-sale (POS) sector, has established itself as a front-runner with its innovative TCP2000 and TCP100 series printers. These printers are designed to meet the diverse needs of the retail and hospitality industries, ensuring efficient operation and high-quality output.The TCP2000 series stands out with its compact design, making it an ideal choice for environments where space is a premium. This series features high-speed printing capabilities, with a remarkable print speed of up to 300 mm per second. Built-in Bluetooth and wireless connectivity enable seamless integration with mobile devices, making it suitable for modern, on-the-go applications. Users can expect superior reliability and longevity thanks to the robust mechanics and long-lasting print heads, which contribute to lower total cost of ownership.
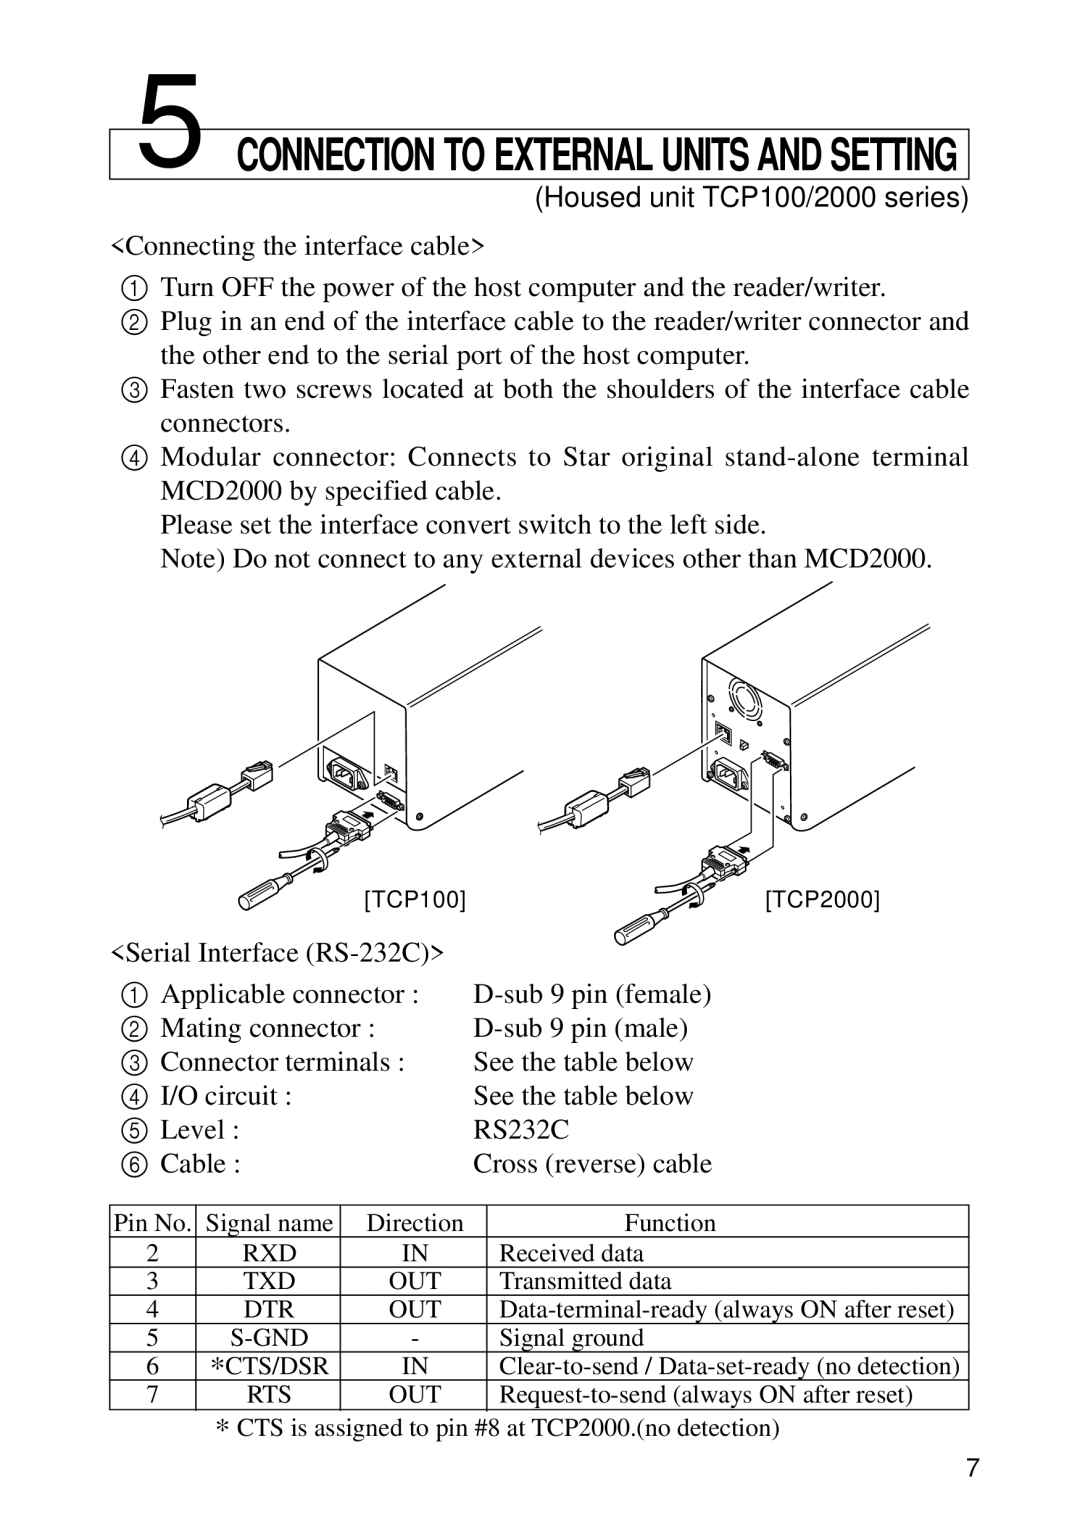
One of the key technological highlights of the TCP2000 series is its compatibility with a wide range of operating systems and software platforms, including iOS, Android, Windows, and Linux. This flexibility ensures that businesses can integrate the printers into their existing systems without significant downtime or additional costs. Furthermore, the series supports various communication interfaces, including USB, Ethernet, and serial connections, allowing for versatile deployment options.
On the other hand, the TCP100 series offers a more cost-effective solution without compromising on quality or performance. With a print speed of up to 250 mm per second, these printers are designed for high-volume printing environments. The TCP100 series also features easy paper loading and simple maintenance, making it user-friendly for staff at all experience levels.
Both series offer high-resolution printing, ensuring that barcodes, logos, and receipts are printed with clarity. They incorporate advanced thermal printing technology, which not only enhances print quality but also reduces the need for consumables like ink and toner, making them an environmentally friendly option.
In terms of durability, the TCP2000 and TCP100 series are designed to withstand the rigors of daily use in busy environments. They are constructed with materials that resist dust and moisture, ensuring reliable performance even in challenging conditions.
In conclusion, Star Micronics' TCP2000 and TCP100 series printers combine advanced technology, superior print quality, and versatile connectivity options, making them ideal solutions for businesses looking to optimize their point-of-sale operations. Whether you’re seeking high-speed printing, reliability, or cost efficiency, these printers meet the demands of modern retail and hospitality industries.

