Appendix B: Dip Switch Setting
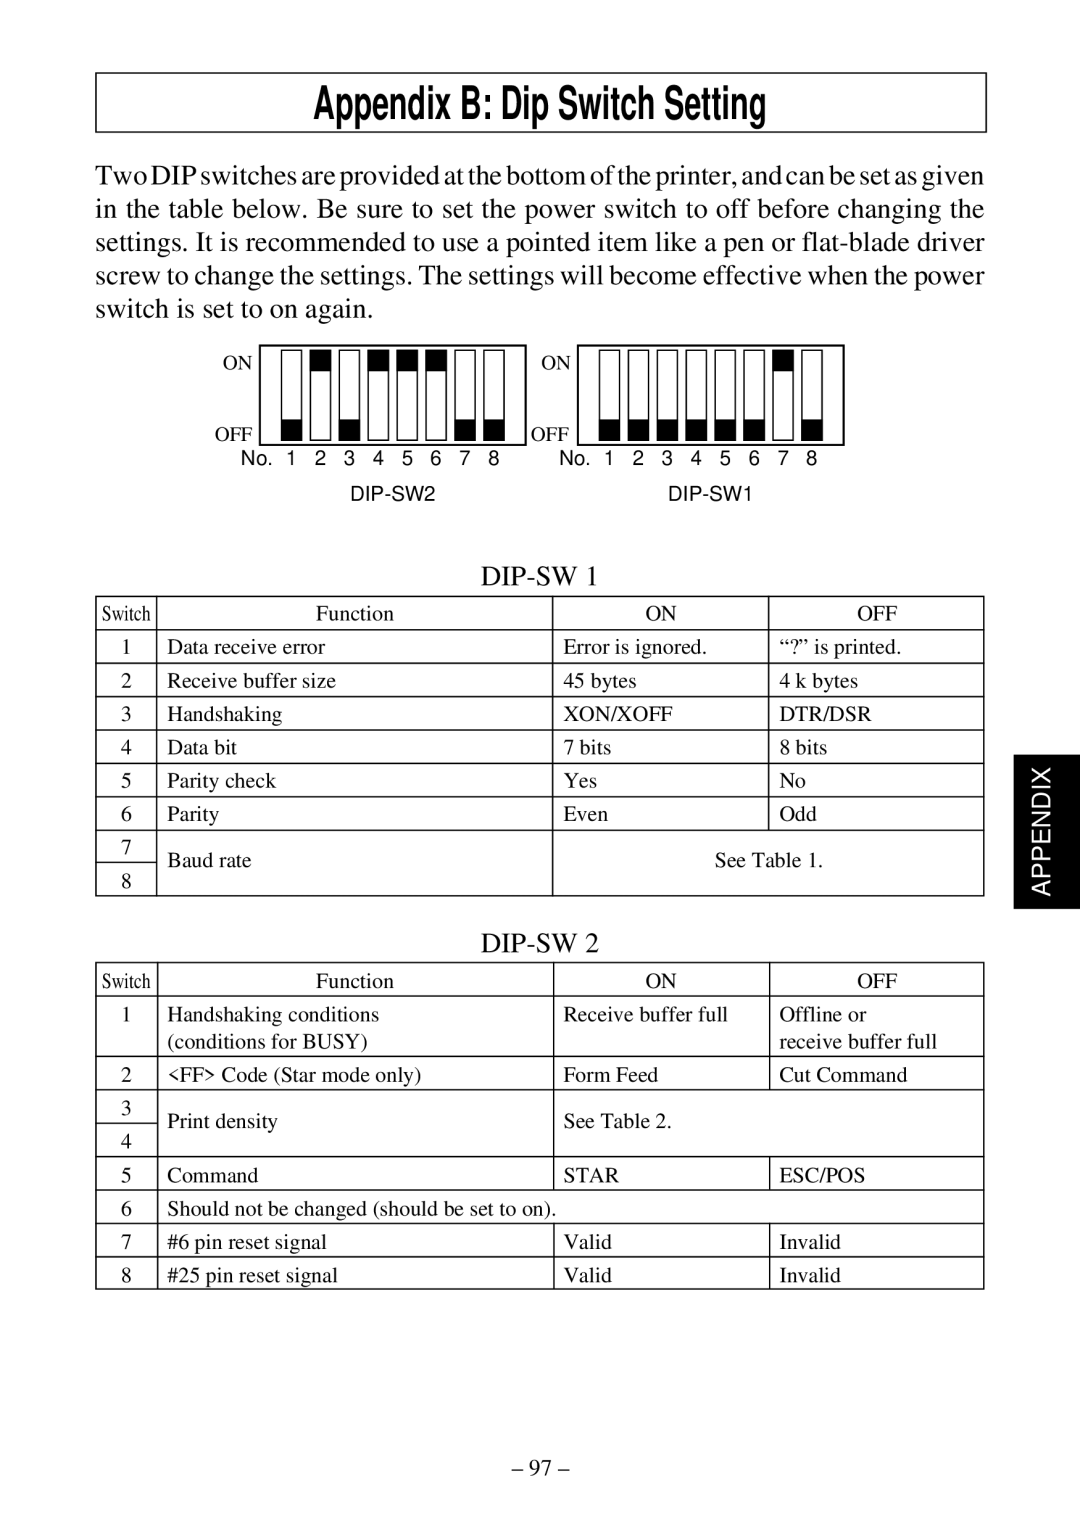
Two DIP switches are provided at the bottom of the printer, and can be set as given in the table below. Be sure to set the power switch to off before changing the settings. It is recommended to use a pointed item like a pen or
ON |
|
|
|
|
|
|
|
|
OFF |
|
|
|
|
|
|
|
|
No. | 1 | 2 | 3 | 4 | 5 | 6 | 7 | 8 |
ON
OFF
No. 1 2 3 4 5 6 7 8
DIP-SW 1
Switch | Function | ON |
| OFF |
|
|
|
|
|
|
|
|
|
1 | Data receive error | Error is ignored. |
| “?” is printed. |
|
|
|
|
|
|
|
|
|
2 | Receive buffer size | 45 bytes |
| 4 k bytes |
|
|
|
|
|
|
|
|
|
3 | Handshaking | XON/XOFF |
| DTR/DSR |
|
|
|
|
|
|
|
|
|
4 | Data bit | 7 bits |
| 8 bits |
|
|
|
|
|
|
|
| APPENDIX |
5 | Parity check | Yes |
| No |
| |
|
|
| ||||
|
|
|
|
|
|
|
6 | Parity | Even |
| Odd |
|
|
|
|
|
|
|
|
|
7 | Baud rate |
| See Table 1. |
|
| |
|
|
|
| |||
8 |
|
|
| |||
|
|
|
|
|
| |
|
|
|
|
|
|
|
Switch | Function |
| ON | OFF |
1 | Handshaking conditions |
| Receive buffer full | Offline or |
| (conditions for BUSY) |
|
| receive buffer full |
2 | <FF> Code (Star mode only) |
| Form Feed | Cut Command |
3 | Print density |
| See Table 2. |
|
4 |
|
| ||
|
|
|
| |
5 | Command |
| STAR | ESC/POS |
6 | Should not be changed (should be set to on). |
|
| |
7 | #6 pin reset signal |
| Valid | Invalid |
8 | #25 pin reset signal |
| Valid | Invalid |
– 97 –