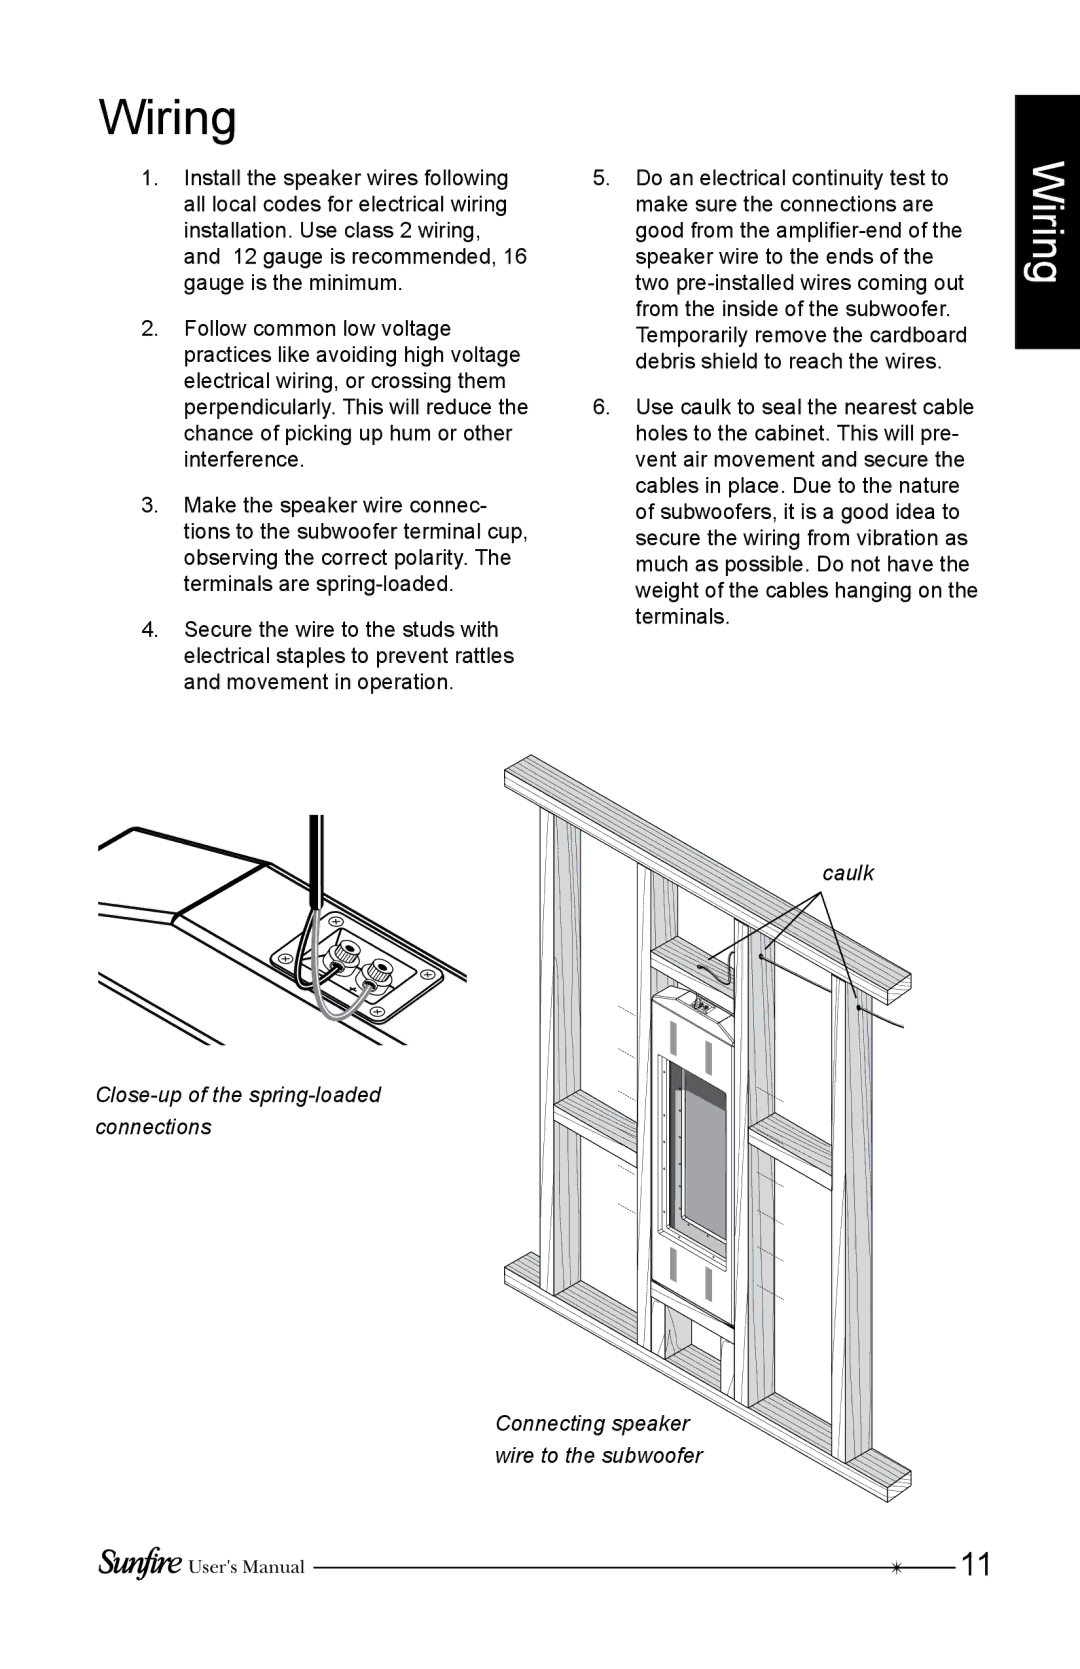
SRS210W-B, SRS210W-C, SRS210W-G specifications
The Sunfire SRS210W series, comprising models SRS210W-C, SRS210W-B, and SRS210W-G, stands out in the realm of high-performance subwoofers. These compact yet powerful subwoofers are designed to deliver deep, immersive bass for home theater and music applications, making them an essential addition for audio enthusiasts.One of the main features of the SRS210W series is its innovative design. Each model is engineered with a high-excursion 10-inch driver that provides remarkable output and clarity. The driver is housed in a unique enclosure that minimizes distortion while maximizing bass response. This ensures that users can enjoy deep low frequencies without compromising sound quality.
The SRS210W models utilize Sunfire's patented Tracking Downconverter technology. This advanced technology allows these subwoofers to produce high levels of output while requiring less power, making them energy-efficient compared to other subwoofers in the market. With a built-in amplifier rated at 1500 watts peak power, these subwoofers can fill large rooms with powerful bass without the need for external amplification.
Connectivity options are another highlight of the SRS210W series. Each model includes both RCA and speaker-level inputs, ensuring compatibility with a wide range of audio systems. This versatility makes it easy for users to integrate the subwoofers into their existing setups, whether they are using a surround sound system or a simple stereo configuration.
The SRS210W series also features adjustable crossover and phase controls, enabling users to tailor the bass response to their specific room acoustics. This customization ensures that users can achieve the optimal sound experience for their environment, whether they are watching movies or listening to music.
In terms of aesthetics, the Sunfire SRS210W series is sleek and unobtrusive, available in multiple color options including black, charcoal, and green. This modern design allows these subwoofers to blend seamlessly with any decor, proving that high performance does not have to compromise style.
In conclusion, the Sunfire SRS210W-C, SRS210W-B, and SRS210W-G subwoofers excel in delivering powerful, precise bass in a compact form factor. With their advanced technologies, adjustable settings, and stylish design, they are ideal for both casual listeners and serious audiophiles alike, making them a top choice for any home audio system.