![]() V I I .
V I I .
O p e r a t i n g
I n s t r u c t i o n s
![]()
![]()
![]()
![]()
![]()
![]()
![]()
![]()
![]() 21
21
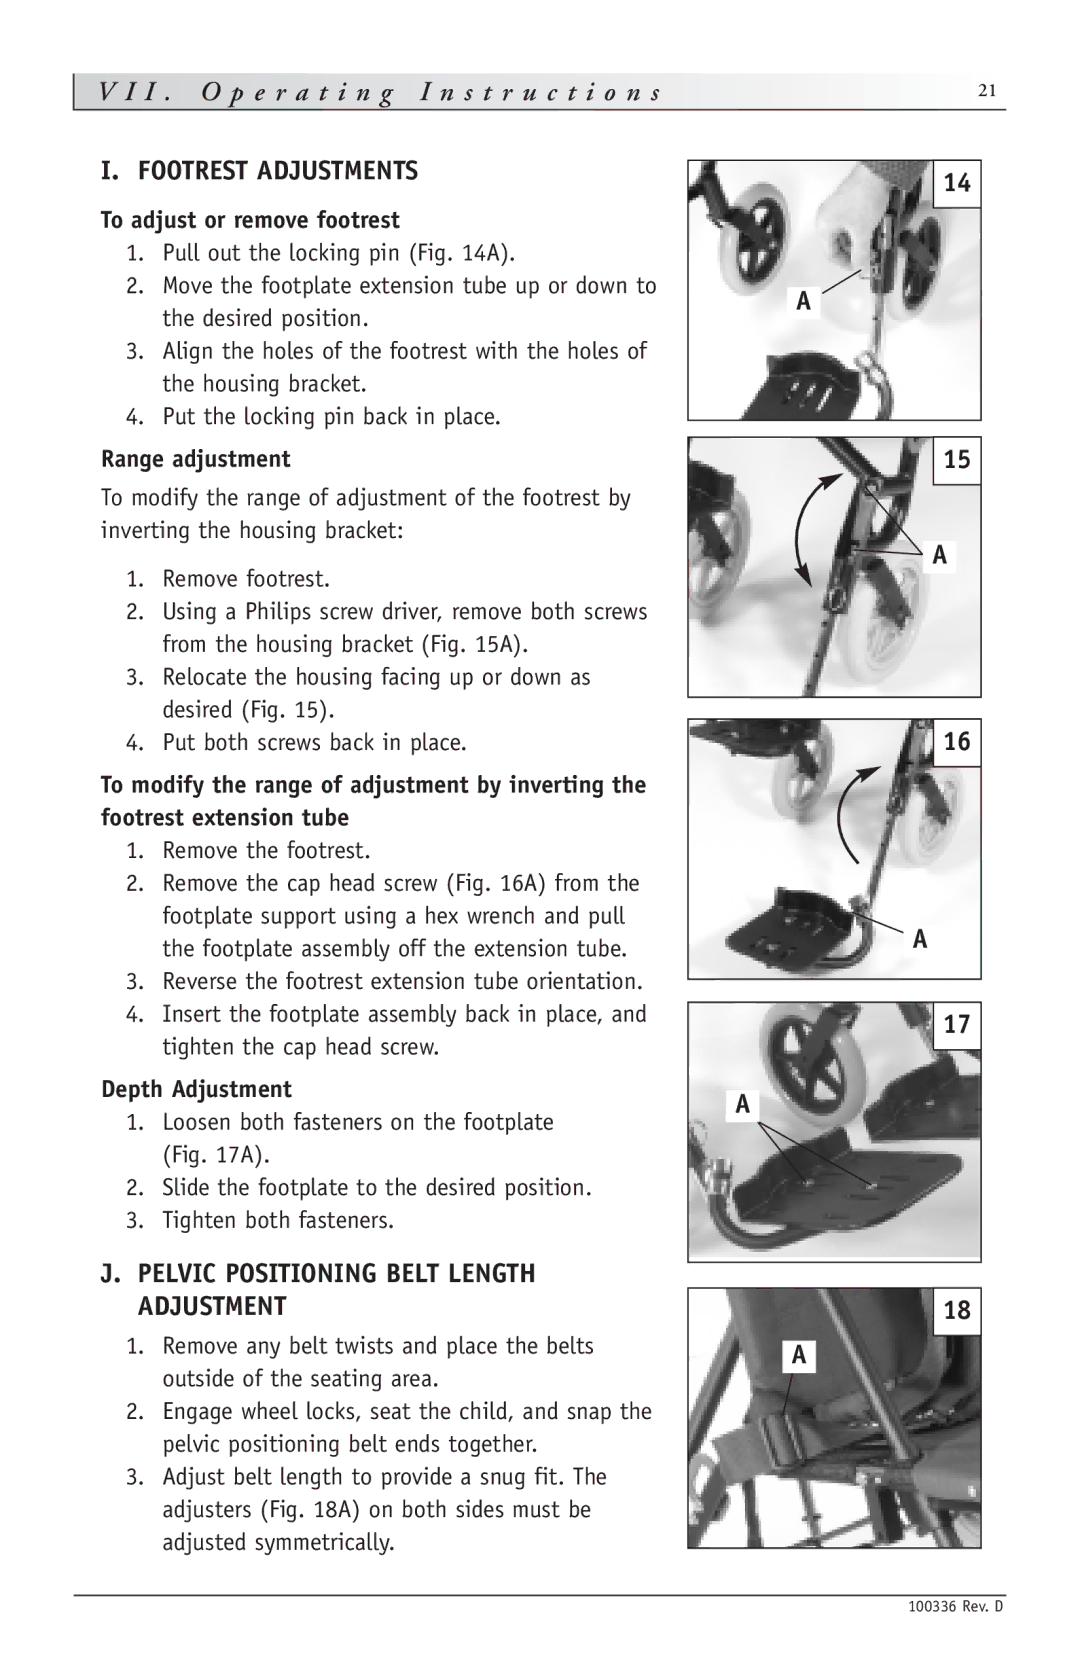
I. FOOTREST ADJUSTMENTS
To adjust or remove footrest
1.Pull out the locking pin (Fig. 14A).
2.Move the footplate extension tube up or down to the desired position.
3.Align the holes of the footrest with the holes of the housing bracket.
4.Put the locking pin back in place.
14
A
Range adjustment
To modify the range of adjustment of the footrest by inverting the housing bracket:
1.Remove footrest.
2.Using a Philips screw driver, remove both screws from the housing bracket (Fig. 15A).
3.Relocate the housing facing up or down as desired (Fig. 15).
4.Put both screws back in place.
To modify the range of adjustment by inverting the footrest extension tube
1.Remove the footrest.
2.Remove the cap head screw (Fig. 16A) from the footplate support using a hex wrench and pull the footplate assembly off the extension tube.
3.Reverse the footrest extension tube orientation.
4.Insert the footplate assembly back in place, and tighten the cap head screw.
Depth Adjustment
1.Loosen both fasteners on the footplate (Fig. 17A).
2.Slide the footplate to the desired position.
3.Tighten both fasteners.
J.PELVIC POSITIONING BELT LENGTH ADJUSTMENT
1.Remove any belt twists and place the belts outside of the seating area.
2.Engage wheel locks, seat the child, and snap the pelvic positioning belt ends together.
3.Adjust belt length to provide a snug fit. The adjusters (Fig. 18A) on both sides must be adjusted symmetrically.
15
![]() A
A
16
A
17
A
18
A
100336 Rev. D