I I I . S P E C I F I C A T I O N S A N D F E A T U R E S | |
| 1 |
6 | 2 |
5 |
|
4 | 1 |
3 | 2 |
| |
| 5 |
| 4 |
| 3 |
| Quickie TS |
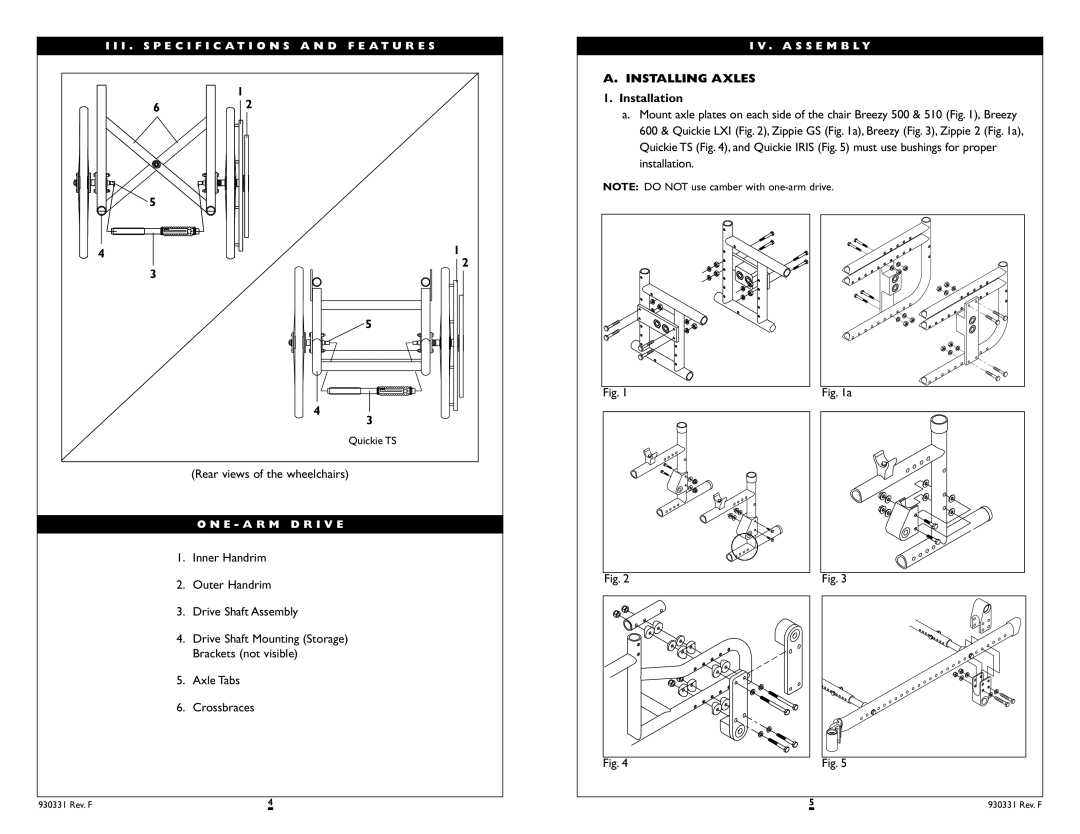
(Rear views of the wheelchairs)
O N E - A R M D R I V E
1.Inner Handrim
2.Outer Handrim
3.Drive Shaft Assembly
4.Drive Shaft Mounting (Storage) Brackets (not visible)
5.Axle Tabs
6.Crossbraces
I V . A S S E M B L Y
A. INSTALLING AXLES
1.Installation
a.Mount axle plates on each side of the chair Breezy 500 & 510 (Fig. 1), Breezy 600 & Quickie LXI (Fig. 2), Zippie GS (Fig. 1a), Breezy (Fig. 3), Zippie 2 (Fig. 1a), Quickie TS (Fig. 4), and Quickie IRIS (Fig. 5) must use bushings for proper installation.
NOTE: DO NOT use camber with
|
|
|
|
Fig. 1 |
| Fig. 1a | |
|
|
|
|
|
|
|
|
|
|
|
|
|
|
|
|
Fig. 2 |
| Fig. 3 |
|
|
|
|
|
|
Fig. 4 | Fig. 5 |
930331 Rev. F | 4 | 5 | 930331 Rev. F |