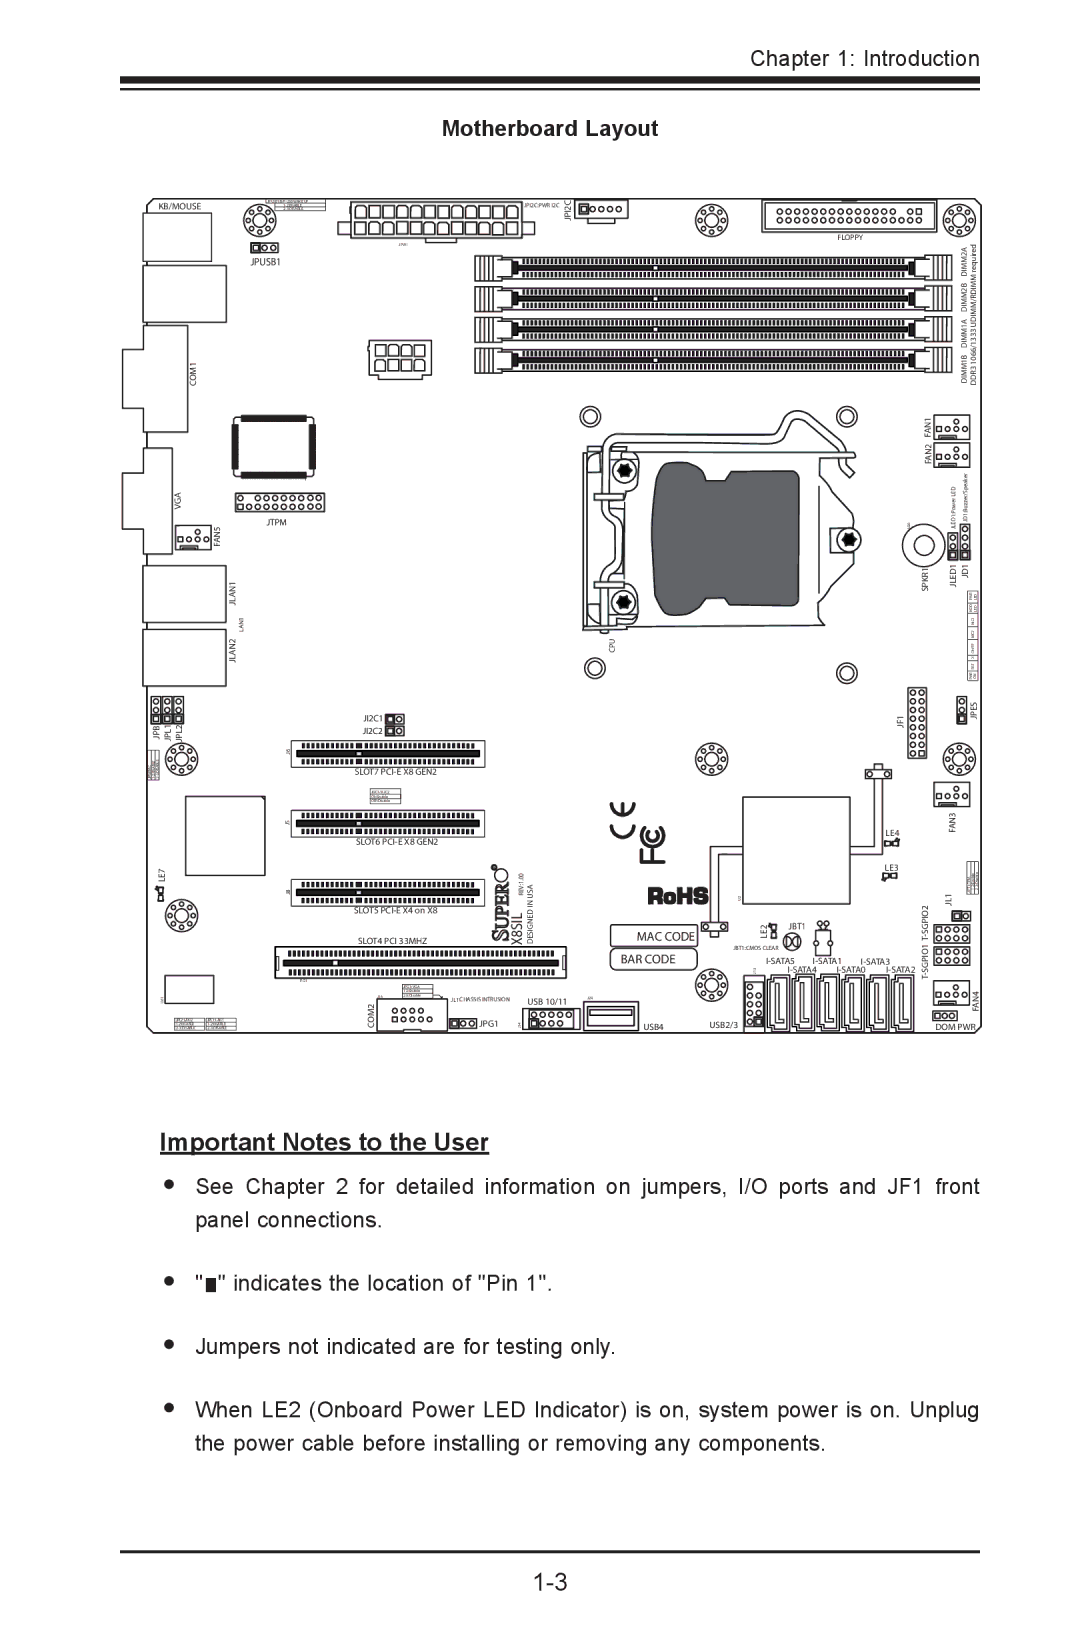
X8SIL-V, X8SIL-F, X8SIL specifications
SUPER MICRO Computer X8SIL, X8SIL-F, and X8SIL-V are advanced server motherboards designed to meet the demanding needs of today's data centers and enterprise environments. These motherboards from Supermicro deliver exceptional performance, scalability, and reliability, making them suitable for a wide range of applications, including virtualization, cloud computing, and database management.One of the main features of the X8SIL series is its compatibility with Intel's Xeon 5500 and 5600 series processors. This allows users to harness the power of multi-core technology, ensuring optimal performance for both single-threaded and multi-threaded applications. With support for up to 144GB of DDR3 ECC memory, the X8SIL motherboards provide ample memory bandwidth, enhancing the overall system performance and efficiency.
The X8SIL-F variant includes an integrated IPMI (Intelligent Platform Management Interface) feature, which enables remote management and monitoring of the system. This technology allows IT administrators to proactively manage server health, perform remote troubleshooting, and ensure minimal downtime. Additionally, the X8SIL-F supports Supermicro's Green Computing technology, which helps reduce power consumption and enhance energy efficiency, leading to lower operational costs.
In terms of storage, the X8SIL series offers multiple SATA and SAS interface options, facilitating a wide range of storage configurations. The motherboards feature six SATA II ports and optional SAS capabilities, allowing users to implement RAID setups for improved performance and data redundancy. This flexibility in storage solutions is crucial for environments that require high availability and reliability.
The X8SIL motherboard series is equipped with a range of I/O ports, including multiple USB ports, PCI Express slots, and Gigabit Ethernet interfaces. This extensive connectivity ensures that users can easily expand and customize their systems according to specific application needs. The onboard Gigabit Ethernet ports provide fast network access, which is essential for data-intensive workloads.
Furthermore, the X8SIL, X8SIL-F, and X8SIL-V boast an efficient thermal design. These motherboards feature robust heat sinks and fan headers, which help maintain optimal operating temperatures, even under heavy workloads. This thermal efficiency is critical in extending the lifespan of components and ensuring consistent performance.
In summary, SUPER MICRO Computer's X8SIL, X8SIL-F, and X8SIL-V motherboards stand out with their strong performance, advanced management features, flexible storage options, and efficient thermal design. These characteristics make them ideal choices for businesses looking to build reliable and scalable data center solutions.

