Connect the Maxi Day/Night Camera to your monitoring device
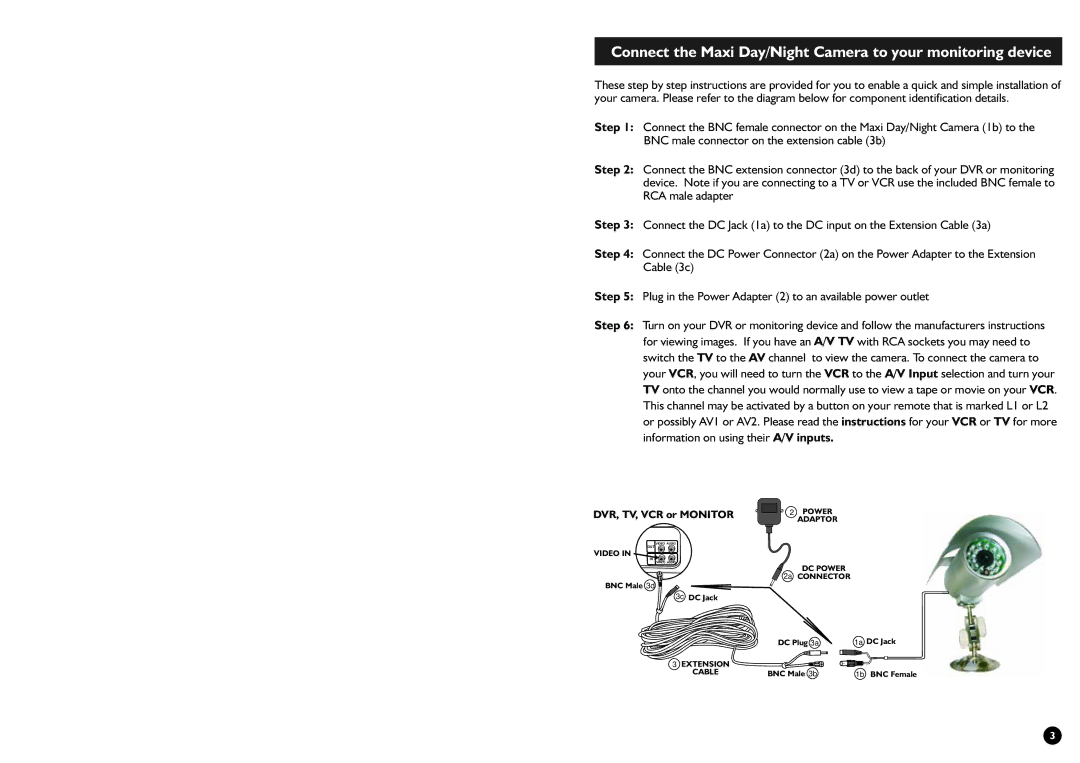
These step by step instructions are provided for you to enable a quick and simple installation of your camera. Please refer to the diagram below for component identification details.
Step 1: Connect the BNC female connector on the Maxi Day/Night Camera (1b) to the BNC male connector on the extension cable (3b)
Step 2: Connect the BNC extension connector (3d) to the back of your DVR or monitoring device. Note if you are connecting to a TV or VCR use the included BNC female to RCA male adapter
Step 3: Connect the DC Jack (1a) to the DC input on the Extension Cable (3a)
Step 4: Connect the DC Power Connector (2a) on the Power Adapter to the Extension Cable (3c)
Step 5: Plug in the Power Adapter (2) to an available power outlet
Step 6: Turn on your DVR or monitoring device and follow the manufacturers instructions for viewing images. If you have an A/V TV with RCA sockets you may need to switch the TV to the AV channel to view the camera. To connect the camera to your VCR, you will need to turn the VCR to the A/V Input selection and turn your TV onto the channel you would normally use to view a tape or movie on your VCR. This channel may be activated by a button on your remote that is marked L1 or L2 or possibly AV1 or AV2. Please read the instructions for your VCR or TV for more information on using their A/V inputs.
DVR, TV, VCR or MONITOR
VIDEO AUDIO
OUT
VIDEO IN ![]()
VIDEO AUDIO
BNC Male 3d ![]()
![]()
![]()
![]() 3c DC Jack
3c DC Jack
2 POWER ADAPTOR
![]() DC POWER 2a CONNECTOR
DC POWER 2a CONNECTOR
| DC Plug 3a | 1a DC Jack |
3 EXTENSION |
|
|
CABLE | BNC Male 3b | 1b BNC Female |
|
3
