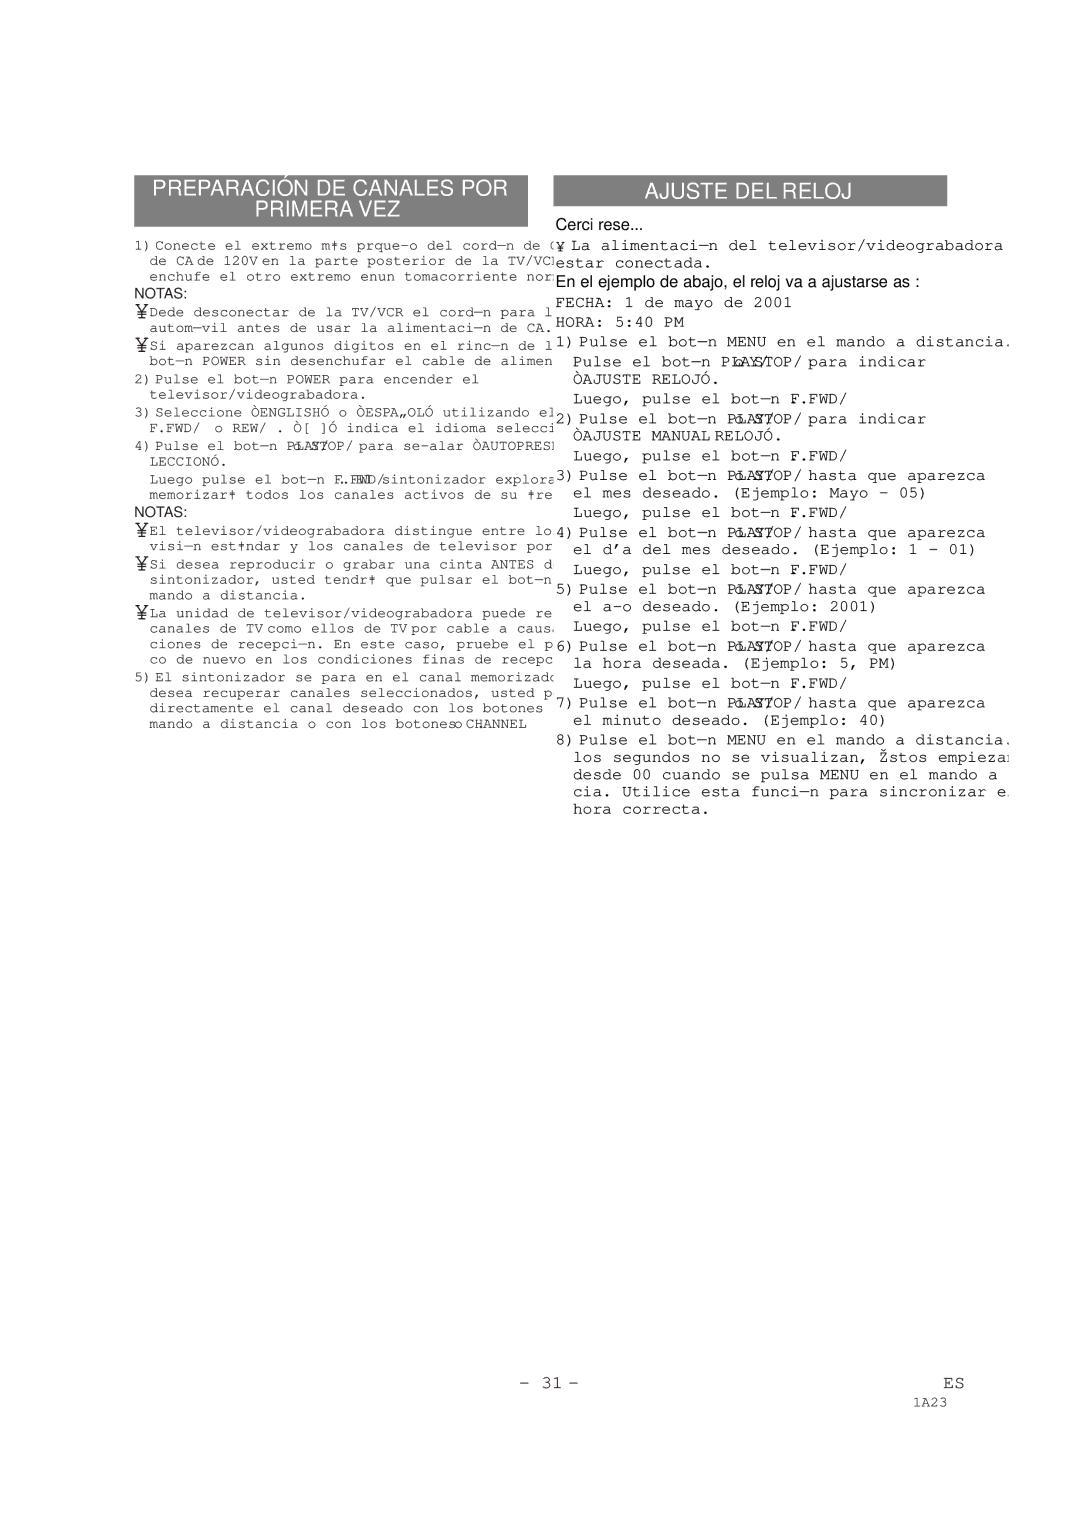
PREPARACIÓN DE CANALES POR

PRIMERA VEZ

1)Conecte el extremo más prqueño del cordón de CA al conector de CA de 120V en la parte posterior de la TV/VCR. Luego, enchufe el otro extremo enun tomacorriente normal de CA.

NOTAS:

Dede desconectar de la TV/VCR el cordón para la batería del automóvil antes de usar la alimentación de CA.

Si aparezcan algunos digitos en el rincón de la pantalla, pulse el botón POWER sin desenchufar el cable de alimentación.

2)Pulse el botón POWER para encender el televisor/videograbadora.

3)Seleccione “ENGLISH” o “ESPAÑOL” utilizando el botón F.FWD/B o REW/s. “[ ]” indica el idioma seleccionado.

4)Pulse el botón PLAY/ K o STOP/L para señalar “AUTOPRESE- LECCION”.

Luego pulse el botón F.FWD/ B. El sintonizador explorará y memorizará todos los canales activos de su área.

NOTAS:

El televisor/videograbadora distingue entre los canales de tele- visión estándar y los canales de televisor por cable.

Si desea reproducir o grabar una cinta ANTES de preajustar el sintonizador, usted tendrá que pulsar el botón MENU en el mando a distancia.

La unidad de televisor/videograbadora puede reconocer los canales de TV como ellos de TV por cable a causa de los condi- ciones de recepción. En este caso, pruebe el preajuste automáti- co de nuevo en los condiciones finas de recepción.

5)El sintonizador se para en el canal memorizado más bajo. Si desea recuperar canales seleccionados, usted podrá seleccionar directamente el canal deseado con los botones numerados del mando a distancia o con los botones CHANNEL K o L.

AJUSTE DEL RELOJ

Cerciórese...

La alimentación del televisor/videograbadora deberá estar conectada.

En el ejemplo de abajo, el reloj va a ajustarse así: FECHA: 1 de mayo de 2001

HORA: 5:40 PM

1) Pulse el botón MENU en el mando a distancia. Pulse el botón PLAY/ K o STOP/L para indicar “AJUSTE RELOJ”.

Luego, pulse el botón F.FWD/ B.

2) Pulse el botón PLAY/ K o STOP/L para indicar

“AJUSTE MANUAL RELOJ”. Luego, pulse el botón F.FWD/ B.

3) Pulse el botón PLAY/ K o STOP/L hasta que aparezca el mes deseado. (Ejemplo: Mayo - 05)

Luego, pulse el botón F.FWD/ B.

4) Pulse el botón PLAY/ K o STOP/L hasta que aparezca el día del mes deseado. (Ejemplo: 1 - 01)

Luego, pulse el botón F.FWD/ B.

5) Pulse el botón PLAY/ K o STOP/L hasta que aparezca el año deseado. (Ejemplo: 2001)

Luego, pulse el botón F.FWD/ B.

6) Pulse el botón PLAY/ K o STOP/L hasta que aparezca la hora deseada. (Ejemplo: 5, PM)

Luego, pulse el botón F.FWD/ B.

7) Pulse el botón PLAY/ K o STOP/L hasta que aparezca el minuto deseado. (Ejemplo: 40)

8) Pulse el botón MENU en el mando a distancia. Aunque los segundos no se visualizan, éstos empiezan a contar desde 00 cuando se pulsa MENU en el mando a distan- cia. Utilice esta función para sincronizar el reloj con la hora correcta.

- 31 -

ES

1A23

Page 31
Image 31
Sylvania SSC091 owner manual Preparación DE Canales POR Primera VEZ

SSC091 specifications

The Sylvania SSC091 is a remarkably engineered and innovative lighting solution that has gained notable attention in the market for its advanced features and energy-efficient technologies. Designed primarily for both residential and commercial spaces, the SSC091 offers a unique blend of performance, aesthetics, and environmental responsibility.

One of the standout features of the Sylvania SSC091 is its LED technology. The integration of LED lighting provides exceptional illumination while consuming significantly less energy compared to traditional incandescent or fluorescent bulbs. This not only leads to reduced electricity bills but also contributes positively to sustainability efforts by lowering carbon footprints.

In terms of brightness, the SSC091 shines with a high lumen output, ensuring that spaces are well-lit and visually appealing. The fixture offers various color temperature options, allowing users to choose between warm, neutral, or cool lighting, depending on the specific ambiance they wish to create. This versatility makes it suitable for various applications, from cozy living rooms to dynamic retail environments.

Another noteworthy characteristic of the SSC091 is its longevity. With a lifespan of up to 25,000 hours, the LED bulb reduces the frequency of replacements, making it a practical choice for both homeowners and business owners. This longevity, coupled with lower maintenance costs, positions the SSC091 as a cost-effective option in the long run.

The design of the Sylvania SSC091 reflects a modern aesthetic, featuring sleek lines and a minimalistic profile. Its understated elegance allows it to blend seamlessly into any decor, enhancing the overall visual appeal of the space it occupies. The fixture is available in various finishes, catering to diverse tastes and interior design themes.

Additionally, the SSC091 incorporates advanced thermal management technologies that ensure optimal performance and prevent overheating. This capability not only prolongs the lifespan of the product but also maintains consistent brightness levels throughout its usage.

Overall, the Sylvania SSC091 is an exemplary lighting solution that embodies cutting-edge technology, aesthetic sophistication, and energy efficiency. Whether for home or business, it is designed to elevate any environment while keeping sustainability in focus. As the demand for smart lighting solutions continues to rise, the SSC091 stands out as a leading choice for those seeking quality and innovation in their lighting products.