
SY4100 specifications
The Sylvania SY4100 is an innovative LED bulb designed to deliver exceptional lighting performance while maintaining energy efficiency. As a part of Sylvania's renowned lineup of lighting solutions, the SY4100 stands out for its advanced features and technologies that cater to both residential and commercial applications.One of the primary characteristics of the SY4100 is its impressive lumen output. With a brightness capacity of 1600 lumens, this bulb provides ample illumination for a variety of settings, from living rooms and kitchens to offices and store displays. This high lumen output ensures that spaces are brightly lit and conducive to various activities, making it a versatile choice for homeowners and business owners alike.
The SY4100 boasts an energy-efficient design that consumes only 15 watts of power while delivering the equivalent of a traditional 100-watt incandescent bulb’s brightness. This significant reduction in energy consumption not only helps save on electricity bills but also contributes to a decreased carbon footprint, aligning with contemporary sustainability goals.
Additionally, the SY4100 features a warm white color temperature of 2700K, creating an inviting and cozy atmosphere in any environment. This color temperature is ideal for living spaces, where a comfortable and welcoming ambiance is desired. Moreover, its high Color Rendering Index (CRI) of over 80 ensures that colors appear true and vibrant under its light, making it suitable for artistic endeavors and retail displays.
Another key technology behind the SY4100 is its long lifespan. Rated for approximately 25,000 hours, this LED bulb outlasts traditional incandescent and fluorescent options, resulting in less frequent replacements and reduced maintenance costs. This durability makes the SY4100 an excellent choice for hard-to-reach fixtures.
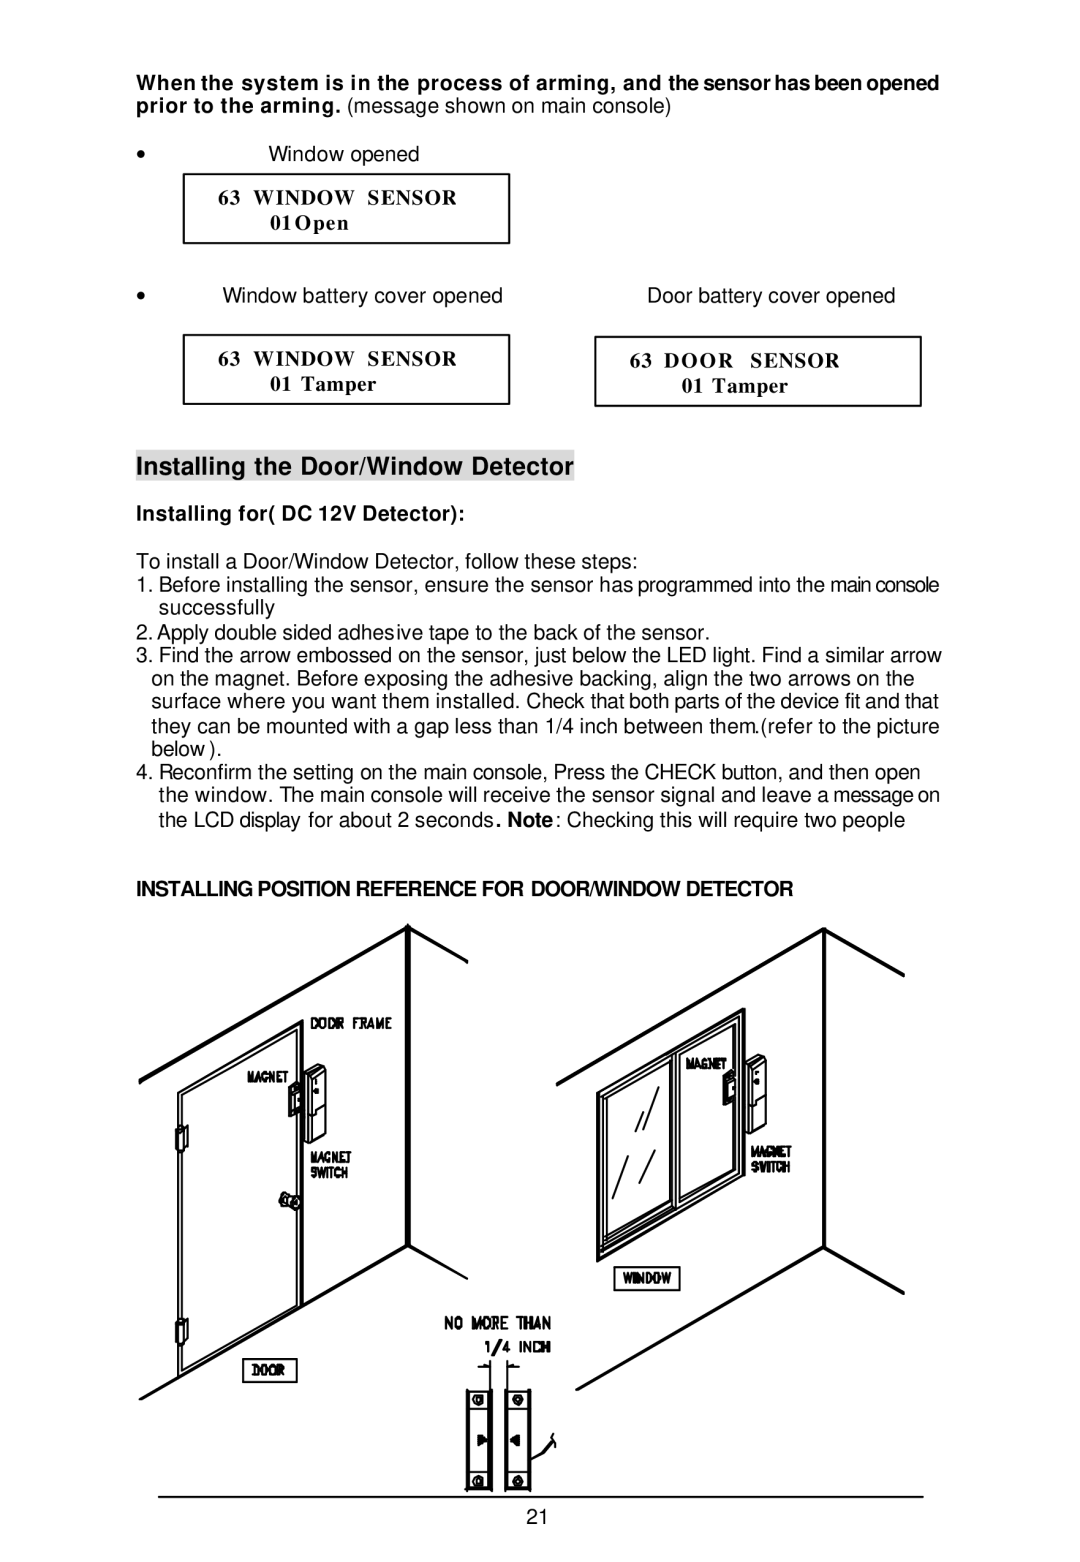
The SY4100 is also compatible with a variety of fixtures and can be easily installed in standard sockets, offering versatility for various lighting setups. It is also dimmable, allowing users to customize lighting levels according to different moods or activities, enhancing the overall user experience.
In summary, the Sylvania SY4100 is a standout LED bulb characterized by its high lumen output, energy efficiency, warm color temperature, and long lifespan. With these features, it offers a practical and stylish lighting solution that meets the needs of today’s consumers while promoting sustainability and energy conservation. Whether for home or business use, the SY4100 is a reliable choice for superior lighting performance.