Changing the ribbon cassette | Quick |
to open |
pull |
to open |
pull |
| to | open |
| pull |
|
to | open |
|
pull |
|
|
12 |
|
|
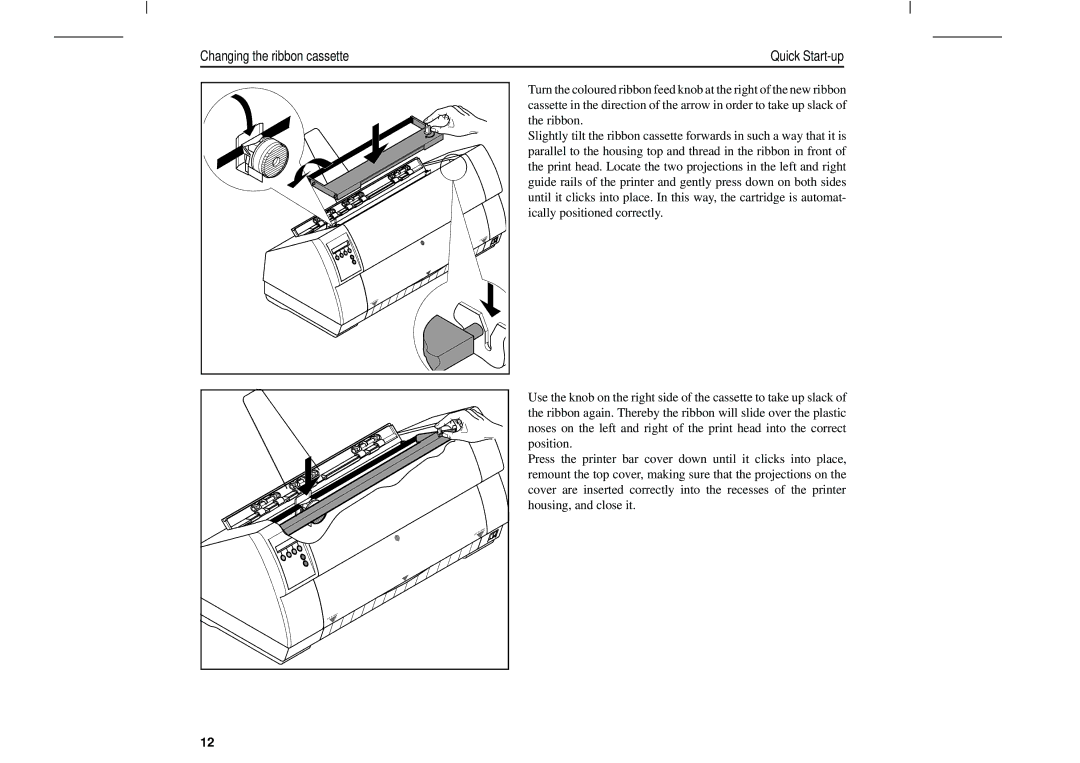
Turn the coloured ribbon feed knob at the right of the new ribbon cassette in the direction of the arrow in order to take up slack of the ribbon.
Slightly tilt the ribbon cassette forwards in such a way that it is parallel to the housing top and thread in the ribbon in front of the print head. Locate the two projections in the left and right guide rails of the printer and gently press down on both sides until it clicks into place. In this way, the cartridge is automat- ically positioned correctly.
Use the knob on the right side of the cassette to take up slack of the ribbon again. Thereby the ribbon will slide over the plastic noses on the left and right of the print head into the correct position.
Press the printer bar cover down until it clicks into place, remount the top cover, making sure that the projections on the cover are inserted correctly into the recesses of the printer housing, and close it.