CMS | 5.1 MECHANICAL INSTALLATION GUIDE FOR SUSPENDED CEILINGS | |||
| 1 |
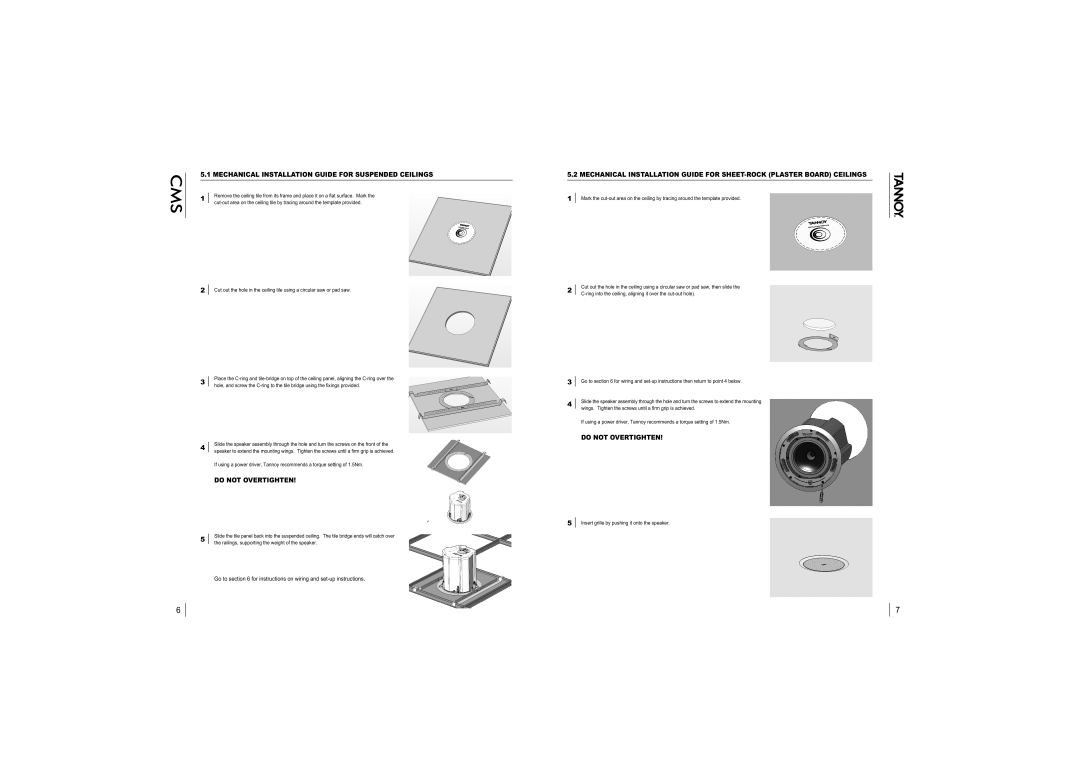
| Remove the ceiling tile from its frame and place it on a flat surface. Mark the | |
| ||||
|
| |||
|
| |||
|
|
|
| |
|
|
|
|
|
2Cut out the hole in the ceiling tile using a circular saw or pad saw.
3 | Place the | |
hole, and screw the | ||
|
4 | Slide the speaker assembly through the hole and turn the screws on the front of the | |
speaker to extend the mounting wings. Tighten the screws until a firm grip is achieved. | ||
| ||
| If using a power driver, Tannoy recommends a torque setting of 1.5Nm. | |
| DO NOT OVERTIGHTEN! |
5 | Slide the tile panel back into the suspended ceiling. The tile bridge ends will catch over | |
the railings, supporting the weight of the speaker. | ||
|
Go to section 6 for instructions on wiring and
5.2 MECHANICAL INSTALLATION GUIDE FOR
1Mark the
2 | Cut out the hole in the ceiling using a circular saw or pad saw, then slide the | |
|
3Go to section 6 for wiring and
4Slide the speaker assembly through the hole and turn the screws to extend the mounting wings. Tighten the screws until a firm grip is achieved.
If using a power driver, Tannoy recommends a torque setting of 1.5Nm.
DO NOT OVERTIGHTEN!
5Insert grille by pushing it onto the speaker.
6
7