FRONT PANEL CONTROLS AND CONNECTION OPTIONS
PREPARATION FOR REMOTE CONTROL
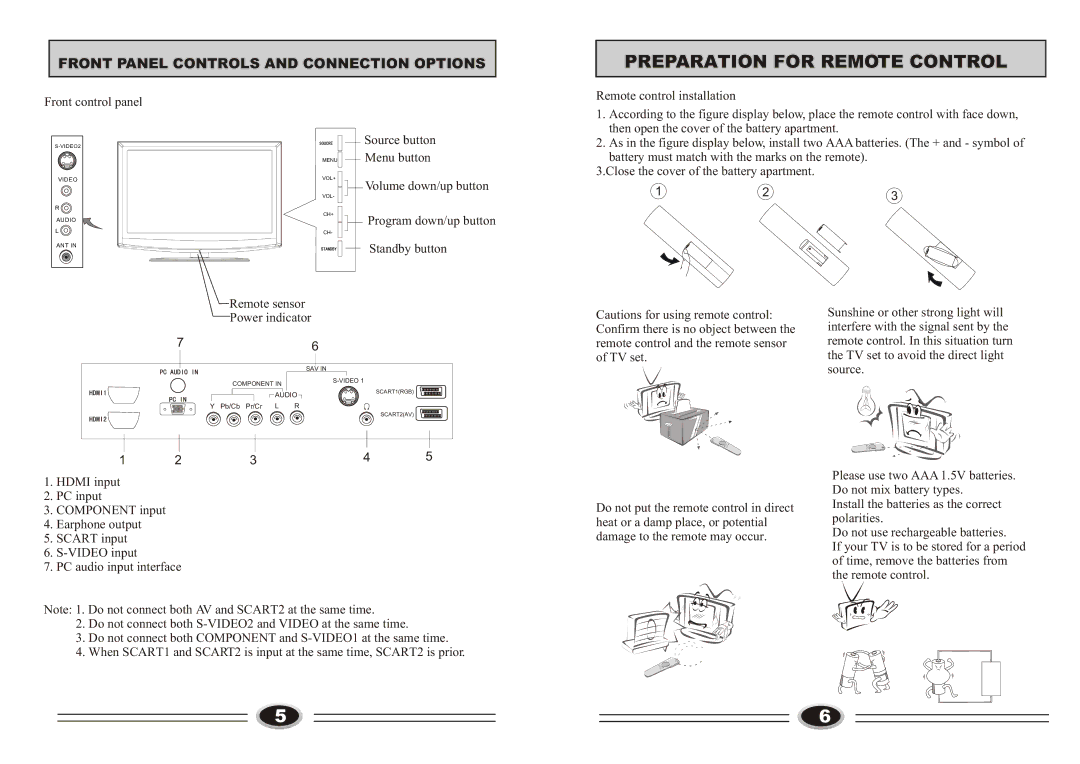
Front control panel
VIDEO |
R |
AUDIO |
L |
ANT IN |
MENU
VOL+
VOL-
CH+
CH-
![]()
![]()
![]() Source button
Source button
![]()
![]()
![]() Menu button
Menu button
![]() Volume down/up button
Volume down/up button
![]() Program down/up button
Program down/up button
Standby button
Remote control installation
1.According to the figure display below, place the remote control with face down, then open the cover of the battery apartment.
2.As in the figure display below, install two AAA batteries. (The + and - symbol of battery must match with the marks on the remote).
3.Close the cover of the battery apartment.
1 | 2 | 3 |
Remote sensor
Power indicator
| 7 |
|
|
| 6 |
|
|
|
|
|
| SAV IN |
|
|
| COMPONENT IN |
| |||
|
|
|
| |||
|
|
|
| AUDIO | SCART1(RGB) | |
|
|
|
|
| ||
| Y | Pb/Cb | Pr/Cr | L | R | SCART2(AV) |
|
|
|
|
|
| |
1 | 2 |
| 3 |
| 4 | 5 |
1.HDMI input
2.PC input
3.COMPONENT input
4.Earphone output
5.SCART input
6.
7.PC audio input interface
Note: 1. Do not connect both AV and SCART2 at the same time.
2.Do not connect both
3.Do not connect both COMPONENT and
4.When SCART1 and SCART2 is input at the same time, SCART2 is prior.
Cautions for using remote control: Confirm there is no object between the remote control and the remote sensor of TV set.
Do not put the remote control in direct heat or a damp place, or potential damage to the remote may occur.
Sunshine or other strong light will interfere with the signal sent by the remote control. In this situation turn the TV set to avoid the direct light source.
Please use two AAA 1.5V batteries. Do not mix battery types.
Install the batteries as the correct polarities.
Do not use rechargeable batteries.
If your TV is to be stored for a period of time, remove the batteries from the remote control.
5 |
|
|
|
| 6 |
|
| ||||
|
|
|