Teledyne NALL instruction manual Receiving and Inspection

Models: NALL

1 23
Download 23 pages 11.18 Kb
Page 7
Image 7

3.0RECEIVING AND INSPECTION

3.1Initial Inspection:

Carefully unpack the Hastings Linear Mass Flowmeter and inspect it for any obvious signs of damage due to shipment. Immediately advise the carrier who delivered the shipment of any suspected damage.

3.2Packing List:

The basic flowmeter consist of four separate parts:

1.The power supply (NALL, NALL-P, NALL-P/CC, DNALL-P, TNALL-P, NALL-C, etc.)

2.The transducer (examples: HS-10S, HS-50KM, etc.)

3.The connecting cable (examples: NF-8-NM, NF-25-NM, etc.)

4.The laminar flow element attached to transducer, for ranges higher than 0-100 SLPM (examples: L-5S, L-100SF, L-200MF, etc.)

Optional equipment or accessories will be listed as part of the model number or listed separately on the packing list. (See Section 11.0, OPTIONS AND ACCESSORIES.)

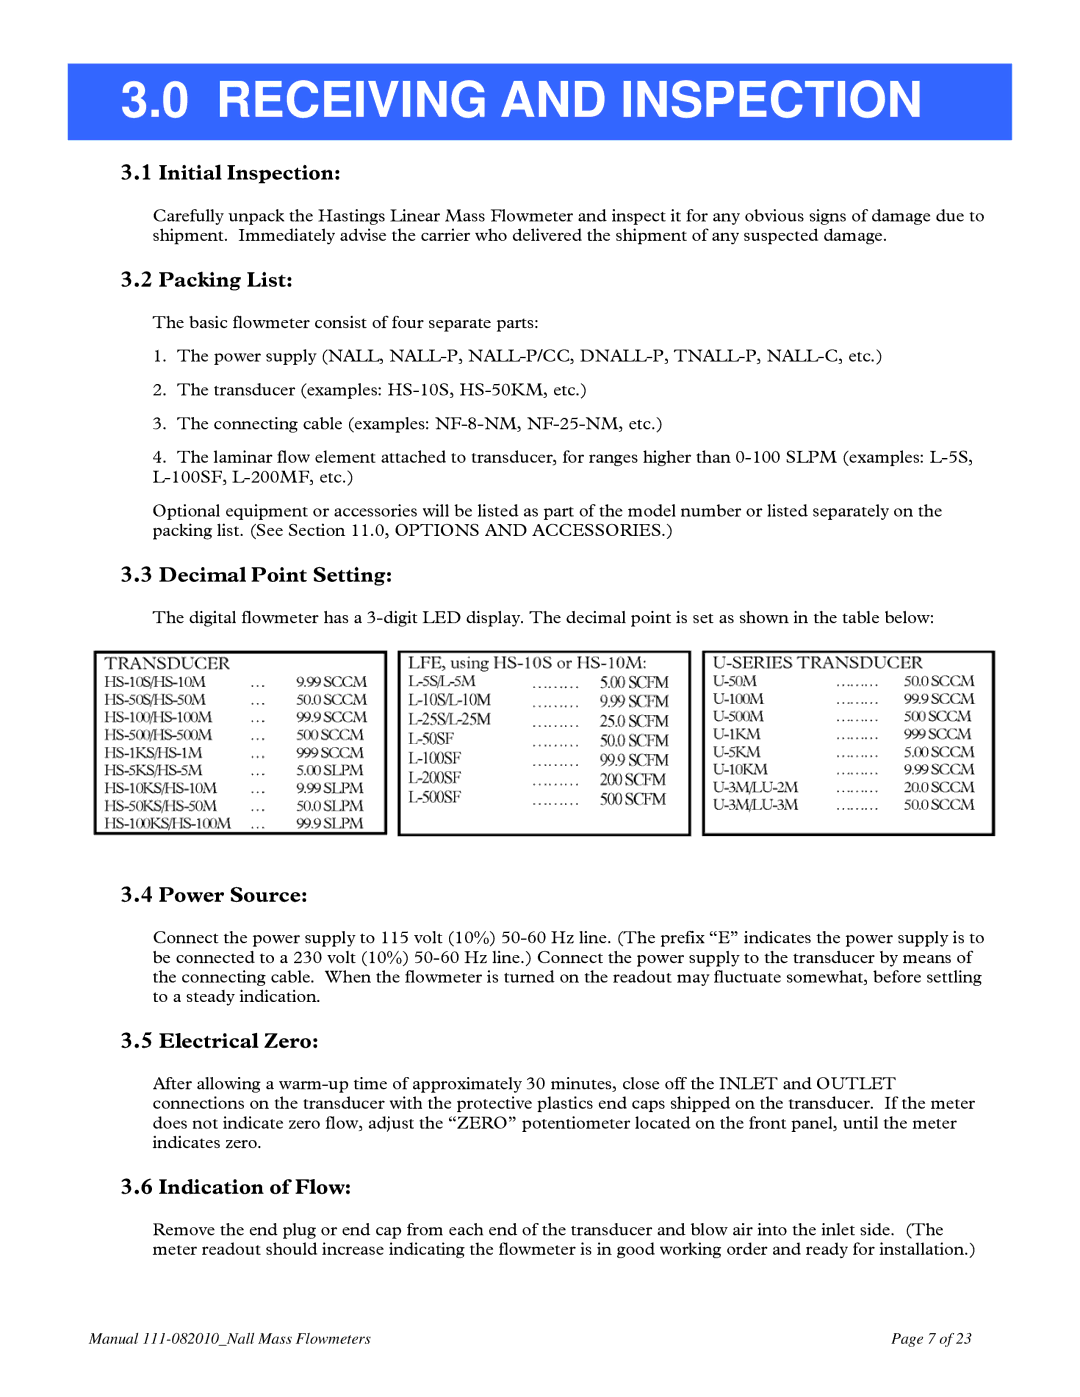
3.3Decimal Point Setting:

The digital flowmeter has a 3-digit LED display. The decimal point is set as shown in the table below:

3.4Power Source:

Connect the power supply to 115 volt (10%) 50-60 Hz line. (The prefix “E” indicates the power supply is to be connected to a 230 volt (10%) 50-60 Hz line.) Connect the power supply to the transducer by means of the connecting cable. When the flowmeter is turned on the readout may fluctuate somewhat, before settling to a steady indication.

3.5Electrical Zero:

After allowing a warm-up time of approximately 30 minutes, close off the INLET and OUTLET connections on the transducer with the protective plastics end caps shipped on the transducer. If the meter does not indicate zero flow, adjust the “ZERO” potentiometer located on the front panel, until the meter indicates zero.

3.6Indication of Flow:

Remove the end plug or end cap from each end of the transducer and blow air into the inlet side. (The meter readout should increase indicating the flowmeter is in good working order and ready for installation.)

Manual 111-082010_Nall Mass Flowmeters

Page 7 of 23

Page 7
Image 7
Teledyne NALL instruction manual Receiving and Inspection