5.If talk is selected the user will be asked to set the inter- com in and out levels. If Listen is selected the user will be asked to set the lis ten level . Use th e <UP>/<DOWN> arrow buttons to adjust the levels, then press <SET> to accept the levels. NOTE: Inverted character for the intercom / listen levels indicates the option is off. After levels are set the aux input selec- tion is now active.

6.The aux input selection will now be flashing. Use the <UP>/<DOWN> arrow buttons to select aux audio Yes or No. Press <SET> to accept the choice. Aux in- put is selectable by button only. Setting the aux input for button A to yes sets all intercoms active for that button to yes, setting it to no sets all intercom ports for no.

7.If aux input was set to “Y” then the user will be asked to set the auxiliary input and output levels. Use the <UP>/<DOWN> arrow buttons to adjust the input and output levels, then press <SET> to accept the levels. Press <MENU> once to go back to the status screen or press <SET> again to begin the editing of the screen again.

8.On the “C” button there are two more selectable op- tions: QB and RELAY. If active these options are in normal characters, if off the options are in inverted characters. Use the <UP>/<DOWN> arrow buttons to select the option then press <SET> to accept the op- tion.

QB = If active, when the button C on the beltpack is pressed, a 1000 Ohm path to ground is activated at pin 15 of the male and female D-sub connector in the rear of the unit. This can be used to active a PTT on some external radio systems. Audio from the beltpack and local base station’s headset is also available at pin 15 only when QB is active.

Relay = If active, when button C on the beltpack is pressed, a relay closure is activated on the rear of the base station.

RF Meter

This screen displays a larger version of the 5 bars of received signal strength displayed on the status screen. It also displays the receive frequency.

2.Select the RF meter menu with the <UP>/<DOWN> arrow keys and press <SET> to go to the RF meter.

ClearScan

Press and hold <MENU> + <SET> for 3 seconds to enter the ClearScanmenu. There will be three option from with to choose from by using the <UP>/<DOWN> arrow buttons and then press <SET>. Those options and the results are explained below.

ClearScanGroups

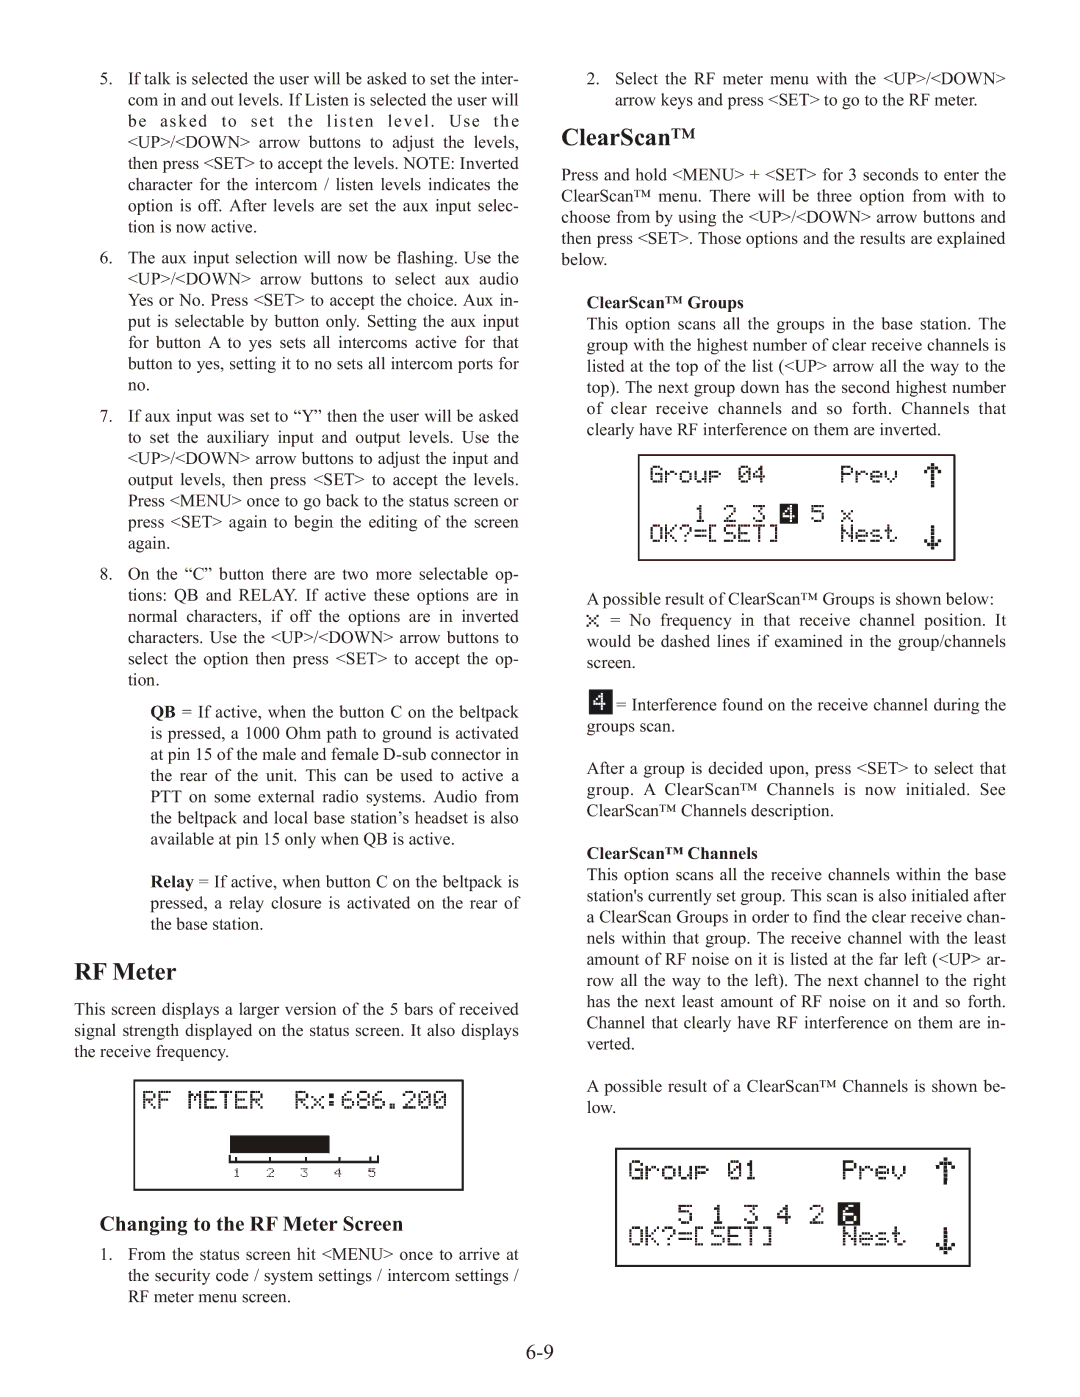
This option scans all the groups in the base station. The group with the highest number of clear receive channels is listed at the top of the list (<UP> arrow all the way to the top). The next group down has the second highest number of clear receive channels and so forth. Channels that clearly have RF interference on them are inverted.

A possible result of ClearScanGroups is shown below:

x= No frequency in that receive channel position. It would be dashed lines if examined in the group/channels screen.

4= Interference found on the receive channel during the groups scan.

After a group is decided upon, press <SET> to select that group. A ClearScanChannels is now initialed. See ClearScanChannels description.

ClearScan™ Channels

This option scans all the receive channels within the base station's currently set group. This scan is also initialed after a ClearScan Groups in order to find the clear receive chan- nels within that group. The receive channel with the least amount of RF noise on it is listed at the far left (<UP> ar- row all the way to the left). The next channel to the right has the next least amount of RF noise on it and so forth. Channel that clearly have RF interference on them are in- verted.

A possible result of a ClearScanChannels is shown be- low.

Changing to the RF Meter Screen

1.From the status screen hit <MENU> once to arrive at the security code / system settings / intercom settings / RF meter menu screen.

6-9

Page 28
Image 28
Telex BTR-1 operating instructions Changing to the RF Meter Screen, ClearScan Groups, ClearScan Channels

BTR-1, TR-1 specifications

The Telex TR-1 and BTR-1 represent significant advancements in the realm of professional audio communication, particularly suited for broadcast environments and large-scale live events. Both devices reflect Telex's commitment to innovation and superior functionality.

The Telex TR-1 is a crucial component in wireless intercom systems. It is designed for portable use, featuring a compact and lightweight design that makes it ideal for remote locations and on-the-go communications. The TR-1 utilizes advanced digital signal processing technology, which ensures crystal-clear audio quality and minimal latency, crucial for effective communication in dynamic environments. Its ergonomic design includes intuitive controls, which allow users to adjust volumes and change channels with ease, providing quick access to vital communication functionalities.

One standout feature of the TR-1 is its impressive battery life. The device can operate for extended periods, allowing users to focus on their work without the constant need to recharge. Additionally, the TR-1 incorporates a robust RF performance capability, enabling reliable connectivity over long distances in challenging RF environments, where multiple signals may contest the same frequency spectrum.

On the other hand, the Telex BTR-1 is a versatile base station that complements the TR-1 by providing the backbone for wireless communication in professional settings. The BTR-1 supports multiple channels and can accommodate a variety of belt packs and headsets, making it an ideal choice for complex setups with numerous users. Its 2.4 GHz frequency band means less susceptibility to interference, ensuring that communications remain clear even in crowded situations.

The BTR-1's advanced matrix intercom features allow for flexible routing of audio signals between users, enhancing coordination during productions or events. The unit also includes extensive network capabilities, making it possible to integrate with other communication systems and allowing for remote access and monitoring.

Overall, both the Telex TR-1 and BTR-1 epitomize the blend of portability, reliability, and scalability required for professional audio communications. Their cutting-edge technologies and thoughtful design make them indispensable tools for broadcasters, event organizers, and any professionals who rely on effective and efficient communication solutions.