INSTALLATION
Step 5: INSTALLATION
This hood is intended to be mounted onto the kitchen wall.
1.Remove the grease filter (refer to Opera- ting Instructions).
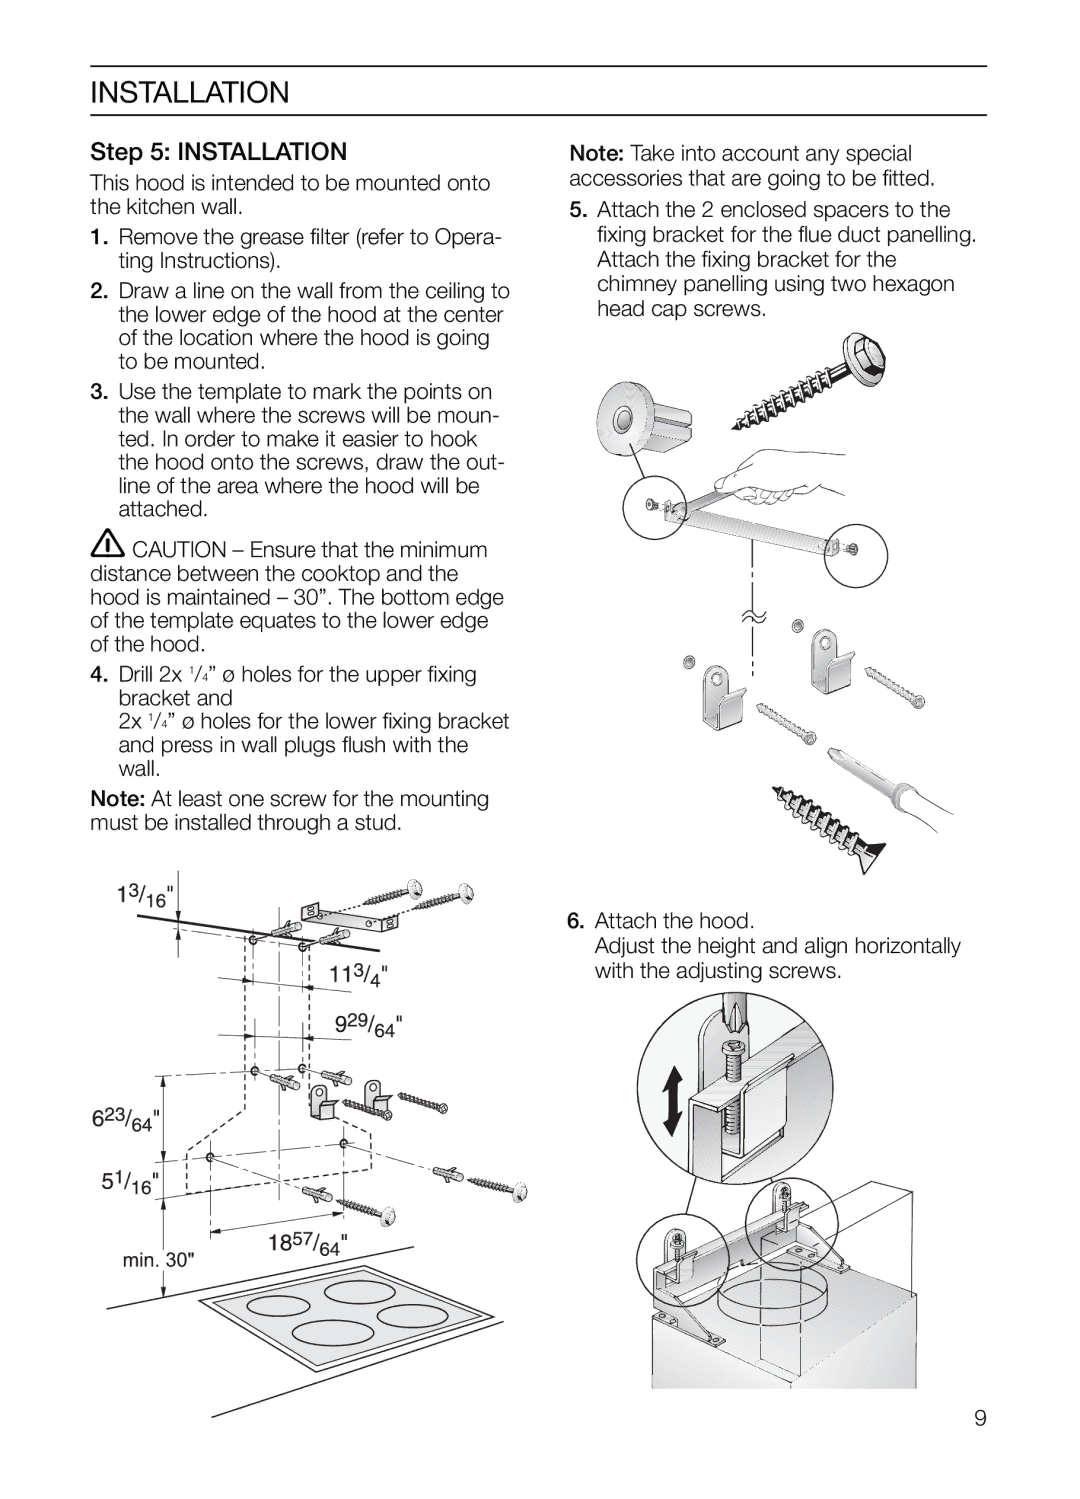
2.Draw a line on the wall from the ceiling to the lower edge of the hood at the center of the location where the hood is going to be mounted.
3.Use the template to mark the points on the wall where the screws will be moun- ted. In order to make it easier to hook the hood onto the screws, draw the out- line of the area where the hood will be attached.
CAUTION – Ensure that the minimum distance between the cooktop and the hood is maintained – 30”. The bottom edge of the template equates to the lower edge of the hood.
4.Drill 2x 1/4” ø holes for the upper fixing bracket and
2x 1/4” ø holes for the lower fixing bracket and press in wall plugs flush with the wall.
Note: At least one screw for the mounting must be installed through a stud.
Note: Take into account any special accessories that are going to be fitted.
5.Attach the 2 enclosed spacers to the fixing bracket for the flue duct panelling. Attach the fixing bracket for the chimney panelling using two hexagon head cap screws.
6.Attach the hood.
Adjust the height and align horizontally with the adjusting screws.
9
